

Size Greenhouse Ventilation for 1 Exchange/Min With Off Grid Solar
Size Greenhouse Ventilation for 1 Exchange/Min With Off Grid Solar
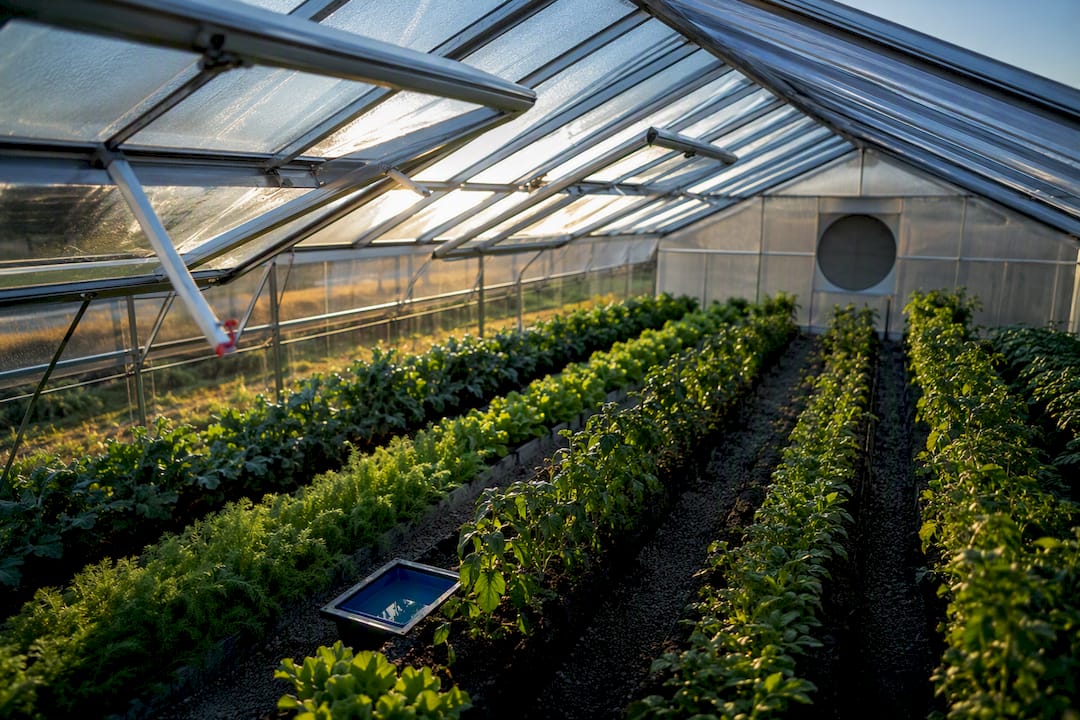
Required fan CFM equals your greenhouse’s volume in cubic feet multiplied by the air exchanges you need per minute, and one exchange per minute is the accepted summer baseline. Once you have that CFM figure, size your intake shutters at roughly 1.5 square feet of free area per 1,000 CFM of fan capacity, or about 1.5 times the fan’s gross face area. Winter airflow drops sharply, usually to 2 to 5 air changes per hour, and every fan you buy needs an AMCA rating confirming it hits that CFM against real static pressure, not just free-air numbers on a box.
TL;DR:
- Greenhouse fan capacity needs to be sized based on volume, with 1 exchange per minute in summer and 2 to 5 ACH in winter, requiring AMCA-rated fans at the correct static pressure.
- Intake shutters should be sized at about 1.5 square feet per 1,000 CFM, with face velocities targeted between 250 and 400 feet per minute to prevent plant stress and noise issues.
- Obstructions like screens, pads, and dense crops require derating CFM by up to 25%, and fan selection must account for actual static pressure rather than only free-air ratings.
- Proper fan placement involves exhaust on the leeward endwall, intakes on the opposite side, and the use of horizontal airflow fans in wide or long houses to ensure even distribution.
- For off-grid systems, panel and battery sizing must match airflow demand, with oversizing batteries recommended to handle overnight ventilation during cloudy conditions.
Table of Contents
- How Do You Calculate Required CFM for a Greenhouse?
- Sizing Intake Shutters and Free Inlet Area
- Derating for Screens, Pads, and Canopy Density
- What Fan Specs Actually Matter?
- Where Should Fans and Inlets Go?
- Controls and Staging That Save Energy
- Sizing Off-Grid and Solar Ventilation Systems
- What Growers Should Prioritize First
- Matching Your Numbers to a Real Kit
- Sources
- FAQ
How Do You Calculate Required CFM for a Greenhouse?
Start with volume, not floor space; for a deeper understanding, see concepts explained in the GreenLearn educational blog. For a simple gable or hoop house, multiply floor area by average interior height (peak height plus eave height, divided by two, works fine for hoops). For gutter-connected houses, use the gutter height as your baseline and add a modest allowance for roof volume above it.
Once you have cubic feet, apply your air exchange rate. The math is simple:
- Calculate volume. Length × width × average height = volume in cubic feet.
- Pick your ACH target. Summer cooling calls for 1 air exchange per minute, the equivalent of 60 air changes per hour. Winter humidity and heat control need far less, typically 2 to 5 ACH.
- Convert to CFM. Divide volume by 1 (for the one-minute summer rule) to get CFM directly, or multiply volume by your chosen winter ACH and divide by 60 to get CFM on an hourly basis.
- Compare against heat load. On hot, high-solar-gain days, run the calculation both ways and use whichever number is larger, a method built into tools like the greenhouse ventilation calculator from Farmer Grows.
Worked example: A 30-foot by 96 foot gutter-connected house with an average interior height of 12 feet has a volume of 34,560 cubic feet. At the summer rate of one exchange per minute, you need 34,560 CFM of fan capacity. In winter, dropping to 3 ACH, the math is 34,560 × 3 ÷ 60, which comes out to 1,728 CFM, a fraction of the summer figure. That gap is exactly why growers who size only for winter comfort get scorched crops come July.
Sizing Intake Shutters and Free Inlet Area
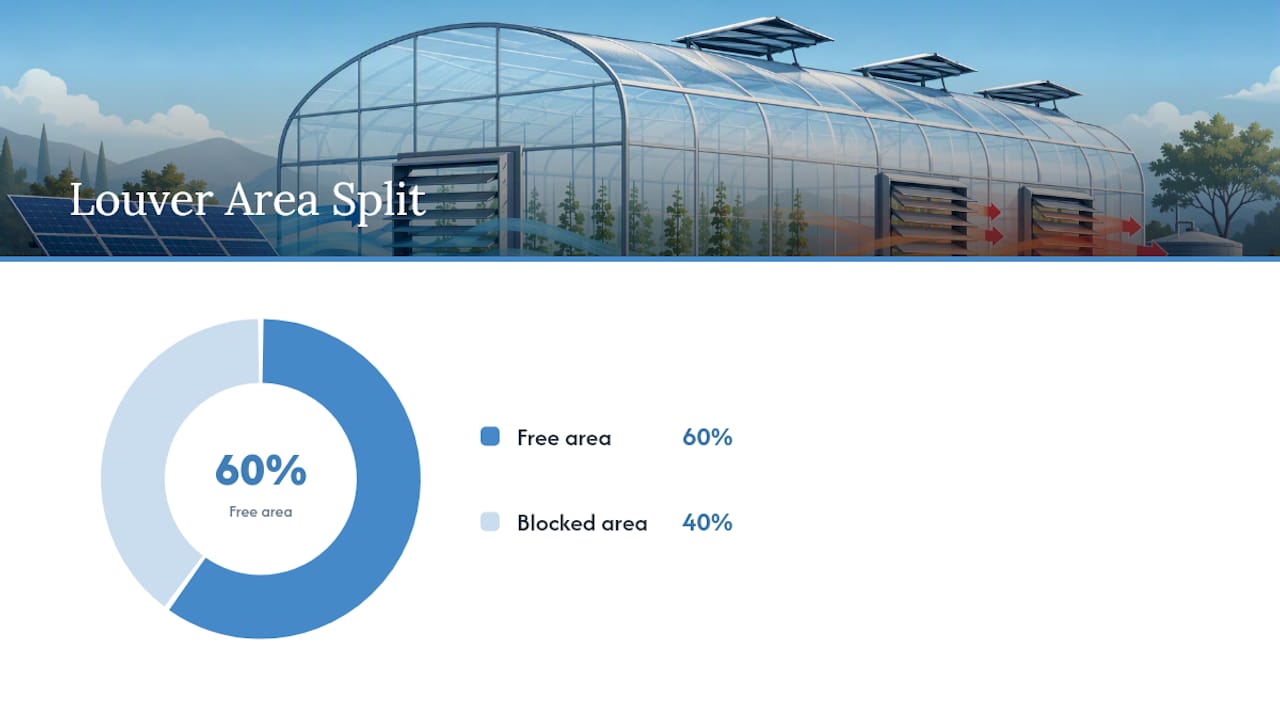
Fan CFM means nothing if the air can’t get in. Intake shutters and louvers reduce the gross opening to a smaller “free area,” the actual clear space air passes through once you subtract louver blades, screen mesh, and frame structure.
Face velocity, the speed air moves through that free area, needs to land in a specific range. Too fast and you get plant stress and noise; too slow and you’re not moving enough air to matter.
- Target face velocity of roughly 250 to 400 feet per minute through the free area of your intake.
- Size gross intake opening at about 1.5 square feet per 1,000 CFM of fan capacity as a starting point, then adjust for the free-area factor of your specific louver or screen.
- Use two shutters instead of one when the required opening would otherwise exceed roughly 6 to 8 feet in width, since oversized single shutters distribute airflow unevenly across the wall.
For that 34,560 CFM summer example, the starting gross intake area comes to about 51.8 square feet (34,560 ÷ 1,000 × 1.5). If your louvers have a 60% free-area factor once you account for blades and framing, you’d need to increase the gross opening further to hit your target face velocity, which is exactly the adjustment covered next.
Derating for Screens, Pads, and Canopy Density
Base CFM numbers assume clean air moving through an unobstructed opening. Real greenhouses rarely offer that, and skipping the derate step is one of the most common reasons a “properly sized” system underperforms once it’s built and running.
Apply these adjustments on top of your base CFM:
- Insect screens: add 10 to 20% to required CFM, since fine mesh restricts airflow and increases the pressure drop the fan has to overcome.
- Evaporative cooling pads: add 15 to 25%, since wetted pad media creates significant static resistance.
- Dense crop canopy: add roughly 10% when tall or thick crops block airflow paths near plant height.
Do the arithmetic by multiplying base CFM by (1 + total derate percentage), then recheck your intake area against the new, larger CFM figure. Static pressure rises right along with these obstructions, which is why fan selection has to account for pressure, not just airflow volume, a point AMCA-rated fan curves are built to answer.
What Fan Specs Actually Matter?
CFM on a fan’s spec sheet is usually measured at zero static pressure, a number you will almost never hit in a working greenhouse with screens, shutters, and ductwork in the way. Look instead at the fan curve, the chart showing how CFM output drops as static pressure rises, and pick a fan that still delivers your adjusted CFM at roughly 0.015 kPa, or 0.060 inches of water column, a common design pressure for greenhouse exhaust systems.
- Axial fans work well for low static pressure situations, short duct runs, and straightforward endwall exhaust setups.
- Centrifugal fans handle higher static pressure better, making them a fit for systems with pads, long duct runs, or heavy screening.
- Always cross-check a fan’s rated CFM against its curve at your calculated static pressure, not the headline number on the label.
- For off-grid or remote sites, DC and solar fan kits eliminate grid dependency but require careful matching of panel wattage and battery capacity to your airflow demand.
Pro Tip: Size your battery bank for at least one full night of low-speed ventilation if humidity control matters after sundown. A fan that only runs when the sun is up leaves your crop unprotected during the exact hours condensation risk peaks.
If your greenhouse sits off the grid entirely, a kit like the brushless solar exhaust fan gives you a DC option built around real airflow numbers rather than a generic ventilation gimmick.
Where Should Fans and Inlets Go?
Airflow distribution matters as much as raw CFM. A fan that moves the right volume of air but leaves half the house stagnant hasn’t solved your climate problem.
- Place exhaust fans on the leeward endwall whenever possible, so prevailing wind doesn’t fight the fan’s discharge and cause backpressure.
- Locate intake shutters on the opposite wall, giving air the longest possible travel path through the growing space rather than short circuiting near the fans.
- Add horizontal airflow (HAF) fans in houses wider than about 30 feet or longer than 100 feet, spaced roughly 40 to 50 feet apart in a continuous loop pattern to eliminate dead zones.
- Stage additional exhaust fans in houses longer than 125 feet, since a single endwall fan bank can’t pull air evenly across that distance without creating a hot zone at the far end.
Natural ventilation deserves a mention here too. If you’re relying on roof vents and sidewall vents instead of powered exhaust, UMass Extension recommends total vent area equal to 15 to 25% of floor area, split roughly evenly between roof and sidewall openings to maximize stack effect.
Controls and Staging That Save Energy
A single on/off thermostat wastes energy and creates humidity swings that stress plants. Two-stage control fixes both problems by matching fan output to actual cooling demand instead of running everything at once.
- Set Stage 1 to activate a smaller fan bank at roughly +5°F above setpoint, and Stage 2 to bring on the full fan bank at +10°F above setpoint.
- Variable-speed drives extend this concept further, ramping fan speed gradually instead of jumping between fixed stages, which smooths out temperature swings in larger or highly variable climates.
- Interlock evaporative pad pumps with your fan stages, and use a humidistat alongside your thermostat so winter ventilation doesn’t overcorrect for temperature at the expense of humidity control.
Pro Tip: Wire your evaporative pad pump so it can’t run without the exhaust fan active. A pad soaking wet with no airflow behind it just breeds algae and wastes water.
Sizing Off-Grid and Solar Ventilation Systems
Solar ventilation sizing adds one more constraint on top of CFM and static pressure: available sun hours. A fan sized correctly for airflow still needs a panel and battery combination that can deliver its full power draw during the hours cooling matters most, plus enough battery reserve for early morning or overnight ventilation when growers need it.
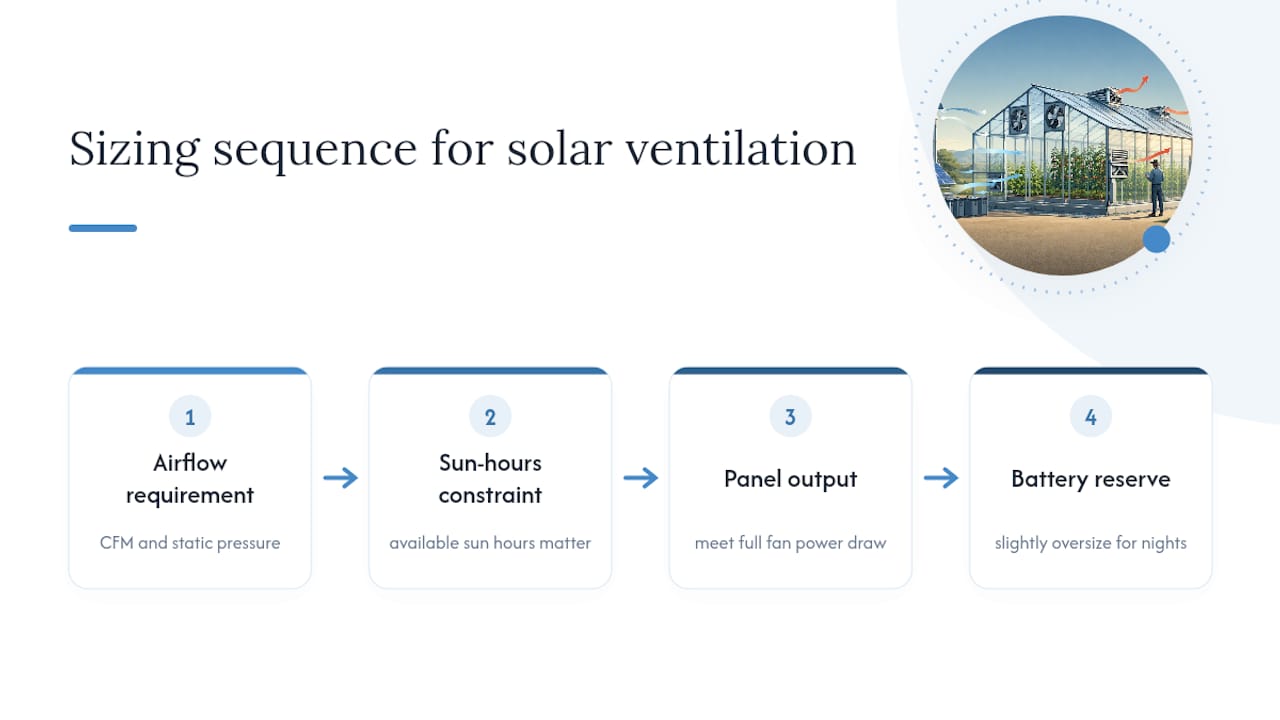
Field installs point to a few consistent habits: mount panels facing true south at an angle matched to local latitude, keep wire runs short to minimize voltage drop, and oversize battery capacity slightly rather than sizing to the bare minimum, since cloudy stretches happen. Growers running larger houses often string multiple kits together rather than hunting for one oversized unit, a practical workaround that mirrors the staged-fan approach used in grid-tied systems.
What Growers Should Prioritize First
The checklist that actually prevents callbacks: compute volume, size for summer peak using the one-exchange-per-minute rule, apply your derates for screens and pads, then pick an AMCA-rated fan that holds its CFM at your expected static pressure. Add HAF circulation if the house runs long or wide, and stage your controls before you ever flip the switch.
After installation, measure. An anemometer check at plant height in two or three spots across the house tells you whether your shutters and fan speed match the paper calculation, and it’s worth doing before the first heat wave, not after. Clean screens and pads on a set schedule, since restricted airflow degrades quietly and shows up as heat stress before anyone notices the fan is straining.
— Chris
Matching Your Numbers to a Real Kit
Once you know your target CFM and intake dimensions, the next step is hardware that actually hits those numbers off the grid. Some companies build solar and DC ventilation kits sized around real airflow requirements rather than generic wattage claims, which matters when your calculation says you need a specific CFM at a specific static pressure and the fan on the shelf either delivers it or doesn’t.

For smaller hobby houses and supplemental cooling, the 10 watt solar fan kit covers light-duty airflow needs in the 10 to 100 CFM class without any grid tie-in required. Mid-size operations running in the 100 to 2,500 CFM range typically land on something closer to the 200 watt battery-backed exhaust kit, which adds overnight capacity for humidity control after sundown. Larger installations that need staged fan banks or evaporative cooling paired with solar power can browse the full solar-powered fan catalog to match capacity class to house size, or reach out directly for help matching a system to your specific volume and derate numbers.
Sources
- Natural ventilation in greenhouses — UMass Extension
- Ventilation for greenhouses — IFAS/UF
- Heating, ventilating and cooling greenhouses (ASAE/CEAC engineering guidance)
- Greenhouse ventilation calculator — Farmer Grows
FAQ
How Do You Size an Exhaust Fan for a Greenhouse?
Multiply greenhouse volume in cubic feet by your target air exchange rate (one exchange per minute for summer) to get required CFM, then select an AMCA-rated fan that delivers that CFM at your expected static pressure after adding derates for screens and pads.
What Is the 1 to 300 Rule for Ventilation?
There’s no standard “1 to 300” rule in greenhouse engineering guidance; growers may be thinking of the 15 to 25% floor-area rule for natural vent sizing or the roughly 1.5 square feet per 1,000 CFM intake guideline used for powered systems.
How Many CFM Do I Need for My Greenhouse?
Take your greenhouse’s volume in cubic feet and divide by one minute for summer cooling, which gives you CFM directly; a 30 by 96 foot house at 12 feet average height needs roughly 34,560 CFM before any derates for screens or pads.
How Much Venting Does a Greenhouse Need?
For natural ventilation, total vent area should equal 15 to 25% of floor area split between roof and sidewall openings; for powered systems, intake free area should scale with fan CFM at roughly 1.5 square feet per 1,000 CFM.