

Greenhouse Ventilation Fans: Solar Guide for Off-Grid Growers
Greenhouse Ventilation Fans: Solar Guide for Off-Grid Growers
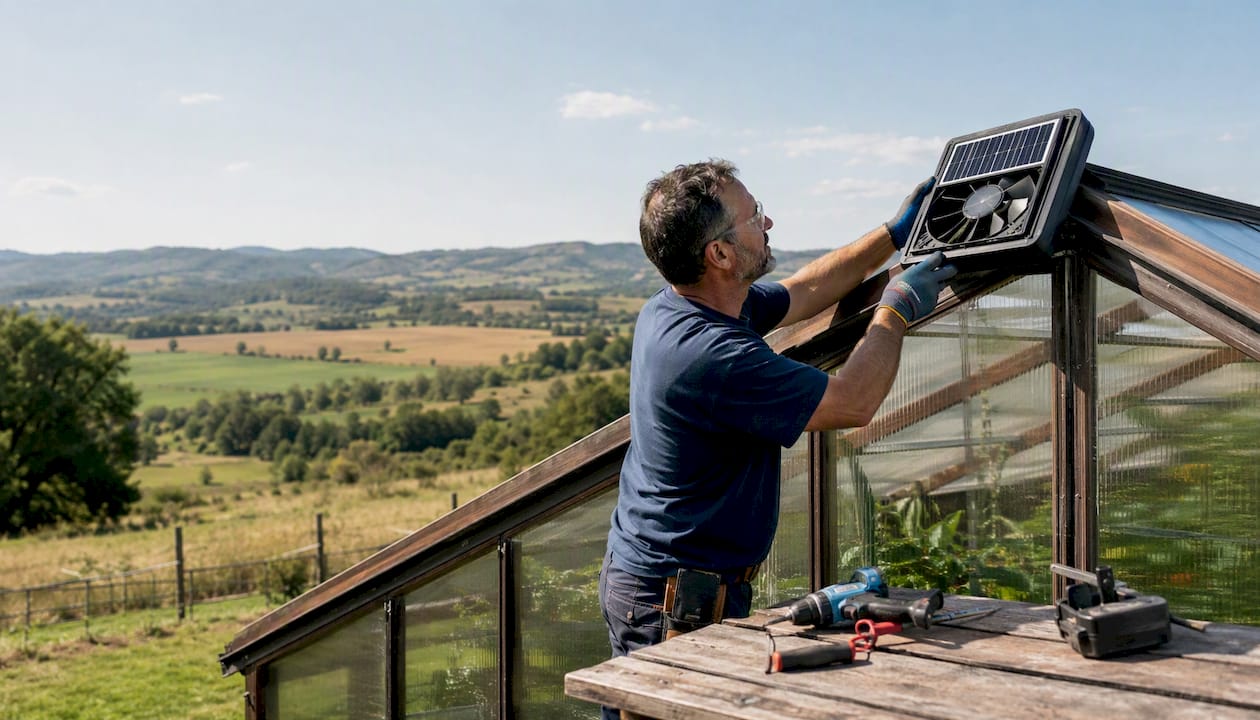
For most small-to-medium off-grid greenhouses, the right answer is a DC brushless exhaust fan wired directly to a matched solar panel, paired with motorized intake louvers on the opposite wall. That combination gives you self-regulating daytime cooling with no battery, no charge controller, and no grid connection. If your crops need airflow after dark or your region sees extended cloud cover, add a battery-backed unit like the Westernharmonics PowerJam. The sizing concept, parts to consider, and installation steps are outlined below.
Table of Contents
- Why solar-powered greenhouse ventilation fans work off-grid
- What a complete solar greenhouse fan kit includes
- How to size your fan and solar panel
- Direct-solar vs battery-backed: which power setup fits your situation?
- Mounting, intake placement, and avoiding short-circuit airflow
- What does a solar greenhouse fan system cost, and how long does installation take?
- Maintenance checklist and troubleshooting common problems
- Do you need a permit to install greenhouse ventilation fans?
- Key Takeaways
- The part most growers get wrong about solar ventilation
- Westernharmonics solar ventilation kits for off-grid greenhouses
Why solar-powered greenhouse ventilation fans work off-grid
Solar direct-drive fans do something no grid-tied fan can: they self-regulate with sunlight, spinning faster when the sun is intense and the greenhouse heat load peaks, then slowing naturally when clouds reduce both solar input and heat gain. That behavior is a feature, not a flaw. When cloud cover drops the panel output, the greenhouse is also cooling down, so less airflow is exactly what you need.
The operational advantages for off-grid operators are real:
- Low startup current: DC brushless motors draw minimal current at startup, so a modest panel can spin the fan up without a large battery bank.
- No inverter losses: running DC fans directly from a DC panel skips the 10–15% efficiency loss of an AC inverter.
- Synchronized climate control: pairing exhaust fans with motorized intake louvers prevents airflow short-circuiting and creates uniform air exchange across the plant canopy.
- Minimal maintenance: brushless motors have no brushes to replace and run reliably in dusty, humid greenhouse environments.
The main limits are nighttime and heavy-overcast conditions. If you grow frost-sensitive crops that need continuous airflow on cool nights, or if your site gets frequent multi-day cloud cover, a battery-backed system is worth the added cost.
Pro Tip: Automate your intake louvers with a time-delay relay so they open a few seconds before the exhaust fan reaches full speed. This prevents the poly cover from being sucked against the frame and stops cold air from short-circuiting directly to the fan during winter.
What a complete solar greenhouse fan kit includes
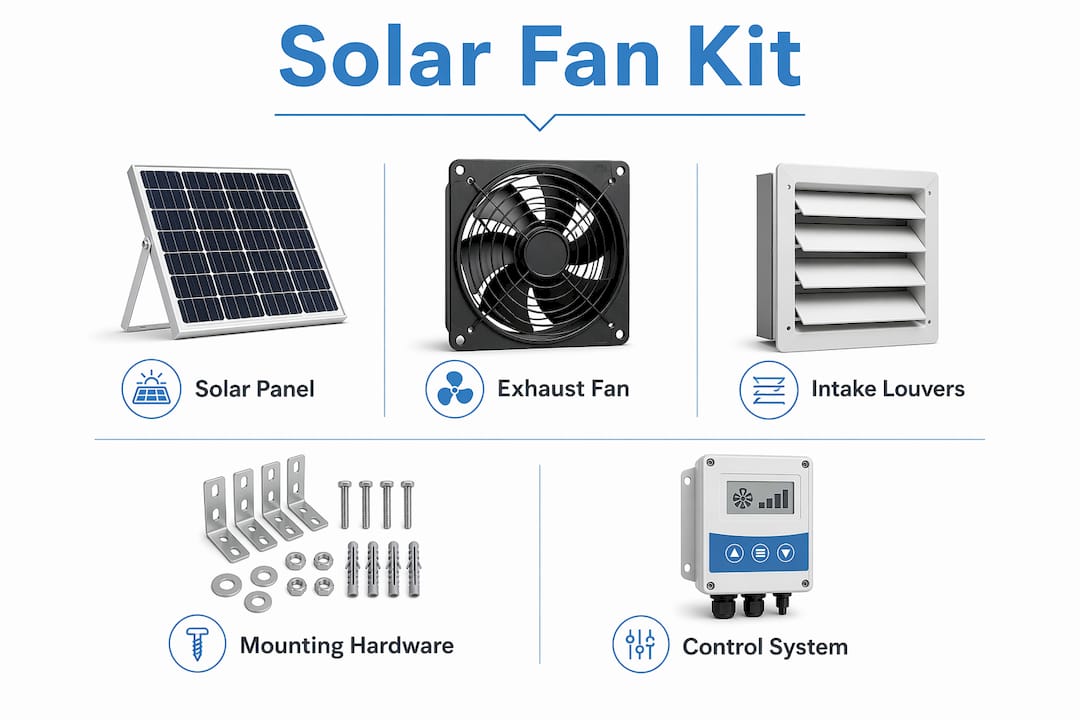
A complete kit should contain at minimum: an exhaust fan with integrated shutter, motorized intake louvers, a thermostat or speed controller, a solar panel with PV cable and MC4 connectors, and mounting hardware with weather sealing. Some kits also include a fuse and wiring harness. Prepackaged solar kits for small greenhouses typically bundle a 12-inch DC brushless fan with a 50 W panel, MC4 connectors, and fuse in one box.
Key parts to verify before ordering:
- Fan blade diameter and CFM rating — confirm the CFM matches your greenhouse volume (see sizing section below).
- Rough opening dimensions — the rough opening should be 1/2 inch larger than the fan or shutter housing. A 12-inch shutter typically needs a 12.5-inch rough opening; a 24-inch shutter needs a 24.5-inch opening.
- Panel wattage — must meet or exceed the fan’s rated watt draw at full speed.
- Louver type — motorized louvers are strongly preferred over manual ones for off-grid setups where you won’t be present to open them manually.
How to size your fan and solar panel
Size fans to provide one full air exchange per minute to an 8-foot effective height. That’s the standard for summer ventilation in most U.S. greenhouse scenarios, and it targets an 8–10°F temperature rise from intake to exhaust under peak conditions.
The formula:
- Measure your greenhouse: length × width × 8 ft (effective height) = volume in cubic feet.
- Required CFM = that volume (one exchange per minute).
- Example: a 25 × 96 ft greenhouse requires a fan capacity that matches its volume to ensure adequate air exchange.
- Select a fan (or multiple fans) whose combined CFM meets that number.
- Match solar panel wattage to the fan’s rated watt draw. A fan with a ventilating efficiency ratio of 15 CFM per watt delivering 1,200 CFM draws roughly 80 W — so an 80–100 W panel covers it with a small headroom buffer.
- For battery-backed operation: multiply fan wattage by required run hours, then add 20–30% for system overhead.
| Greenhouse size | Volume (8 ft height) | Required CFM | Suggested fan diameter | Ballpark panel wattage |
|---|---|---|---|---|
| Small (8 × 12 ft) | — | 900 CFM | 12 inch | 50 W |
| Medium (12 × 24 ft) | — | — | — | 100–150 W |
| Large (20 × — ft) | — | 4,450 CFM | 24 inch | — |
For a 12-inch shutter fan, expect roughly 900 CFM; a 24-inch shutter fan delivers approximately 4,450 CFM. Those numbers let you quickly cross-check whether one fan covers your greenhouse or whether you need two.
Direct-solar vs battery-backed: which power setup fits your situation?
Direct-solar is the right starting point for most off-grid growers. The fan wires straight to the panel, speed scales with sunlight, and there’s nothing to charge, maintain, or replace on a battery cycle. It’s also the lower-cost option. The tradeoff is that the fan stops when the sun goes down and slows significantly under heavy cloud cover.
Battery-backed systems, like a Westernharmonics PowerJam setup, deliver consistent fan speed regardless of sun angle and keep air moving overnight. That matters for crops sensitive to night humidity or for growers in the Pacific Northwest or upper Midwest where multi-day overcast is common. The added cost includes the battery module, a charge controller, and periodic battery maintenance.
A quick decision checklist:
- Do your crops need airflow after dark? → Battery-backed.
- Is your site in a high-cloud region (more than 15 overcast days per month in summer)? → Consider battery backup.
- Is daytime overheating your only concern? → Direct-solar is sufficient.
- Do you want the simplest possible system with the fewest failure points? → Direct-solar wins.
For a deeper look at how solar vs electric ventilation compares on operating cost and reliability, that breakdown is worth reading before you finalize your power approach.
Mounting, intake placement, and avoiding short-circuit airflow
Mount exhaust fans so air flows over the plant canopy, with the fan bottom about 3 feet above the floor. Place intake louvers on the opposite end wall or along sidewalls, never adjacent to the exhaust fan. Keep the draw distance under 150 feet; in longer houses, run fans along sidewalls to eliminate dead air zones.
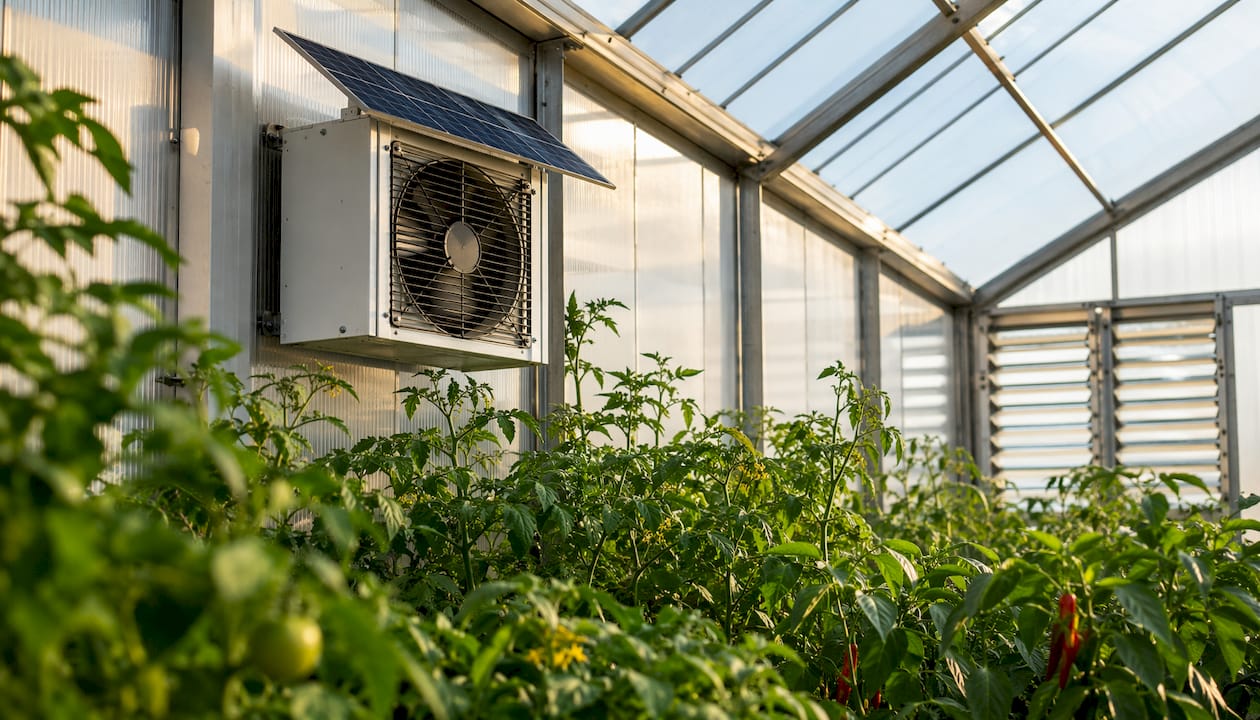
Intake louver area should be at least 1.25 times the fan area, especially in poly-covered greenhouses where undersized intakes create negative pressure and pull the cover inward.
Installation checklist:
- Tools: drill, jigsaw or hole saw, level, wire strippers, crimping tool, caulk gun.
- Cut the rough opening 1/2 inch larger than the fan housing.
- Mount the fan with the blade center roughly 3 feet above the floor.
- Run PV cable from the panel to the fan, keeping connections weatherproofed with MC4 connectors or a sealed junction box.
- Mount intake louvers on the opposite wall; wire motorized louvers to the same thermostat circuit as the fan.
- Seal all gaps around the fan housing and louver frames with exterior-grade caulk.
- Test the thermostat setpoint before closing up the wall.
Pro Tip: Spray louver pivot pins with a dry silicone lubricant each fall. Louvers that freeze shut in January are the single most common cause of winter heat loss in solar-ventilated greenhouses.
What does a solar greenhouse fan system cost, and how long does installation take?
Expect a weekend for a single-fan install and two to three days for a multi-fan system. Hardware costs scale with greenhouse size.
| System type | Approximate hardware cost | Typical install time |
|---|---|---|
| Small kit (12 in fan + 50 W panel) | $150 | 4–6 hours |
| Medium kit (— in fan + 100–150 W panel) | $350 | 6–10 hours |
| Large / multi-fan (24 in fans + — panels) | $700+ | 2–3 days |
| Battery-backed add-on (PowerJam + charge controller) | Add $200 | Half day additional |
Additional costs to budget: electrical permits if you’re hard-wiring to a panel (typically $50–$150 depending on your county), professional labor if you’re not comfortable working at height, and weatherproofing accessories like foam tape and exterior caulk.
- Order lead time for solar fan kits: typically 3–10 business days for in-stock items.
- Commission and test run: allow one full sunny day to verify thermostat setpoints and louver sequencing.
Maintenance checklist and troubleshooting common problems
Regular maintenance keeps airflow at rated capacity and prevents the slow efficiency losses that add up to real heating and cooling penalties over a season.
- Clean fan blades every 60–90 days. Dust buildup on blades reduces CFM and increases motor load.
- Inspect and lubricate louver pivots at the start of each season. Stiff louvers reduce effective intake area.
- Check wiring and MC4 connectors for corrosion or looseness, especially after winter.
- Clean the solar panel surface monthly; a 10% dust layer can reduce output by a meaningful margin.
- Verify thermostat calibration with a separate thermometer at the start of the growing season.
- Inspect mounting brackets and caulk annually for cracks or gaps that let cold air bypass the louvers.
Common problems and fixes:
- Low airflow despite fan running: Check for blocked or frozen louvers first, then inspect for debris on the blade.
- Fan not reaching full speed: Look for panel shading from new vegetation or a dirty panel surface; check all connections.
- Short-circuit airflow (one side of greenhouse stays hot): Verify intake louver area meets the 1.25× rule and check that doors and vents aren’t creating a bypass path.
If the motor runs hot to the touch or draws noticeably more current than rated, contact the manufacturer before the warranty period expires. DC brushless motors rarely fail outright; persistent overheating usually points to a blocked blade or a panel voltage mismatch.
Do you need a permit to install greenhouse ventilation fans?
In most rural U.S. counties, installing a solar-powered exhaust fan in an existing greenhouse does not require a building permit, because the work is classified as a minor accessory structure modification. That said, the rules vary by jurisdiction, and a few situations do trigger permit requirements.
You likely need a permit if you are: hard-wiring the fan to a main electrical panel (most jurisdictions require an electrical permit for any new circuit), constructing a new greenhouse rather than retrofitting an existing one, or operating a commercial agricultural facility subject to state or county agricultural building codes.
Check with your local county building department or agricultural extension office before starting. The USDA’s Natural Resources Conservation Service and your state’s Cooperative Extension system are good starting points for understanding what applies to your specific operation. This article is general information, not legal or permitting advice; confirm current requirements with your local authority having jurisdiction.
Key Takeaways
A solar direct-drive DC brushless exhaust fan paired with motorized intake louvers, sized to one air exchange per minute at an 8-foot effective height, is the most reliable and cost-effective greenhouse ventilation solution for off-grid and rural operators.
| Point | Details |
|---|---|
| Size to 1 air exchange/min | Multiply length × width × 8 ft to get required CFM; match fan and panel wattage accordingly. |
| Rough opening fit | Cut the opening 1/2 inch larger than the fan or shutter housing before mounting. |
| Intake louver area | Size intake louvers to at least 1.25× the fan area to prevent negative pressure in poly greenhouses. |
| Battery backup decision | Add a PowerJam-style battery unit only if crops need overnight airflow or your site sees frequent cloud cover. |
| Westernharmonics kits | Westernharmonics supplies U.S.-made solar fan kits with matched DC brushless fans, PV panels, and optional PowerJam battery units for off-grid greenhouse installs. |
The part most growers get wrong about solar ventilation
The conventional wisdom says “bigger panel, better fan.” In practice, the intake side is where most solar greenhouse ventilation systems fail. We’ve seen well-sized exhaust fans pulling hard against undersized or manually operated louvers, creating negative pressure that bows poly covers inward and channels all the fresh air in a single cold streak across the floor rather than over the canopy.
The 1.25× intake rule from UMass extension research isn’t a suggestion — it’s the minimum. And motorized louvers aren’t a luxury upgrade; they’re what makes the system behave as designed when you’re not standing there to open a door. A $40 motorized louver paired to the same thermostat circuit as your exhaust fan is the highest-return upgrade in the whole system.
The second thing growers underestimate is the value of the self-regulating behavior in DC brushless direct-drive fans. On a partly cloudy afternoon, the fan slows down exactly when the greenhouse is cooling down. That’s not a bug. It’s a passive control loop that a thermostat alone can’t replicate, and it’s one of the reasons Westernharmonics has built its off-grid ventilation line around DC brushless motors from the start.
Westernharmonics solar ventilation kits for off-grid greenhouses
Off-grid greenhouse operators need hardware that works without a utility connection, without a technician on call, and without a complicated setup. Westernharmonics builds exactly that: U.S.-made solar greenhouse fan kits with DC brushless exhaust fans, matched PV panels, motorized louvers, and optional PowerJam battery units for operators who need overnight or low-sun ventilation.

Every kit ships with the components this guide recommends: a properly rated exhaust fan, a solar panel sized to the fan’s watt draw, MC4-connected PV cable, and mounting hardware. The PowerJam add-on handles battery-backed operation without requiring a separate charge controller or inverter. Westernharmonics ships to rural addresses across the U.S. and backs its kits with manufacturer support. Visit westernharmonics.com to request a quote or get design help sized to your specific greenhouse footprint.