

Solar Power for Barns: A Practical Owner's Guide
Solar Power for Barns: A Practical Owner’s Guide
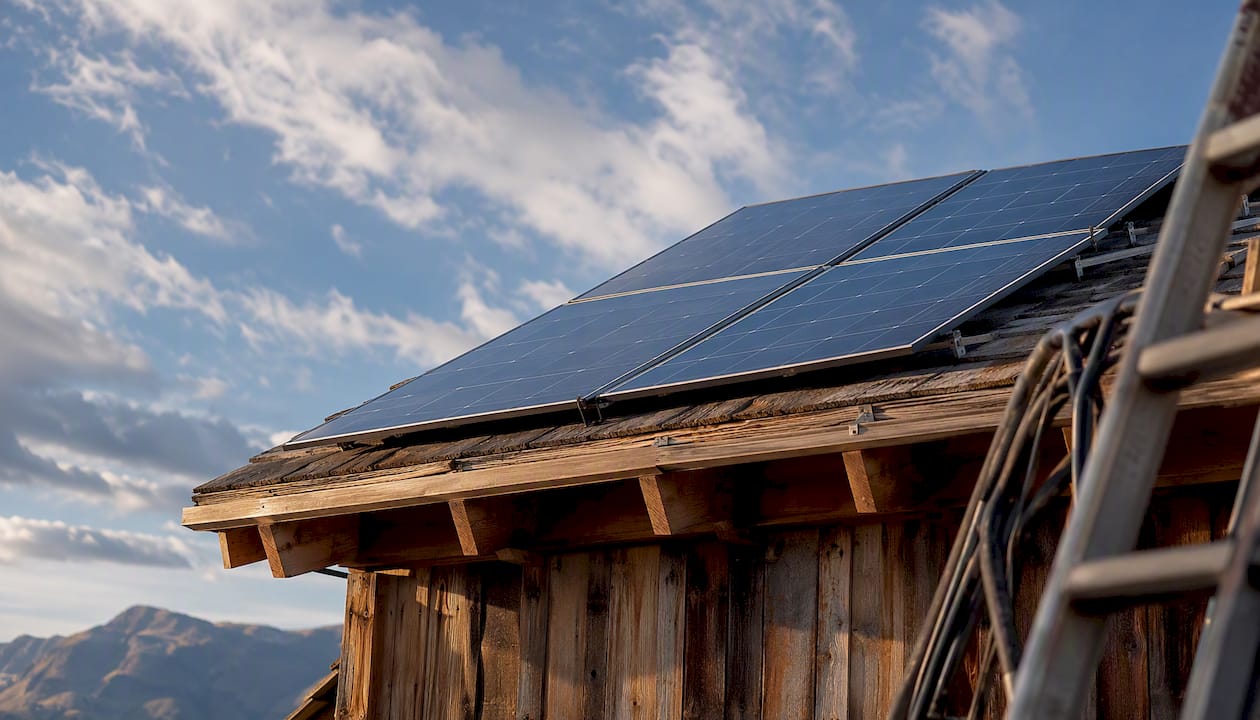
For most barn owners, the right starting point is a small DC kit for lighting and ventilation or a grid-tied system with battery backup under 3 kW — whichever matches your grid access and daily loads. Both paths are proven, affordable, and manageable without an engineering degree.
Two immediate next steps:
- Quick load check: List every electrical load in your barn (fans, lights, pumps), note the wattage and daily hours of use, and add up your daily kWh. If you don’t have 12 months of utility bills, this 15-minute inventory is your starting point.
- Pick a path: If your barn needs basic cooling and lighting only, a Westernharmonics DC fan kit gets you running the same week. For a more complete off-grid or hybrid plan under 3 kW, run a design through PowerMosaics to get a parts list and wiring diagram before you spend a dollar on hardware.
The federal Investment Tax Credit (ITC) covers 30% of installed system costs in 2026, and USDA REAP grants can further reduce costs for qualifying agricultural operations.
Key Takeaways
Most barn owners get the best results by starting with a DC kit for immediate needs, then scaling to a 1–3 kW hybrid design using PowerMosaics for a complete, installer-ready parts list.
| Point | Details |
|---|---|
| Start with a load calculation | Multiply watts × hours ÷ 1,000 for each load, then divide total kWh/day by peak sun hours to size your array. |
| Factor in losses | Multiply your calculated array size by 1.3–1.5 to account for real-world efficiency losses and cloudy days. |
| Use available incentives | The 30% federal ITC applies in 2026; USDA REAP grants can further reduce costs for qualifying agricultural operations. |
| Match system type to grid access | Off-grid with batteries suits remote barns; grid-tied or hybrid works best when utility service is reliable and nearby. |
| Westernharmonics and PowerMosaics | Start with a DC fan kit for immediate needs, then use PowerMosaics to design a complete <3 kW system with an export-ready BOM. |
Table of Contents
- How do you calculate how much solar power your barn actually needs?
- Which system type fits your barn?
- What components does a barn solar system actually need?
- What mounting options work for barn roofs and pole barns?
- What does barn solar cost, and what incentives apply in the U.S.?
- DIY or hire a pro? Permits, safety, and code essentials
- Which Westernharmonics kits work best for common barn needs?
- How does PowerMosaics compare to other design tools for small DC barn systems?
- How do you keep a barn solar system running year after year?
- What real barn owners actually choose, and why
- Westernharmonics and PowerMosaics: where to start your barn solar project
- Sources
How do you calculate how much solar power your barn actually needs?
Getting the sizing right before you buy anything saves real money. The math is straightforward.
Step 1: Inventory your loads
- Walk the barn and list every electrical device: lights, fans, water pumps, feed augers, heat lamps, phone chargers.
- Write down the wattage of each device (check the nameplate or spec sheet).
- Estimate daily hours of use for each device.
- Multiply watts × hours to get watt-hours per day, then divide by 1,000 to convert to kWh/day.
Step 2: Work the numbers
Here’s a realistic worked example for a mid-size horse barn:
To size the solar array, divide daily kWh by your location’s average peak sun hours. Most of the continental U.S. gets 4–5 peak sun hours per day.
Array size (kW DC) = daily kWh ÷ peak sun hours 3.3 kWh ÷ 4.5 hours = 0.73 kW DC (roughly a 750 W array)
Pro Tip: Multiply your calculated array size by 1.3–1.5 to account for wiring losses, dust, heat derating, and cloudy stretches. That 750 W array becomes a 975 W–1,125 W real-world recommendation — call it a 1 kW system.
When to add battery storage
A battery-capable system makes sense when:
- Your barn runs critical loads (water pumps, heat lamps, medical equipment for livestock)
- You want outage protection during storms
- Your utility charges demand fees based on peak draw
- Grid extension to a remote barn would cost more than the solar system itself
According to Green Energy Calculators, off-grid is often the cost-effective choice when utility line extension costs are high per mile or more.
Which system type fits your barn?
Four practical categories cover nearly every barn situation. Choosing the right one before you buy hardware is the single decision that most affects your total cost.
Small DC kits
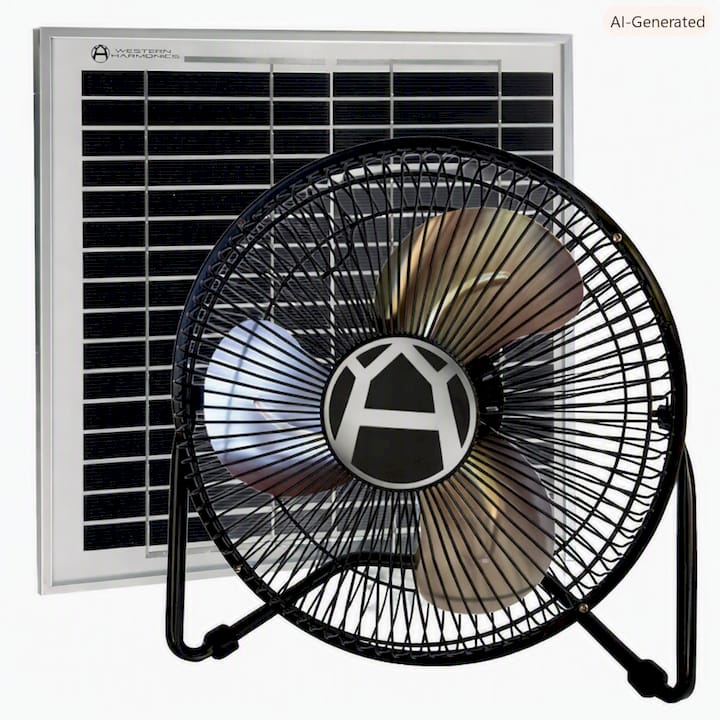
These run fans and LED lights directly from a solar panel and optional 12 V battery, with no inverter required. They’re the lowest-cost, lowest-complexity option and the right fit for tack rooms, small equipment sheds, and single-stall barns. Westernharmonics’ solar-powered fan kits are purpose-built for exactly this use case.
Off-grid with battery bank
When your barn sits far from the grid or when a utility connection would cost more than the solar system, a full off-grid setup with a battery bank is the practical answer. These systems run all barn loads independently, day and night. They cost more upfront than grid-tied systems but eliminate monthly utility bills entirely. Solar barn ventilation guides cover how to size battery banks for overnight fan operation.
Grid-tied (no batteries)
The lowest upfront cost option. Excess power feeds back to the grid through net metering, and the grid acts as your backup. The tradeoff: when the grid goes down, so does your barn power. Best for barns with reliable utility service and no critical loads.
Hybrid (grid-tied with battery backup)
The most resilient option for working barns. You get the economics of net metering plus the outage protection of a battery bank. This is the configuration most barn owners land on after their first power outage during a storm.
Quick comparison by use case:
- Tack room lights and one fan: Small DC kit, 10–200 W
- Horse barn with 4 fans and full lighting: 1–3 kW hybrid or off-grid system
- Water pump or grain dryer: 3 kW+ grid-tied or hybrid with larger inverter
- Remote barn, no grid access: Off-grid with battery bank sized for 1–3 days of autonomy
What components does a barn solar system actually need?
Every barn solar system, from a 10 W fan kit to a 3 kW hybrid array, shares the same core hardware. The sizing changes; the component list stays consistent.
Core components
- PV modules: The panels themselves. Sized in watts DC. Monocrystalline panels offer the best efficiency per square foot, which matters when roof space is limited.
- Charge controller: Manages power flow from panels to batteries. MPPT controllers recover 10–30% more energy than PWM types and are worth the added cost on any system above 200 W.
- Battery bank: Stores energy for nighttime or cloudy-day use. Sized in amp-hours (Ah) at 12 V or 24 V. Lithium iron phosphate (LiFePO4) batteries allow 80–90% depth of discharge (DoD); lead-acid batteries should stay above 50% DoD to preserve lifespan.
- Inverter: Converts DC to AC for standard outlets and equipment. For DC-native setups (fans, LED lights), you can skip the inverter entirely and run loads directly from the battery, eliminating conversion losses.
- Wiring, fuses, and breakers: Sized to the system’s maximum current. Undersized wire is the most common DIY mistake.
- Mounts: Roof-penetrating flash mounts, standing-seam clamps for metal roofs, or ground-mount racking.
- Monitoring: A basic battery monitor or a smart shunt tells you state of charge at a glance. Some charge controllers include this built in.
Quick sizing formulas
Array size: Daily kWh ÷ peak sun hours = kW DC needed (then multiply by 1.3–1.5 for losses)
Battery bank: Critical load kW × desired hours of autonomy ÷ usable DoD = kWh of storage needed
Inverter: Peak load watts × 1.25 safety margin = minimum inverter rating
DC-native setups for small barns
Running fans and LED lights directly from a 12 V or 24 V DC system avoids inverter losses entirely. For a barn where the main loads are ventilation and lighting, this approach cuts hardware cost and complexity. Westernharmonics’ DC fan kits are designed for exactly this configuration. PowerMosaics specializes in DC and low-voltage BOM exports for systems under 3 kW, producing parts lists and wiring diagrams that match this hardware directly.
Common kit capacities
- 10–50 W kits: Single fan or a few LED lights. No battery required for daytime-only use.
- 100–200 W kits: Multiple fans or lights with a 12 V battery for evening operation.
- 500 W–1 kW arrays: Full barn lighting and ventilation with overnight battery backup.
- 1–3 kW systems: All barn loads including small pumps, with grid-tie or hybrid battery option.
What mounting options work for barn roofs and pole barns?
Barn roofs are some of the most solar-friendly structures in rural America. Most barns offer 3,000–10,000+ square feet of unobstructed roof area with simple geometry and easy access, which reduces install complexity and cost compared to residential rooftops.
Assess the roof first
Before ordering panels, check the roof’s age and condition. Solar panels have a 25–30 year design life, and you don’t want to remove them in year 10 to replace rotted decking. Roofs older than 10–15 years or showing visible sag, rust, or deterioration should be repaired or replaced before installation. For systems above 50 kW or barns with old timber framing, a structural engineer review is worth the cost.
Panels add roughly 2–4 lb/ft² to the roof load. Most modern metal and wood-framed barn roofs handle this without reinforcement, but it’s a number worth confirming before you commit.
Mounting approaches by roof type
- Standing-seam metal roofs: The easiest and cleanest install. Clamp-based mounts attach to the seams without any roof penetrations, preserving the weatherproof seal.
- Corrugated metal roofs: Penetrating mounts with rubber-gasketed screws work well. Seal every penetration carefully.
- Shingle or wood-sheathed roofs: Standard flashed lag-bolt mounts, same as residential installs.
- Pole-barn open truss structures: Ground mounts adjacent to the barn are often simpler and cheaper than roof mounts on open-truss structures with minimal decking.
- Low-slope or flat roofs: Ballasted racking (weighted, no penetrations) works for slopes under 5°.
Pro Tip: For thin or lightweight metal roofs, flexible and lightweight solar panels can be adhered or clamped without heavy racking systems, reducing structural stress and enabling installs where standard glass-framed panels would require reinforcement.
Orientation and tilt
South-facing arrays at a tilt angle equal to your latitude produce the most annual energy. East-west splits also produce a flatter daily power curve, which can reduce battery cycling.
Wind and snow loads matter in most U.S. climates. Panels should be mounted per the manufacturer’s wind-speed rating, and ground mounts should be anchored for local frost depth.
What does barn solar cost, and what incentives apply in the U.S.?
Barn and farm solar installations typically cost 15–25% less per watt than comparable residential systems, driven by simpler roof geometry and fewer obstructions. The 2026 installed cost range for barn systems runs roughly $2.50–$3.80 per watt before incentives.
Cost by system size
Federal and state incentives
- Federal ITC (Investment Tax Credit): 30% of total installed system cost, claimed on your federal tax return. Applies to both residential and commercial barn systems in 2026.
- USDA REAP (Rural Energy for America Program): Grants covering up to 50% of eligible project costs for agricultural producers and rural small businesses. Applications are competitive; check current USDA deadlines for your state.
- MACRS depreciation: Commercial barn owners can depreciate solar assets over 5 years under the Modified Accelerated Cost Recovery System, materially improving the economics for farm businesses.
- State and local rebates: Vary widely. Check your state energy office and utility for current programs.
Simple payback example
A 3 kW barn system installed at $3.00/W costs $9,000 before incentives. If the system offsets $900/year in electricity costs, payback is 7 years. REAP grants or MACRS depreciation can cut that to 4–5 years for qualifying operations.
One real-world DIY case reported roughly $10,000 in component costs for a small barn system that offset significant utility charges and achieved payback in approximately 5–6 years, without any contractor labor cost.
Barn solar installations frequently achieve payback in roughly 6–10 years under normal utility rates. Equipment-heavy barns with high demand charges often see faster payback because solar reduces both energy and peak-demand billing.
DIY or hire a pro? Permits, safety, and code essentials
The right answer depends on system size, roof access, and whether you’re connecting to the grid.
When DIY is reasonable
Small DC kits under 200 W that run fans and lights from a battery without grid connection are the clearest DIY case. No utility interconnection, no building permit in most jurisdictions, and no roof work required if you’re using a ground mount or a simple clamp-on metal roof mount. A barn owner with basic electrical comfort can install a Westernharmonics fan kit in an afternoon.
When to hire a licensed installer
- Any system connecting to the utility grid (net metering requires utility approval and often a licensed electrician)
- Roof work on older or structurally uncertain barns
- Systems at or above 3 kW
- Any installation requiring structural reinforcement
- Battery systems using flooded lead-acid in enclosed spaces (ventilation requirements are strict)
For California barn owners, off-grid design and battery-system contractors can handle the full scope from site assessment through interconnection paperwork.
Permits and interconnection checklist
- Contact your local building department to confirm permit requirements for your system size and type.
- For grid-tied systems, submit an interconnection application to your utility before installation.
- Obtain electrical permit and schedule inspection (rough-in and final).
- For systems above certain wattage thresholds (varies by jurisdiction), a licensed electrician must sign off on the AC wiring.
- Submit net-metering application to your utility after final inspection approval.
- Keep all permit documentation for insurance and future property sale.
Safety and code highlights
- Rapid shutdown: NEC 2017 and later requires rapid-shutdown devices on roof-mounted systems so firefighters can de-energize panels quickly. Confirm your jurisdiction’s adopted code version.
- Grounding: All metal racking, frames, and enclosures must be bonded and grounded per NEC Article 690.
- Overcurrent protection: Fuses or breakers sized to the wire, not the load, at every source and combiner point.
- Battery placement: Flooded lead-acid batteries require vented enclosures. LiFePO4 batteries are far more tolerant of enclosed spaces but still need temperature management in extreme climates.
Agricultural solar installations covering installation types, maintenance, and structural permit considerations are detailed in the Solar Permit Solutions barn installation guide.
Which Westernharmonics kits work best for common barn needs?
Matching the kit to the actual load is where most barn owners either get it right or overspend. Here’s how the Westernharmonics product line maps to the most common barn use cases.
Lighting and single-fan ventilation (tack rooms, small sheds): The 10 W Solar Powered Fan Kit (Kit# 1505-HG) is the entry point. It runs a single fan from a small panel with no battery required during daylight hours. Simple, durable, and deployable in under an hour.
Multi-fan ventilation with overnight operation: The 20" Solar Hanging Fan 12V Off-Grid and the Solar Power 2 Fan System cover horse barns and livestock areas where airflow needs to continue after sunset. These run natively on 12 V DC, eliminating inverter losses entirely.
Mid-size barn with fans and lights: The 100 W Solar Floor Fan Kit handles moderate loads and pairs well with a 12 V battery bank for evening coverage. This kit maps directly to the worked example earlier: 1–2 fans and a handful of LED lights.
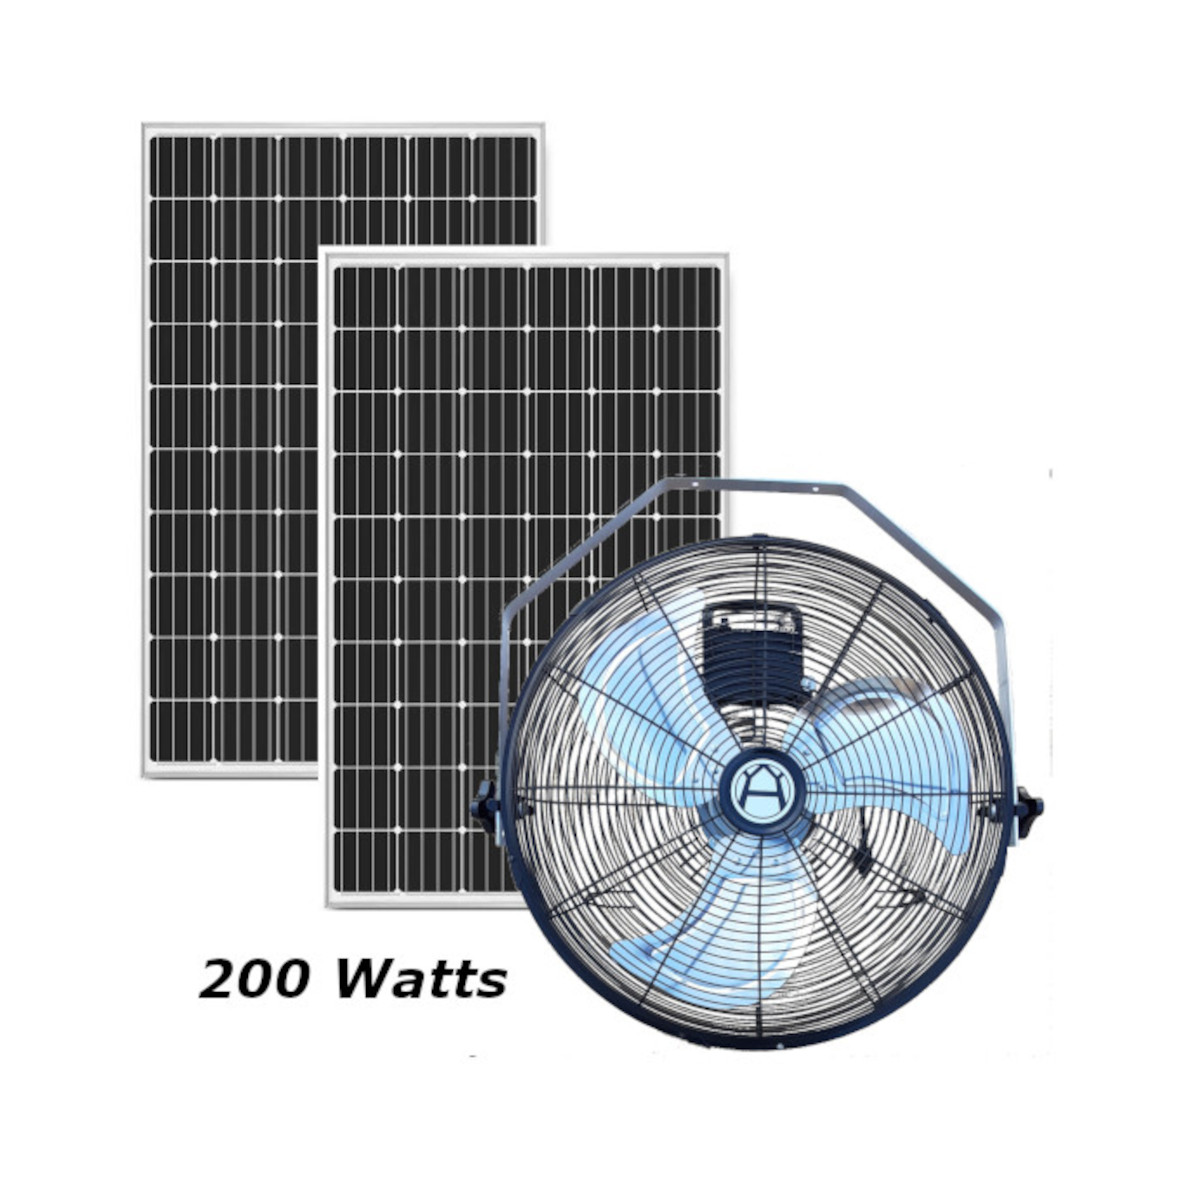
Larger ventilation or small equipment loads: The 200 W Solar Hanging Fan Kit with Battery Backup steps up to larger barns or greenhouse-style structures needing sustained airflow. The built-in battery backup handles overnight operation without a separate battery purchase.
When your load calculation pushes above 500 W or you need a complete parts list for a custom 1–3 kW system, a PowerMosaics design is the right next step. PowerMosaics produces DC/low-voltage BOMs and installer-ready wiring diagrams specifically for systems under 3 kW, which means you get a complete parts list matched to Westernharmonics hardware before you order anything.
Pro Tip: Run your load numbers through PowerMosaics before purchasing any kit above 200 W. The output is an export-ready BOM that tells you exactly which panels, charge controller, battery, and wire gauge you need — cutting the guesswork out of a multi-component purchase.
How does PowerMosaics compare to other design tools for small DC barn systems?
Most barn owners designing a system under 3 kW face a choice between general-purpose solar design software built for large commercial arrays, basic spreadsheet methods, or purpose-built tools for small DC and low-voltage systems. The differences matter when your goal is a working parts list, not a utility-scale proposal.
What the comparison actually covers
The dimensions that matter for a barn owner: how easy the tool is to use without an engineering background, whether it models DC and low-voltage loads accurately, how well it sizes batteries for off-grid or hybrid systems, whether it exports a usable BOM or parts list, and what it costs.
PowerMosaics vs common alternatives
| Dimension | PowerMosaics | Entry-level design tools | Spreadsheet methods |
|---|---|---|---|
| Ease of use / beginner friendliness | Guided workflow, plain-language outputs | Steep learning curve, built for large commercial systems | Flexible but requires manual formula building |
| DC / low-voltage system support | Native support for DC and low-voltage <3 kW | Limited; most tools assume AC grid-tied systems | Possible but requires custom setup |
| Load sizing and battery modeling | Integrated; models daily loads and battery autonomy | Basic or absent for small off-grid systems | Manual; no built-in validation |
| BOM / parts list export | Installer-ready export with wire gauge, fuse sizing, component specs | Rarely available for small systems | Manual; no standardized format |
| Pricing / licensing and US support | US-focused, accessible for small system owners | Often enterprise-licensed; expensive for single-barn use | Free but time-intensive |
The practical gap shows up most clearly in the output. A barn owner using a spreadsheet method can calculate array size, but they still need to manually cross-reference charge controller compatibility, wire sizing tables, and battery chemistry specs. PowerMosaics produces a single export that covers all of those dimensions together, formatted for an installer or a direct hardware order.
For DC-native barn systems running fans and LED lights from a 12 V or 24 V bus, most large-format design tools simply don’t model the system correctly. They assume an AC load profile and a grid-tied inverter. PowerMosaics is built around the DC-first architecture that Westernharmonics hardware uses.
Pro Tip: Use PowerMosaics to generate your BOM, then cross-reference the component list against Westernharmonics’ solar and battery systems catalog. The two are designed to work together — the design output maps directly to available hardware, which means fewer substitutions and fewer surprises at installation.
How do you keep a barn solar system running year after year?
A well-maintained barn solar system runs reliably for 25+ years. The maintenance load is low, but a few routine tasks prevent the small problems that become expensive ones.
Routine tasks
- Panel cleaning: Clean panels 2–4 times per year, or more often in dusty barn environments. Dust and bird droppings on panels can reduce output by 10–25%. A soft brush and water is usually enough; avoid abrasive cleaners.
- Visual inspections: Check for cracked panels, loose wire connections, and corrosion at terminals quarterly. Barn environments are hard on electrical connections.
- Charge controller checks: Verify the controller is reporting normal charge states and no fault codes monthly.
- Monitoring alerts: If your system has a monitoring app or display, set low-battery alerts so you catch problems before loads go dark.
Battery care
Lead-acid batteries need periodic equalization charges and water top-offs (for flooded types). Check electrolyte levels every 1–3 months. Expect lead-acid batteries to last 3–7 years; LiFePO4 typically lasts 10+ years under normal barn cycling.
Winter and seasonal tips
- Clear snow from panels promptly — even a partial snow cover can drop output to near zero.
- In northern climates, tilt adjustments (steeper in winter) improve output when sun angles are low.
- Reduce non-critical loads during short winter days to extend battery autonomy.
- Check battery temperature: lead-acid batteries lose significant capacity below freezing and should be housed in insulated enclosures in cold climates.
Maintenance schedule
Quarterly: Clean panels, inspect wiring and connections, check battery state of charge and water levels (flooded lead-acid), review charge controller logs.
Annually: Full system inspection, torque-check all mounting hardware, test battery capacity under load, verify inverter operation and firmware updates, review energy production vs. prior year.
Panels retain roughly 80–85% of their original output after 25 years, and inverters typically need replacement at the 10–15 year mark. Budget for inverter replacement when planning long-term system economics.
What real barn owners actually choose, and why
Most barn owners we hear from start in the same place: a single fan or a few lights that need power, a barn that’s either off-grid or just far enough from the panel box to make running conduit expensive. A small DC kit solves that problem the same week it arrives.
What changes is what happens next. Once the first kit is running and the barn is cooler and brighter without a monthly bill attached, the question shifts from “does solar work here?” to “how much more can I run?” That’s when the load calculation matters, and that’s when a tool like PowerMosaics earns its keep. Instead of guessing at battery size or wire gauge, you get a complete parts list that accounts for your actual loads, your location’s sun hours, and the DC architecture you’re already using.
The pattern we see most often: a 10–100 W DC kit for immediate needs, followed within a season or two by a 1–3 kW hybrid design that covers the whole barn. The first kit proves the concept; the PowerMosaics design makes the second phase something you can hand to an installer or order from directly. One small barn in the Midwest followed exactly this path, starting with a hanging fan kit for a horse stall and expanding to a 2.4 kW hybrid system that now covers all lighting, ventilation, and a water pump, with battery backup for overnight and storm outages.
Dual-use agrivoltaic installations (panels above crops or grazing areas) are a growing category, but for most barn owners the simpler path is an on-roof or ground-mounted array sized to barn loads. Get that right first.
Westernharmonics and PowerMosaics: where to start your barn solar project
Westernharmonics has been building solar-powered fan kits and DC off-grid hardware for barns, greenhouses, and rural infrastructure longer than any other U.S. manufacturer in this category. The product line runs from a simple 10 W fan kit for a single stall up through the 200 W Solar Hanging Fan Kit with Battery Backup for larger barn ventilation needs. Every kit is designed to run natively on DC power, which means no inverter losses and no unnecessary complexity.

For barn owners ready to move beyond a single kit, PowerMosaics handles the design work for DC, low-voltage, and under-3 kW systems. It produces installer-ready BOMs, wiring diagrams, and battery sizing reports — the exact outputs a barn owner needs to order hardware confidently or hand a plan to a local electrician. Browse the full Westernharmonics solar and battery catalog to match a kit to your barn’s load profile, or contact Westernharmonics directly for a site-specific recommendation and a PowerMosaics export-ready BOM.
Sources
- Solar Panels for a Barn or Farm Building: 2026 Cost Guide | Green Energy Calculators
- Solar Panels On Barn Roof: Complete Installation Guide 2025
- Solar Panels for Barn Roofs: Waste to Energy | Apollo Power
- Examining the options for DIY solar for your barns, outbuildings
- Transform Your Farm With Solar Power: Complete Guide To Agricultural Building Installations