

Solar Panel Tilt Angle: Homeowner's Precision Guide
Solar Panel Tilt Angle: Homeowner’s Precision Guide

For year-round fixed mounting, set your solar panel tilt angle equal to your site’s latitude. For mid-latitude sites (latitude 25°–50°), a refined installer formula gives better results: annual optimal tilt ≈ latitude × 0.76 + 3.1°. Bias toward winter by adding 15°; for summer-heavy loads, subtract 15°. Those numbers cover the vast majority of U.S. residential and off-grid installations.
Before you touch a wrench, check three things:
- Your latitude. Look it up in Google Maps or a GPS app. A home in Denver sits at roughly 39°N; one in Phoenix at 33°N. That number is your starting tilt.
- Your roof pitch. Most U.S. roofs fall in a pitch range that translates to moderate tilt angles common for residential roofs. If your pitch already lands near your latitude, you may not need tilt-up racking at all.
- Your azimuth. A 90° azimuth error at 40°N costs a substantial portion of annual yield, while a 10° tilt error costs comparatively little. Fix your compass bearing before obsessing over degrees of tilt.
For validation, use NREL PVWatts for a quick location-based production estimate, NREL SAM for full financial and battery-sizing models, and EnergySage for residential guidance benchmarks.
Table of Contents
- Should you use a fixed or adjustable mount?
- When does biasing toward winter or summer actually pay off?
- How do you calculate a precise tilt angle?
- What roof and mounting constraints limit your tilt options?
- What does a few degrees of tilt actually cost you in production?
- How do you measure and set tilt on a typical roof?
- Which calculators and apps give you the most reliable tilt numbers?
- When should you bias tilt for seasonal loads? Westernharmonics guidance
- What assumptions are built into the tilt formulas?
- Key Takeaways
- Why Westernharmonics keeps tilt advice practical
- Authoritative sources and calculators to validate your tilt decisions
Should you use a fixed or adjustable mount?
Fixed mounts generally win on cost, simplicity, and long-term reliability for many homeowners. There are no moving parts to maintain, no extra wind-uplift risk from a raised panel, and no twice-yearly roof climb. For a grid-tied system where you’re selling excess production back to the utility, the difference between a fixed optimal tilt and a two-position seasonal adjustment rarely justifies the hardware and labor cost.
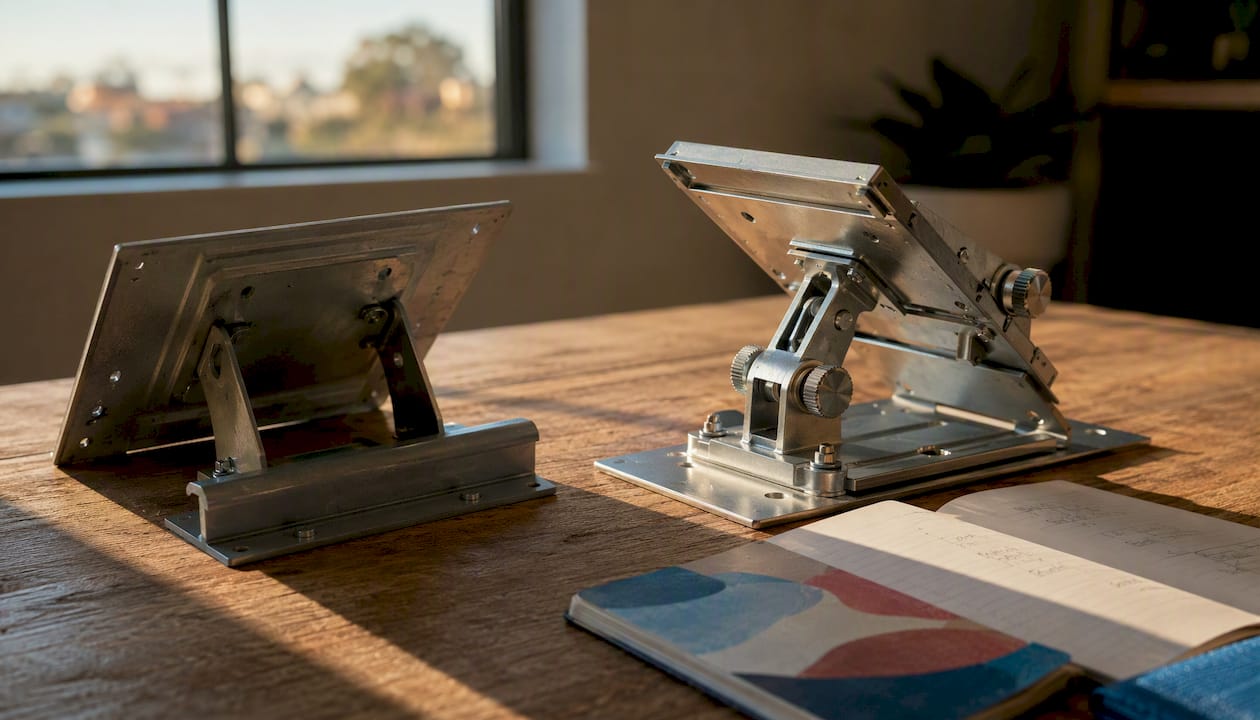
Adjustable mounts make sense in specific situations. A two-position seasonal adjustment (steeper in winter, shallower in summer) can yield a modest increase over a fixed annual tilt. Four-position quarterly adjustments add only marginal gain beyond that. Single-axis trackers capture the most production but carry the highest cost, maintenance burden, and structural load.
| Mount Type | Typical Annual Gain vs. Fixed | Adjustment Frequency | Best For |
|---|---|---|---|
| Fixed optimal tilt | Baseline | None | Most grid-tied homeowners |
| Two-position seasonal | Moderate increase | Twice per year | Off-grid users, small battery banks |
| Four-position quarterly | Slightly more than two-position | Four times per year | Rarely justified for residential |
| Single-axis tracker | Highest yield | Automated | Commercial arrays, large ground mounts |
For off-grid cooling systems, like the barn fans and greenhouse ventilation kits Westernharmonics builds, a two-position adjustment can meaningfully reduce winter battery deficits. But the decision still depends on whether you can safely access the mount twice a year. Roof-mounted panels on a steep pitch with no walkway are a safety problem, not a yield optimization problem. Wind-load increases when a panel is tilted up from its resting angle, and some racking warranties are voided by field adjustments. Check both before committing to an adjustable system.
When does biasing toward winter or summer actually pay off?
The latitude rule optimizes for annual average production. That’s the right target for most grid-tied homeowners. Off-grid users have a different problem: they need production to match their load profile, not just maximize the annual total.
Prioritize winter tilt (latitude + 15°) when:
- Your system powers a rural home, barn, or greenhouse through cold months with limited sun hours.
- You’re running battery-backed refrigeration or heating loads that peak in December and January.
- You’re in a high-snow region where a steeper angle also sheds snow passively.
Prioritize summer tilt (latitude − 15°) when:
- Your primary load is cooling: fans, evaporative coolers, or ventilation systems that run hardest in June through August.
- You’re on a time-of-use (TOU) utility rate where afternoon summer peak hours carry the highest credit.
- You’re running a solar-powered greenhouse exhaust fan that needs maximum midday output during the growing season.
Seasonally adjustable mounts materially help small battery systems: setting panels steeper in winter and shallower in summer smooths production and reduces winter charge deficits. For a greenhouse or barn cooling setup, that summer bias can mean the difference between a fan running at full speed at 2 PM and one that’s throttling because the panel is generating 20% less than it could.
Pro Tip: If your off-grid load is cooling-heavy, bias your tilt toward summer first, then run PVWatts to confirm you still have enough winter production to keep batteries healthy. Adjust from there rather than starting with the annual-average tilt.
How do you calculate a precise tilt angle?
Start with the latitude rule, then refine. Here’s the progression from quick estimate to installer-grade precision.
The basic formulas
The simplest approach: fixed annual tilt = your latitude in degrees. For mid-latitude locations (25°–50°), installers increasingly use the refined formula: annual optimal tilt ≈ latitude × 0.76 + 3.1°. For latitudes below 25°, annual optimal tilt ≈ latitude × 0.87. These produce a tilt slightly below raw latitude, improving actual yield and simplifying racking geometry. For latitudes above 50°, or for bifacial panels and trackers, run iterative PVWatts or PVGIS modeling, since formulas lose accuracy.
Worked example: 34°N (Los Angeles area)
- Annual fixed tilt: roughly 29°
- Winter tilt: about 15° steeper than annual
- Summer tilt: about 15° shallower than annual
Raw latitude (34°) would have given you a starting point of 34°. The refined formula shaves off about 5°, which matters when you’re specifying racking hardware.
Converting roof pitch to tilt degrees
If your panels mount flush to the roof, your tilt equals your roof pitch angle. Convert pitch (rise/run) to degrees using: tilt = arctan(rise ÷ run). A 6/12 pitch gives arctan(0.5) = 26.6°. A 4/12 pitch corresponds to a shallow angle; a 9/12 pitch corresponds to a steeper angle.
For final validation, run your site coordinates through NREL PVWatts. Enter your system size, tilt, and azimuth, and it returns monthly and annual production estimates based on real TMY (Typical Meteorological Year) weather data for your location. That output is more reliable than any formula for making a purchasing decision.
What roof and mounting constraints limit your tilt options?
Most U.S. residential roofs already sit in a pitch range that works well. A 4/12 pitch is 18.4°; a 9/12 pitch is 36.9°. For homeowners between roughly 30°N and 45°N, that range covers the optimal tilt for many latitudes without any tilt-up racking. If your roof pitch is already close to your latitude, flush-mount hardware is simpler, cheaper, and lower-profile.
Flat roofs
Flat-panel installs at 0°–5° lose significant yield and create drainage problems that accelerate soiling. A 10° minimum tilt is the standard recommendation for flat-roof mounts. That angle enables self-cleaning from rain and prevents standing water behind the panel frame. Ballasted mounts (no roof penetration) are common on commercial flat roofs but add weight; penetrating mounts are lighter but require waterproofing at every anchor point.
Wind uplift and structural limits
Tilting a panel increases its wind-load profile. A panel at 30° catches significantly more wind force than one at 10°. Above 35°, most racking manufacturers require an engineering review or specify heavier anchor hardware. If you’re adding tilt-up racks to an existing flush-mount system, check whether your roof structure and existing anchors are rated for the new load.
Snow shedding improves sharply above 35°. Arrays tilted above 45°–50° approach self-clearing in heavy snowfall, but the structural requirements increase substantially at those angles. In high-snow regions, targeting at least 35° for passive shedding is a reasonable engineering target, with a structural review before going higher.
Pro Tip: Pull your local building permit requirements before finalizing tilt. Many jurisdictions require a permit for any racking change, and some require a structural engineer’s stamp for tilt-up frames above a certain height or wind-exposure category.
What does a few degrees of tilt actually cost you in production?
Small tilt errors are far less damaging than most homeowners expect. A 5° deviation from optimal costs a small amount of annual yield; a 10° deviation costs a bit more. These are real losses, but they’re dwarfed by shading, soiling, and azimuth errors.
At 40°N, a 90° azimuth error (facing east or west instead of south) costs 14–16% of annual yield. A 10° tilt error costs 2–3%. That ratio holds across most U.S. latitudes. Fix your compass bearing first.
| Latitude | Annual Optimal Tilt | Summer Tilt | Winter Tilt | Two-Position Gain vs. Fixed |
|---|---|---|---|---|
| 25°N (Miami) | 26° | ~10° | ~40° | ~5–8% |
| 34°N (Los Angeles) | ~29° | ~14° | — | ~5–8% |
| 40°N (Denver) | ~33° | ~18° | — | ~5–8% |
| 45°N (Portland) | 37° | 26° | — | ~5–8% |
The two-position seasonal gain is modest and relatively consistent across many U.S. latitudes due to the sun’s seasonal arc geometry. What does change is the absolute production difference: at higher latitudes with shorter winter days, that 5–8% gain in annual yield represents a larger absolute number of kilowatt-hours.
Pro Tip: Before adjusting tilt, check your azimuth with a compass app and correct for magnetic declination. In the western U.S., magnetic north can be 10°–15° east of true north. A panel aimed at magnetic south in Seattle is actually pointed 15° east of true south, costing you far more than any tilt error.
How do you measure and set tilt on a typical roof?
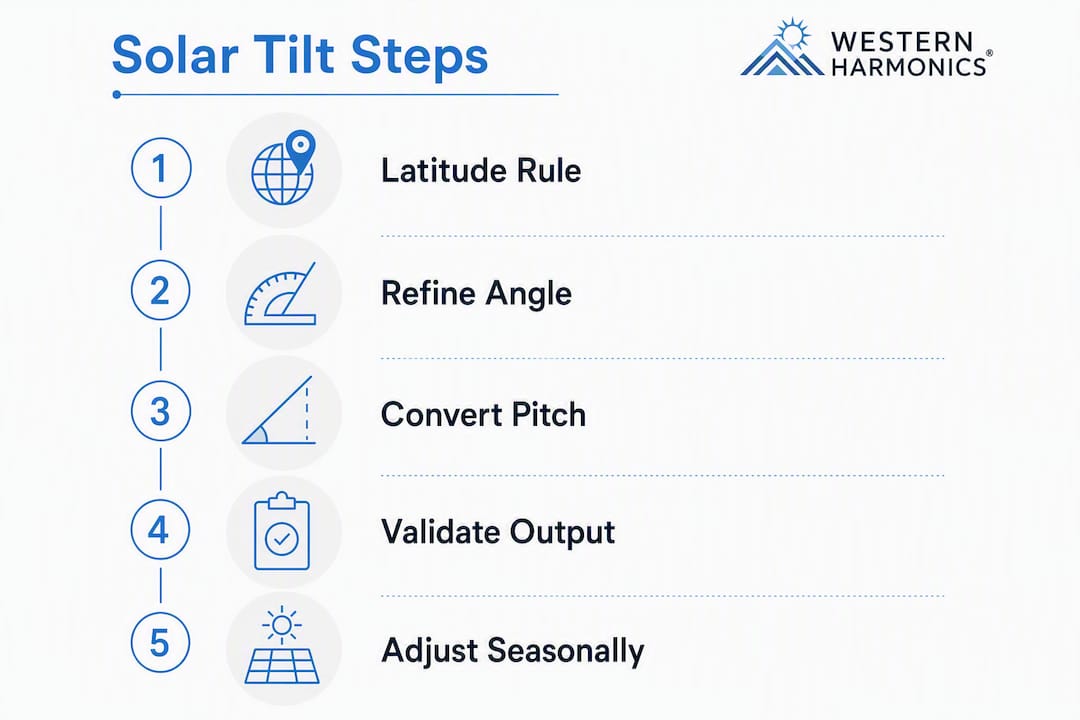
Follow this sequence. It’s the same checklist professional installers use, compressed for a homeowner or DIY installer.
- Find your latitude. Open Google Maps, drop a pin on your roof, and read the coordinates. Round to the nearest whole degree.
- Measure your roof pitch. Use a digital angle finder or a pitch-measuring app (Pitch Gauge is a common iOS/Android option). Record the pitch as both rise/run and degrees.
- Check for shading obstructions. Walk the roof at solar noon and note any chimneys, vents, or trees that cast shadows on the array area. Shading a single cell can cut output from an entire string.
- Verify your azimuth. Use a compass app (iOS Compass or Android equivalents) and correct for magnetic declination using NOAA’s online declination calculator. True south in the continental U.S. is your target.
- Calculate your recommended tilt. Apply the refined formula for your latitude, or run PVWatts with your coordinates and roof pitch to get a modeled estimate.
- Choose your mount type. If your roof pitch is within 5° of your calculated optimal tilt, flush mounting is the practical choice. If the gap is larger, evaluate tilt-up racking against the cost and structural requirements.
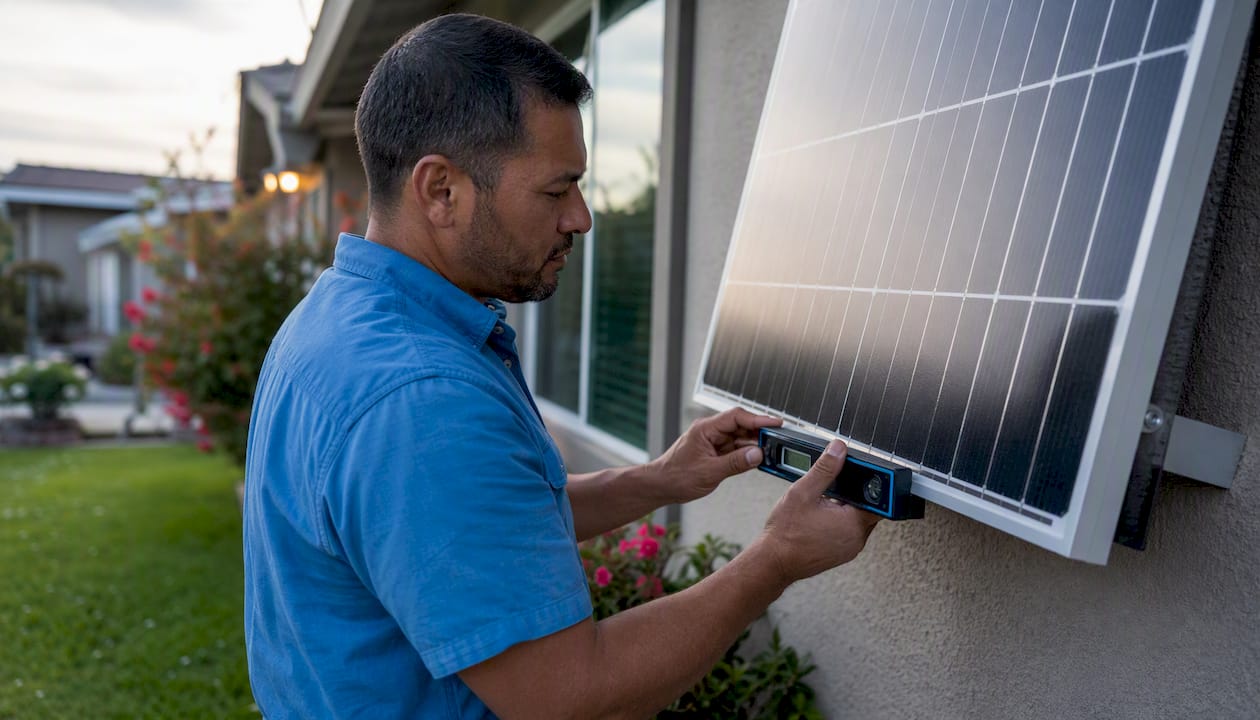
- Set and verify. After installation, use a digital angle finder or a smartphone inclinometer app to confirm the actual panel tilt. A 2°–3° installation error is common and acceptable; anything beyond 5° is worth correcting.
Tools you’ll need:
- Smartphone compass app with magnetic declination correction
- Digital angle finder or pitch-measuring app
- NREL PVWatts for production validation
- NOAA magnetic declination calculator (search “NOAA declination calculator”)
- Tape measure and level for physical verification
If you’re mounting on a ground frame rather than a roof, you have full freedom to set any tilt angle, which makes the refined formula worth applying precisely.
Which calculators and apps give you the most reliable tilt numbers?
The right tool depends on what decision you’re making.
Quick tilt estimates: Online tilt calculators like the one at Lumen Calculator use the latitude ±15° shortcut and solar declination to return a monthly or seasonal recommended tilt in seconds. These are useful for a first pass or for confirming a rule-of-thumb. They don’t account for local weather patterns, shading, or system losses.
Production validation: NREL PVWatts is the standard tool for homeowners and installers who need a location-specific production estimate. Enter your address, system size, tilt, and azimuth, and it returns monthly kWh estimates based on TMY weather data. PVWatts is free, authoritative, and accurate enough for most residential decisions. Run it before finalizing your tilt and azimuth to confirm your assumptions.
Full system and financial modeling: NREL SAM (System Advisor Model) is the installer-grade tool for detailed financial modeling, battery sizing, and iterative tilt/azimuth optimization. SAM supports complex inputs including shading, inverter efficiency curves, and time-of-use rate structures. It’s the right tool when a battery-sizing decision or a financial payback calculation depends on getting the tilt precisely right. SAM requires more setup than PVWatts but returns a far more complete picture of system performance.
EnergySage provides residential guidance benchmarks and a marketplace context. Its guidance that south-facing panels tilted between roughly 15° and 40° perform well for most U.S. roofs is a useful sanity check, though it’s not a substitute for a PVWatts run with your actual coordinates.
For most homeowners: start with a quick calculator, validate with PVWatts, and call in SAM only if you’re sizing a battery bank or making a financial case for a specific tilt configuration.
When should you bias tilt for seasonal loads? Westernharmonics guidance
For off-grid and cooling-heavy systems, the annual-average tilt is often the wrong target. The right question is: when does your system need to produce the most power?
A solar-powered greenhouse exhaust fan running eight hours a day in July needs maximum midday summer production. Setting that panel at latitude − 15° instead of raw latitude can meaningfully increase afternoon output during peak heat. The annual total goes down slightly, but the system does its actual job better.
The reverse is true for off-grid homes and barns that need to keep batteries charged through December and January. A winter-biased tilt (latitude + 15°) captures more of the low winter sun and reduces the depth of discharge that shortens battery life.
Westernharmonics has built off-grid cooling hardware for barns, greenhouses, and rural infrastructure across the country. The consistent finding from that experience: most customers with cooling-heavy loads underestimate how much a summer-biased tilt improves system reliability, and most customers with winter heating or refrigeration loads underestimate how much a steeper winter angle reduces battery stress. The latitude rule is a starting point. Your load profile is the finishing argument.
For systems where the load profile changes significantly between seasons, a two-position adjustable mount pays for itself in reduced battery cycling and longer battery life, even if the raw annual yield gain is only 5–8%.
What assumptions are built into the tilt formulas?
Every tilt formula and rule-of-thumb in this guide assumes:
- Clear-sky approximation — The formulas use average solar geometry. Local weather patterns (persistent marine layer, high-altitude haze) affect actual production and are only captured by PVWatts TMY data.
Simple formulas lose accuracy above 50° latitude, where winter sun angles are extreme and the seasonal production swing is large enough that iterative PVWatts or PVGIS modeling is necessary. Bifacial panels and ground-mounted trackers also require full modeling rather than formula-based estimates.
One more misconception worth addressing: tilt does not need to be perfect. The production curve around optimal tilt is relatively flat. A panel 5° off optimal loses 1–3% annually. A panel 15° off loses more, but still far less than a partially shaded array or a panel facing southeast instead of south.
Key Takeaways
Setting your solar panel tilt angle equal to your latitude gives you 95–98% of maximum annual production, and fixing your azimuth to true south matters far more than fine-tuning tilt by a few degrees.
| Point | Details |
|---|---|
| Start with latitude | Use a fixed tilt equal to your latitude or apply the refined formula: latitude × 0.76 + 3.1° for 25°–50°, which improves accuracy for most U.S. sites. |
| Azimuth beats tilt | A 90° azimuth error at 40°N costs 14–16% of annual yield; a 10° tilt error costs only 2–3%. |
| Seasonal bias for off-grid | Add 15° for winter-heavy loads; subtract 15° for summer cooling loads like fans and ventilation. |
| Validate with PVWatts | Run NREL PVWatts with your coordinates, tilt, and azimuth before finalizing any system design. |
| Roof pitch often works | Most U.S. roofs (4/12–9/12 pitch) already fall in the 18°–37° range that suits many U.S. latitudes. |
For off-grid cooling projects, explore Westernharmonics’ solar and battery systems catalog or use the system designer to model tilt and load trade-offs for your specific setup.
Why Westernharmonics keeps tilt advice practical
The tilt angle conversation in solar is often overcomplicated. Installers debate formulas; online calculators return five decimal places; forum threads spiral into tracker comparisons that have nothing to do with a barn fan on a 6/12 roof. We’ve watched that happen for years, and it’s not useful to the person who just needs their greenhouse cooled through August.
Our position is straightforward: the latitude rule works. The refined formulas are worth applying when you’re sizing hardware. PVWatts is worth running before you spend money. Beyond that, the variables that actually drive underperformance in real off-grid systems are shading, azimuth errors, undersized wire gauge, and battery capacity, not whether the tilt is 29° or 31°.
What we’ve learned building solar fan kits and off-grid cooling systems across the country is that simplicity and reliability beat theoretical optimization every time. A fixed mount at the right latitude tilt, pointed true south, with clean wire runs and no shading, will outperform a complex adjustable system that nobody adjusts because the roof access is inconvenient. Engineering for the real world means accounting for the human factor.
If you’re planning an off-grid cooling system and want to work through the tilt and load trade-offs for your specific site, Westernharmonics’ system designer walks you through it. Or start with something proven: the 10W solar fan kit is a low-cost way to validate a small off-grid setup before committing to a larger array.
Authoritative sources and calculators to validate your tilt decisions
Use these tools in sequence: quick estimate first, then PVWatts validation, then SAM for financial or battery-sizing decisions.
-
NREL PVWatts Calculator — The standard production modeling tool for U.S. residential and commercial systems. Enter coordinates, tilt, and azimuth for monthly and annual kWh estimates based on TMY weather data. Use this before finalizing any tilt or azimuth decision.
-
NREL Solar Resource Data — The underlying irradiance database that powers PVWatts. Useful for understanding the solar resource at your site and for comparing locations.
-
DOE Homeowner’s Guide to Going Solar — Plain-language guidance from the Department of Energy covering system sizing, orientation, and installer selection. A reliable starting point for homeowners new to solar.
-
EnergySage Solar Panel Orientation Guide — Residential benchmark guidance confirming that south-facing panels tilted 15°–40° perform well for most U.S. roofs. Useful for a quick sanity check on azimuth and tilt range.
-
Lumen Solar Panel Tilt Calculator — Quick monthly tilt estimates using solar declination. Good for a first-pass number; not a substitute for PVWatts.
Run PVWatts at minimum before committing to a tilt angle for any system larger than a single-panel off-grid setup. For battery-backed systems, run SAM. The tools are free, and the modeling takes less time than a second trip to the roof.