

Wiring a Solar Fan: Direct-Wire, Controller, or Battery?
Wiring a Solar Fan: Direct-Wire, Controller, or Battery?
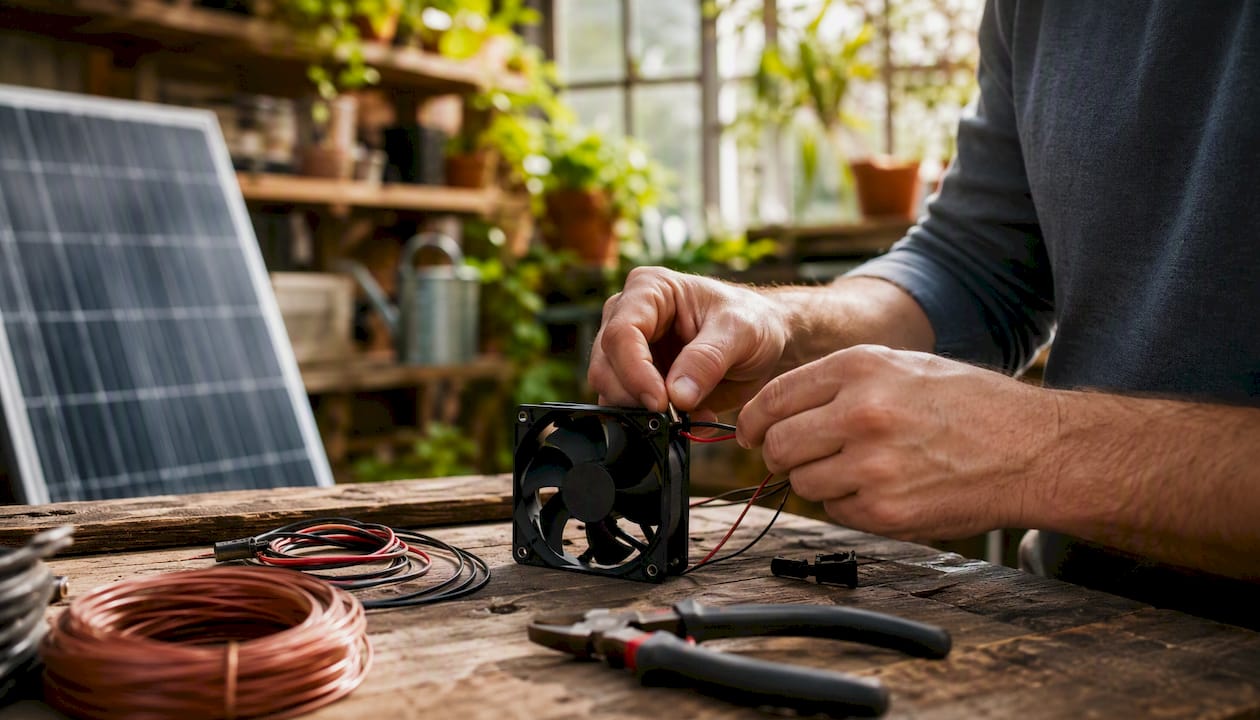
Yes, you can wire a fan directly to a solar panel, and for small two-wire DC fans, that is often the simplest path to airflow. The condition is voltage match: your fan’s rated voltage needs to line up with the panel’s output, and you have to accept that fan speed rises and falls with sunlight because there’s no regulation smoothing things out.
That single sentence hides three real wiring paths, and picking the wrong one is why most DIY solar fan projects stall out. Here’s how they compare before we get into the wiring itself:
- Direct panel to fan — simplest wiring, cheapest, but speed varies with sun intensity and the fan may not run at all in low light.
- Panel through a charge controller to the fan — adds voltage regulation and overcurrent protection, worth it when your panel’s output runs higher than the fan’s rating.
- Panel to battery to fan — the only option that lets the fan run at night or through cloudy stretches, at the cost of battery maintenance and a bigger budget.
Quick fact: a nominal 12V solar panel typically puts out 17 to 18 volts open-circuit in full sun, not a flat 12V. That gap matters the moment you start matching panels to fans; it’s the first thing to check before you strip a single wire.
Key Takeaways
| Point | Details |
|---|---|
| Match voltage first | Confirm your fan’s rated voltage against the panel’s Vmp and open-circuit output before wiring anything. |
| Polarity is non-negotiable | Red connects to positive, black to negative, on both the panel and fan side. |
| Fuse the positive lead | Place the fuse near the power source, sized for the fan’s stall current, not just its steady draw. |
| Size wire for the run | Keep voltage drop under about 3% by stepping up wire gauge on longer cable runs. |
| Add a controller or battery when needed | Use a charge controller for voltage regulation, or a battery when you need the fan to run after dark. |
| Test before you commit | Cover the panel while wiring, then confirm polarity and voltage with a multimeter before final connections. |
| Scale up with the right tools | DIY wiring suits a single small fan; PowerMosaics or a Westernharmonics pre-wired kit suits multi-component systems under 3kW. |
Table of Contents
- How Does Direct Solar Fan Wiring Work?
- When Should You Wire a Fan Through a Charge Controller?
- How Do You Wire a Fan Through a Battery for Night Operation?
- What’s Different About 3-Wire Fans and PWM Control?
- How Big a Solar Panel Do You Need for Your Fan?
- What Fuse and Wire Gauge Does Solar Fan Wiring Need?
- Where Should You Mount the Panel and Run the Cable?
- Why Won’t My Solar Fan Start, or Why Is It So Slow?
- What Safety Precautions Matter Most for Solar Fan Wiring?
- Should You Build a Kit Yourself or Use a System Design Tool?
- What We’ve Learned From Years of Solar Fan Wiring
- Get a Faster Path to a Working Solar Fan
- Sources
How Does Direct Solar Fan Wiring Work?
Direct-wire works when your panel’s operating voltage sits close to the fan’s rated voltage and you’re fine with variable speed. It’s the setup most barn and workshop owners reach for first, because there’s no controller to buy and no battery to maintain. It also has real limits: a direct-drive fan can sputter or refuse to start on hazy mornings even when the panel is technically producing power because the panel and motor settle at an operating point that can sit below the motor’s start-up voltage.
Here’s the sequence we recommend, whether you’re wiring a small vent fan or something closer to our greenhouse exhaust fan specs:
- Check the fan’s rated voltage on its nameplate or spec sheet. Most small ventilation fans run at 12V or 24V DC.
- Verify the panel’s Vmp and open-circuit voltage. A 12V nominal panel commonly reads 17 to 18V open-circuit in full sun, which is normal, not a fault.
- Match polarity before connecting anything. Standard two-wire fans use red for positive and black for negative.
- Confirm connector types. Kit panels usually ship with MC4 connectors; match male to female and never force a mismatched pair together.
- Install an inline fuse on the positive lead, sized close to the fan’s steady current draw, before the fan side of the connection.
- Make mechanical connections secure. Twist-and-tape joins fail outdoors. Use crimp connectors or solder, then seal with heat-shrink tubing.
- Test under a covered panel first. Drape a towel or box over the panel while making connections, then uncover it briefly to confirm the fan spins the right direction.
Polarity is non-negotiable: red to panel positive, black to panel negative. If your fan or panel uses unlabeled wires or different colors, use a multimeter on the panel in full sun first, confirm which terminal reads positive, and mark it before you touch the fan leads.
Some installers add a blocking diode or series resistor when panel voltage runs meaningfully higher than the fan’s rating, to trim peak voltage on bright days. A full voltage regulator can do the same job more precisely, but it also burns off power as heat, which defeats some of the point of running lean off-grid hardware. For most small fans, matching panel and fan voltage is important to avoid issues from voltage mismatch.
Pro Tip: Cover the panel completely before you make any connection, then use a multimeter to confirm open-circuit voltage and polarity before the final crimp. It takes thirty seconds and it’s the difference between a clean install and a fan spinning backward on a hot roof.
When Should You Wire a Fan Through a Charge Controller?
Use a charge controller when your panel’s output runs higher than the fan can handle, or when you want the fan protected from voltage spikes on bright days. A controller regulates the raw panel voltage down to something steady, and many models include a load terminal labeled specifically for a fan or light, which makes wiring straightforward.
The wiring order matters more here than in a direct setup. Many controllers need a battery connected first to initialize before their load output will switch on at all, so follow this sequence: connect the battery to the controller’s battery terminals first (if your system uses one), then connect the panel to the PV input, and connect the fan last to the load terminals. Wiring in a different order risks damaging the controller on some budget models.
Before you buy a controller, check it against these basics:
| Feature | What to look for |
|---|---|
| Current rating | Rated above your fan’s steady-state draw, not just its nameplate wattage |
| Load terminal labeling | Clearly marked for “load,” “fan,” or “light” output |
| Battery dependency | Confirm whether the load output requires a battery to initialize |
| Overcurrent protection | Built-in fuse or breaker on the load side |
| Panel compatibility | PV input voltage range matches your panel’s Vmp and open-circuit rating |
Pro Tip: Pick a controller with a load rating comfortably above the fan’s steady current draw, and add an inline fuse sized for the fan’s stall current, not its running current. Motors pull more amps for a fraction of a second at startup than they do once spinning, and that spike is what trips an undersized fuse.
How Do You Wire a Fan Through a Battery for Night Operation?
Adding a battery lets the fan run after dark or through overcast days, because the panel charges the battery and the fan draws from stored power instead of straight off the panel. That steadiness costs you: battery maintenance, an added expense, and a few safety habits you don’t need with a direct-wire setup.
The wiring sequence for a battery-backed system:
- Connect the panel to the charge controller’s PV input.
- Connect the battery to the controller’s battery terminals.
- Wire the fan to the controller’s load output, or to a separately fused DC output if your controller doesn’t have a dedicated load terminal.
- Place an inline fuse between the battery’s positive terminal and the rest of the circuit, as close to the battery as possible.
- Add a switch on the fan’s positive lead if you want manual on/off control independent of the controller.
Sizing a battery starts with the fan’s wattage. A 12V fan pulling 24 watts draws 2 amps (24W ÷ 12V = 2A). Running that fan for 8 hours overnight uses roughly 16 amp-hours. A 12V deep-cycle battery rated for 35 amp-hours gives you that runtime with margin left over, since you generally don’t want to draw a lead-acid battery down past 50% of its rated capacity if you care about its lifespan. Size your panel to replace that overnight draw the next day. If the fan needs 16 amp-hours and your panel delivers roughly 4 amps in good sun, expect about 4 hours of solid charging to fully recover, so a 50 to 60 watt panel gives you comfortable headroom over a bare minimum match.
- Match battery amp-hour capacity to your target runtime, not just the fan’s wattage rating.
- Oversize the panel slightly. Cloudy days cut output, and a panel sized exactly to the math leaves you short.
- Keep the battery in a ventilated enclosure, away from direct sun and freezing temperatures where possible.
Pro Tip: A sealed deep-cycle 12V battery is the easiest option for beginners, since it needs no watering and tolerates a barn or shed environment better than a flooded lead-acid unit. Avoid discharging it below 50% capacity if you want it to last more than a season or two.
What’s Different About 3-Wire Fans and PWM Control?
The third wire on a fan is almost always a control or tachometer signal, not a second power line, and it should never be tied into your positive or negative power leads. Power still runs through two of the three wires, exactly like a standard DC fan; the extra wire either reports fan speed back to a controller (tach) or accepts a pulse-width modulation (PWM) signal that adjusts speed.
Never connect a PWM signal wire directly to a raw solar panel output. Panel voltage swings with cloud cover and sun angle, and a PWM input expects a clean, specific signal pattern, not fluctuating DC. If you want variable speed control on a 3-wire fan in a solar setup, you need a controller or driver built for that fan’s specific control input, not a bare panel connection.
- Power wires (positive/negative) connect the same way as any 2-wire fan.
- The signal wire connects only to a compatible controller input, never to panel positive or negative.
- Manufacturer labeling varies. Some use color codes, others use pin numbers on a connector housing.
- Always check the fan’s spec sheet before touching the third wire. Guessing on a control line is how fans get damaged for no good reason.
If you’re picturing the wiring, think of it as two separate circuits sharing one fan body: a simple power circuit (red/black) and a low-signal circuit that talks to a controller. Keep them wired that way and you won’t have problems.
How Big a Solar Panel Do You Need for Your Fan?
Size your panel by converting the fan’s wattage to amps, then adding margin for start-up current and system losses. The math is short: amps equal watts divided by volts. A 24-watt, 12V fan draws 2 amps. From there, you’re deciding how much panel wattage covers that draw reliably.
Motors pull more current for an instant at startup than they do once running, and panels rarely hit their full rated output outdoors due to heat, angle, and haze. A fan drawing 2 amps steady might spike briefly toward 3 amps on startup, so sizing the panel for that higher number keeps the fan starting reliably instead of stalling on marginal mornings.
| Fan power (watts) | Approx. current at 12V | Recommended panel wattage |
|---|---|---|
| 5–10W | 0.6A | 10–20W |
| 25W | 2A | 20–35W |
| 50W | 4A | 50W |
| 60–100W | 8A | 100W |
Quick fact: because a nominal 12V panel actually runs 17 to 18 volts open-circuit in full sun, your real-world wattage delivery at working voltage is higher than the panel’s label suggests once it’s under partial load, which is part of why a modest safety margin covers most edge cases without oversizing dramatically. That gap is also why direct-drive fans often need more startup headroom than their running wattage implies.
Pro Tip: Voltage drop eats into your margin before the fan ever sees full power. Longer wire runs and partial shading both cut delivered voltage, so calculate expected drop for your specific run length and choose wire gauge accordingly rather than assuming your panel’s rated output reaches the fan intact.
What Fuse and Wire Gauge Does Solar Fan Wiring Need?
Always fuse the positive conductor near the power source, and choose wire gauge that keeps voltage drop under roughly 3% for reliable fan speed and consistent startup. Skipping the fuse is the single most common shortcut that turns a minor wiring mistake into a fire risk or a fried controller.
Wire gauge needs to scale with both current and distance. A run that’s fine at 10 feet can lose enough voltage at 25 feet to slow the fan noticeably or prevent startup entirely. DIY solar guides commonly recommend stepping up from 14 AWG to 12 AWG once a run approaches 20 feet, and longer runs call for thicker wire still.
| Run length | Fan current | Recommended wire gauge | Suggested fuse rating |
|---|---|---|---|
| Up to 10 ft | 1–2A | 16–18 AWG | 3–5A |
| 10–25 ft | 1–3A | 14–12 AWG | 5–7A |
| 25–50 ft | 2–4A | 10–12 AWG | 7–10A |
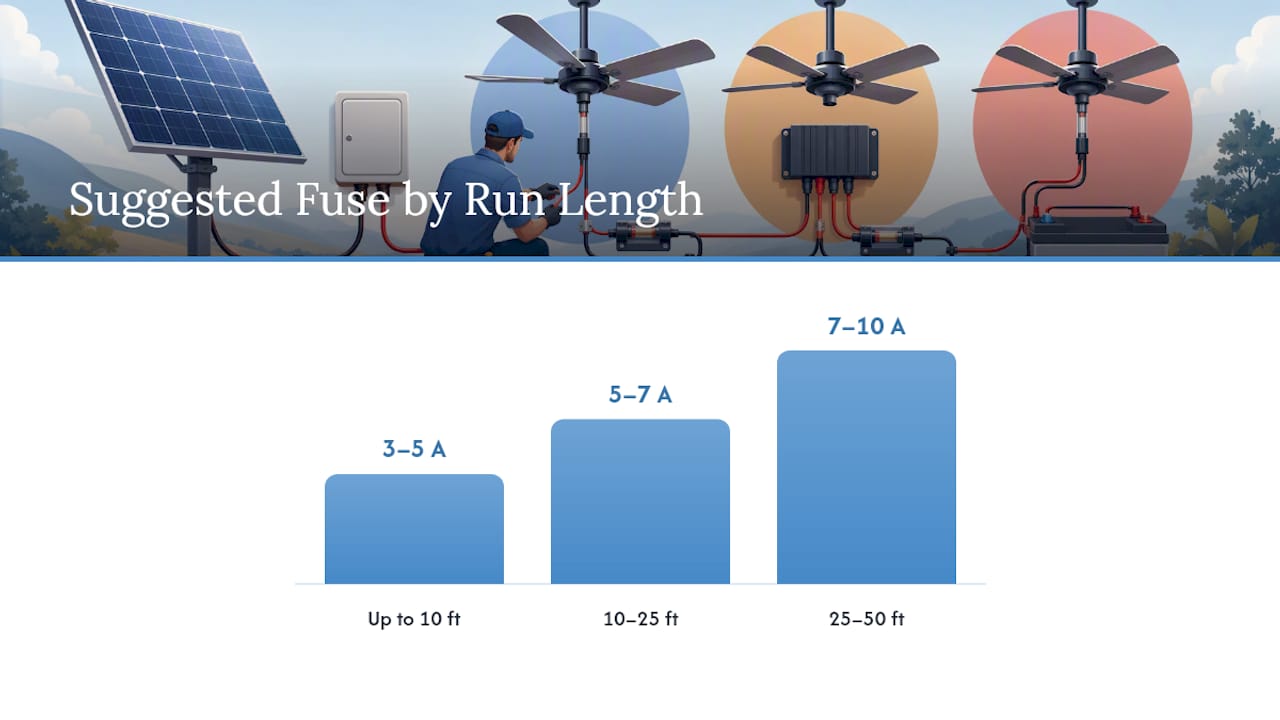
Fuse ratings above are sized for steady current with a safety margin; if your fan’s stall current runs significantly higher (check the spec sheet), size the fuse toward that higher figure so normal startup doesn’t nuisance-trip it.
MC4 connectors make solar wiring far less error-prone than bare wire splices, but only if you use them correctly:
- Always match male to female MC4 connectors. Forcing a mismatched pair damages the housing and breaks the weather seal.
- Match color-coded conductors (red to red, black to black) exactly as shown in manufacturer wiring guides like the Snap-Fan installation manual.
- Use a proper MC4 crimp tool rather than pliers. A bad crimp is invisible until it fails months later.
- When extending PV cable runs, use branch connectors rated for outdoor exposure rather than a generic splice.
Pro Tip: Any connection outside a weatherproof enclosure should be heat-shrinked or soldered, not just twisted and taped. Attic and roof environments cycle through huge temperature swings, and a loose splice is one of the fastest ways to lose a fan connection to corrosion within a season.
Where Should You Mount the Panel and Run the Cable?
Panel placement decides more of your fan’s real-world performance than almost any wiring choice you’ll make. Locate the panel for maximum southern exposure (in the Northern Hemisphere) and check for shading from trees, chimneys, or roof peaks at different times of day, not just at installation. Secure the panel with L-brackets or a pole mount rated for your local wind load, following manufacturer-specific mounting hardware guidance.
Cable routing generally comes down to three options: an exterior run along the roofline, a path through a gable vent into the attic, or a drilled hole through the roof deck itself. Gable routing tends to be the cleanest option when a vent is already positioned near the fan, since it avoids a new roof penetration entirely. A drilled hole works when no gable access exists, but it demands careful sealing.
- Seal every roof or wall penetration with exterior-grade, UV-resistant caulk, not standard indoor sealant.
- Install a drip loop in the cable before it enters any hole, so water runs off the low point of the loop instead of following the wire inside.
- Secure cable runs with cable staples or conduit at regular intervals to prevent wind-driven wear and rodent damage.
- Measure your cable run before ordering parts, and buy a few extra feet of slack for thermal expansion and future adjustments.
Gable and curb-mount installation guides both emphasize the same lesson from field experience: sealed penetrations prevent the slow leaks that show up as attic mold a year later, long after the installer has forgotten which hole they drilled.
Why Won’t My Solar Fan Start, or Why Is It So Slow?
Most solar fan problems trace back to one of four causes: reversed polarity, a loose connector, insufficient panel current for the fan’s start-up draw, or voltage that’s below the motor’s start-up threshold even though the panel is producing power. Work through these in order, from simplest to most technical.
- Check open-circuit panel voltage with a multimeter in full sun. It should read close to the panel’s rated open-circuit spec (commonly 17 to 18V for a 12V panel).
- Check loaded voltage with the fan connected. A big drop between open-circuit and loaded readings points to undersized wire, a bad connection, or a panel that’s too small for the fan’s draw.
- Test fuse continuity with the multimeter in continuity mode. A blown fuse is the most common reason a fan does nothing at all.
- Swap polarity as a test only if you suspect a labeling error, and only briefly. Reversed polarity can spin some fans backward or damage others, so check labels carefully first.
- Test the fan on a known-good 12V supply, like a bench power supply or car battery, to rule out a bad motor before blaming the wiring.
Quick-pass checks anyone can run in five minutes:
- Fuse continuity
- Connector tightness at every joint
- Multimeter reading at the panel in full sun
Deep-dive checks that may call for more patience or a second pair of hands:
- Measuring voltage drop across a long cable run under load
- Diagnosing intermittent starts that suggest a marginal operating point between the panel and motor’s V-I curves
- Replacing a controller suspected of failing to initialize its load output
If the fan runs fine at high noon but won’t start on hazy mornings or refuses to start until the sun climbs higher, that’s a classic sign the panel and fan are settling at an operating point below the motor’s start-up voltage. A slightly larger panel, or a battery buffer, usually resolves it.
What Safety Precautions Matter Most for Solar Fan Wiring?
Treat every PV connection as live the moment the panel sees daylight, and always fuse the positive conductor close to the power source before you connect anything downstream. Cover the panel with an opaque cloth while wiring, and use insulated tools any time you’re working near exposed terminals.
- Use a disconnect switch or breaker between the panel and the rest of the circuit so you can isolate power without covering the panel every time.
- Wear safety glasses when crimping connectors or working with battery terminals.
- Handle batteries with care: keep them ventilated, avoid shorting the terminals with metal tools, and never charge a damaged or swollen battery.
- Never tie a DC fan circuit into household AC wiring or attempt to backfeed power into existing building circuits.
- If you’re working on a roof, use fall-prevention equipment and never work alone on a pitched surface.
Some manufacturer instructions go further and specifically require an all-pole disconnection switch as part of any fixed wiring installation, along with a grounding continuity check after the install is complete. If your project involves tying into a building’s existing electrical system, or local code requires a fixed disconnect, that’s the point where a licensed electrician takes over. DIY wiring is appropriate for standalone, low-voltage DC systems; it stops being appropriate the moment AC circuits or permanent building wiring enter the picture.
Battery safety callout: if your system uses a lead-acid battery, keep it in a ventilated space away from open flame, since charging can release small amounts of hydrogen gas. Dispose of any battery through a proper recycling program rather than household trash.
Should You Build a Kit Yourself or Use a System Design Tool?
DIY direct-wiring makes sense for a single small fan with a straightforward voltage match and a short cable run. Once your project grows into multiple fans, a battery, and a charge controller working together, hand-calculating every wire gauge, fuse size, and panel wattage gets error-prone fast, and that’s the gap tools like PowerMosaics are built to close.
Here’s how the trade-offs stack up:
- Speed of install: a pre-wired kit or a tool-planned system gets you running in an afternoon; ground-up DIY design for a multi-component system can take days of research and trial fitting.
- Built-in protection: kits and properly planned systems arrive with fuses and controllers already sized correctly; a scratch-built system depends entirely on the builder getting every calculation right.
- Ongoing maintenance: a well-planned system with correctly sized components needs less troubleshooting down the road than one assembled through guesswork.
- Cost trade-offs: pure DIY parts-sourcing can be cheaper upfront, but rework from an undersized fuse or wrong wire gauge eats into those savings quickly.
PowerMosaics is built specifically for DC, low-voltage, and under-3kW systems, which is exactly the category most solar fan setups fall into. Rather than being general-purpose solar design software built around grid-tied AC arrays, it walks you through panel sizing, wire gauge, and charge controller selection for the kind of small off-grid load a barn, greenhouse, or workshop fan actually represents. For readers who want a fully assembled path instead of individually sourced parts, a turnkey option like our 200W hanging fan kit with battery backup already has the fuse, controller, and wire gauge decisions made for you.
What We’ve Learned From Years of Solar Fan Wiring
We’ve built solar fan kits since before “solar fan kit” was a category anyone was searching for, and the lesson that never changes is this: wiring mistakes are rarely dramatic. They’re a fuse sized off the nameplate current instead of the stall current. A connector left un-crimped because the tool was “close enough.” A panel undersized by 20% because the math skipped the safety margin. None of these show up as a spark or a bang. They show up six weeks later as a fan that runs slow, or doesn’t start until noon, or stops working entirely after the first hard frost.
That’s part of why so many of our customers, from horse barn owners to greenhouse operators, land on a pre-wired kit after their first DIY attempt rather than before it. It’s not that the wiring is hard. It’s that getting every element right, panel size, wire gauge, fuse rating, connector match, takes real attention, and a kit engineered around a specific fan removes most of the guesswork before it becomes a callback. Western Harmonics built the first U.S. solar fan kit for exactly that reason: rugged, simple systems that keep working in a dusty barn or a humid greenhouse without babysitting.
If you’re wiring your own system and something isn’t behaving the way this guide describes, check your fan’s manual first. Most manufacturers, including ours, publish support contacts and reference manuals specifically because wiring questions come up more often than any other install issue.
Get a Faster Path to a Working Solar Fan
If working through voltage math and wire gauge tables isn’t how you want to spend a weekend, there’s a faster route. A pre-wired fan kit from Westernharmonics arrives with the panel, fuse, and connectors already matched and sized, so you skip the sizing calculations covered above entirely.

- Browse pre-wired kits like the 100-watt hanging fan and panel pairing for a ready-to-mount setup.
Whichever path fits your project, you can check current kit options and specs directly on Westernharmonics.
Sources
Keep a few manufacturer manuals on hand before you start wiring. They show exactly how real products are connected, not just the general principles.
- Snap-Fan Solar Kit Install Guide
- How to power a 12V fan simply using a PV panel?
- How to Build a Solar Panel Fan
Save a local copy of any manual tied to hardware you actually own, since manufacturers occasionally revise wiring diagrams between product runs. Checking the current version before you start a project takes a few minutes and can save you from wiring against an outdated diagram.
FAQ
Can you wire a fan directly to a solar panel without a controller? Yes, for standard two-wire DC fans with voltage matching the panel’s output. Expect variable speed tied to sunlight and understand the fan may not start in low light.
What size solar panel do I need to run a small ventilation fan?
Do I need a fuse for solar fan wiring? Yes. Always install an inline fuse on the positive conductor near the power source, sized for the fan’s stall current rather than its running current.
Why does my solar-powered fan run slow or not start at all? The most common causes are reversed polarity, a loose or corroded connector, an undersized panel for the fan’s start-up draw, or voltage that settles below the motor’s start-up threshold.
When should I use a charge controller instead of direct-wiring? Use a controller when your panel’s voltage runs meaningfully higher than the fan’s rating, or when you want built-in overcurrent protection and a labeled load terminal.