

Small Scale Solar Direct Drive Fans: Buy a Matched Kit for Daytime Use
Small Scale Solar Direct Drive Fans: Buy a Matched Kit for Daytime Use
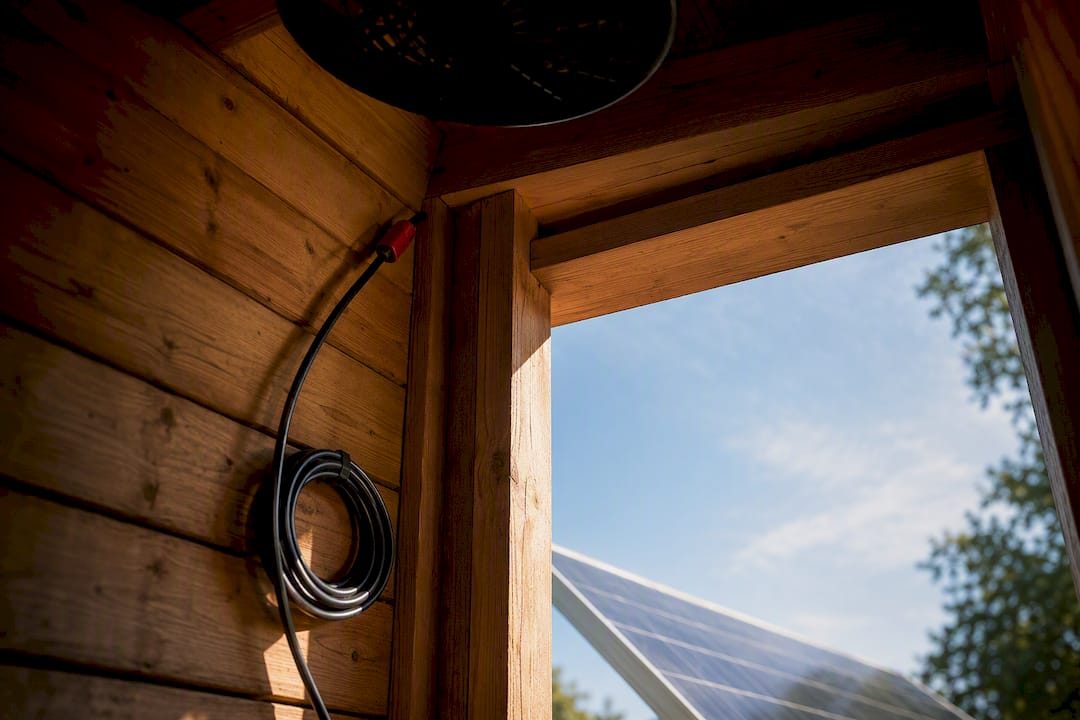
For daytime-only ventilation in greenhouses, sheds, coops, and workshops, a solar direct-drive fan is usually the simplest, most reliable option available. The tradeoff is straightforward: you get sunlight-hours airflow with almost no moving parts to fail, but no fan movement after dusk. Check your fan’s nominal voltage and rated current first, then either buy a matched kit or size your own panel using the method below.
TL;DR:
- A direct-drive solar fan works best with a properly matched 24V panel to ensure sufficient voltage and airflow, especially in partial sunlight.
- Using a purpose-built kit simplifies installation, guarantees component compatibility, and often provides better overall reliability than DIY component mixing.
- For structures needing overnight or continuous airflow, a battery-backed system is essential, but for daytime ventilation, a panel directly wired to a fan suffices.
- Common installation mistakes include undersized panels, voltage mismatches, missing inline fuses, and poor outdoor wiring connections, which can cause poor performance or failures.
- Selecting a kit that includes factory-matched components and clear documentation reduces sizing errors and troubleshooting time.
Table of Contents
- How Do Solar Direct-Drive Fans Work?
- What Are the Advantages and Drawbacks of Direct-Drive Solar Fans?
- How Do You Size a Solar Panel for a DC Fan?
- What Are the Wiring Options for Solar Fan Installation?
- Common DIY Mistakes When Installing a Solar Fan
- Why Choose a Purpose-Built Kit Over DIY Parts?
- What Should Greenhouse, Coop, and Shed Owners Actually Buy?
- Get a Matched Solar Fan Kit Instead of Guessing at Parts
- Sources
- FAQ
How Do Solar Direct-Drive Fans Work?
A solar direct-drive fan wires a photovoltaic panel straight to a DC motor. No battery, no charge controller, no inverter. Sunlight hits the panel, the panel produces DC current, and that current spins the fan directly. When the sun goes behind a cloud, the fan slows down. When the sun sets, it stops. That simplicity is the entire point of the design.
The tricky part is what happens electrically between the panel and the motor. A solar panel is a current-limited device with a specific open-circuit voltage, or Voc, and a maximum power point where it delivers the most watts. A DC motor, meanwhile, has its own electrical resistance, called impedance, which determines how much current it pulls at a given voltage. When you connect the two directly, neither one gets to operate at its ideal point in isolation. They settle at whatever voltage and current satisfy both devices at once, and that settling point is what actually determines your airflow.
This is where fan voltage choice matters more than most people expect. Bench tests comparing 12V and 24V fans on identical panels found that a single 12V fan often pulls the panel voltage down low, limiting how many watts get extracted. A 24V fan, or two 12V fans wired in series, presents higher impedance to the panel, letting the panel voltage float upward toward its more productive range. The result is more usable power from the same panel size.
A few mechanical facts back up why direct-drive is worth the electrical complexity:
- Direct-drive motors spin the fan blade at the same speed as the motor shaft, with no belt, pulley, or gearbox between them.
- Fewer mechanical parts means fewer points where dust, heat, or vibration can cause a failure, a benefit documented across industrial and residential direct-drive fan lines.
- Airflow output rises and falls with sunlight intensity in a fairly predictable curve, not a random on/off pattern.
What Are the Advantages and Drawbacks of Direct-Drive Solar Fans?
We’ve installed and torn apart enough of these systems to know the pros and cons aren’t close to balanced for most small-scale applications. Direct-drive wins on simplicity almost every time daytime ventilation is the actual need.
Advantages of direct-drive fans:
-
Fewer components mean fewer failure points. No controller electronics to fry in a hot barn, no battery to maintain or replace every few years.
-
Installation takes an afternoon, not a weekend, since there’s no programming, no battery box, and no charge controller wiring to get right.
-
Maintenance is nearly zero. Wipe dust off the panel a few times a season and check the wire connections once a year.
-
Cost per unit of airflow tends to be lower than battery-backed systems because you’re not paying for storage hardware you may not need.
Drawbacks of direct-drive fans:
- The fan only runs when the sun is out. No nighttime ventilation, no cloudy-day guarantee of full airflow.
- Speed varies with irradiance, so a fan running strong at noon may crawl at 8 AM or during heavy overcast.
- Under very low light, the motor can stall entirely rather than spin slowly, since some DC motors need a minimum voltage just to overcome internal friction.
Direct-drive makes sense for greenhouses that need heat and humidity relief during daylight, chicken coops that need midday air exchange, and sheds or workshops where nighttime ventilation isn’t a concern. Larger industrial applications sometimes use purpose-built direct-drive units with bigger blades to scale up CFM, proving the same principle works from a small kit to a much larger installation. If your structure needs airflow around the clock, for example a livestock barn in summer heat where nighttime cooling matters for animal welfare, a battery-backed system is the better call, and we’ll cover that tradeoff in the wiring section below.
Pro Tip: If you’re on the fence between direct-drive and battery-backed, ask yourself one question: does anything inside this structure suffer if airflow stops at sunset? If the answer is no, direct-drive saves you money and headaches.
How Do You Size a Solar Panel for a DC Fan?
Sizing is the step where most DIY installations go wrong, and it’s also the step that determines whether your fan runs strong all day or stalls out by mid-morning. The process has four parts, and none of them require advanced math.
Step 1: Read the fan nameplate. Every DC fan motor has a label or spec sheet listing nominal voltage (usually 12V or 24V) and rated current draw, sometimes listed as starting or stall current. Write both numbers down before you shop for a panel.
Step 2: Choose panel Voc and wattage to match. You want a panel whose open-circuit voltage sits comfortably above the fan’s nominal voltage, and whose wattage covers the fan’s rated current with some margin. A panel that just barely meets the fan’s minimum voltage will struggle in anything less than full sun.
Step 3: Favor higher voltage when the panel is current-limited. This is the rule of thumb bench testing keeps confirming: a 24V fan lets a smaller panel’s voltage float higher, extracting more watts than a 12V fan would from the same panel under partial sun.
Step 4: Calculate your expected operating window. Multiply your panel’s rated wattage by the number of strong-sun hours in your region, then compare that to your fan’s power draw to estimate how many hours of solid airflow you’ll get.
Here’s a worked example. Say you have a 24V DC fan rated at 1.5 amps, which works out to about 36 watts at full voltage. A 50W panel with a Voc around 22V and Vmp near 18V would undersize this fan, since the panel’s operating voltage sits below what the fan wants. Stepping up to a panel with a 30V to 36V range and 50 to 65 watts of rated output gives the fan enough headroom to run near its efficient point through most of the day, even as clouds pass over.
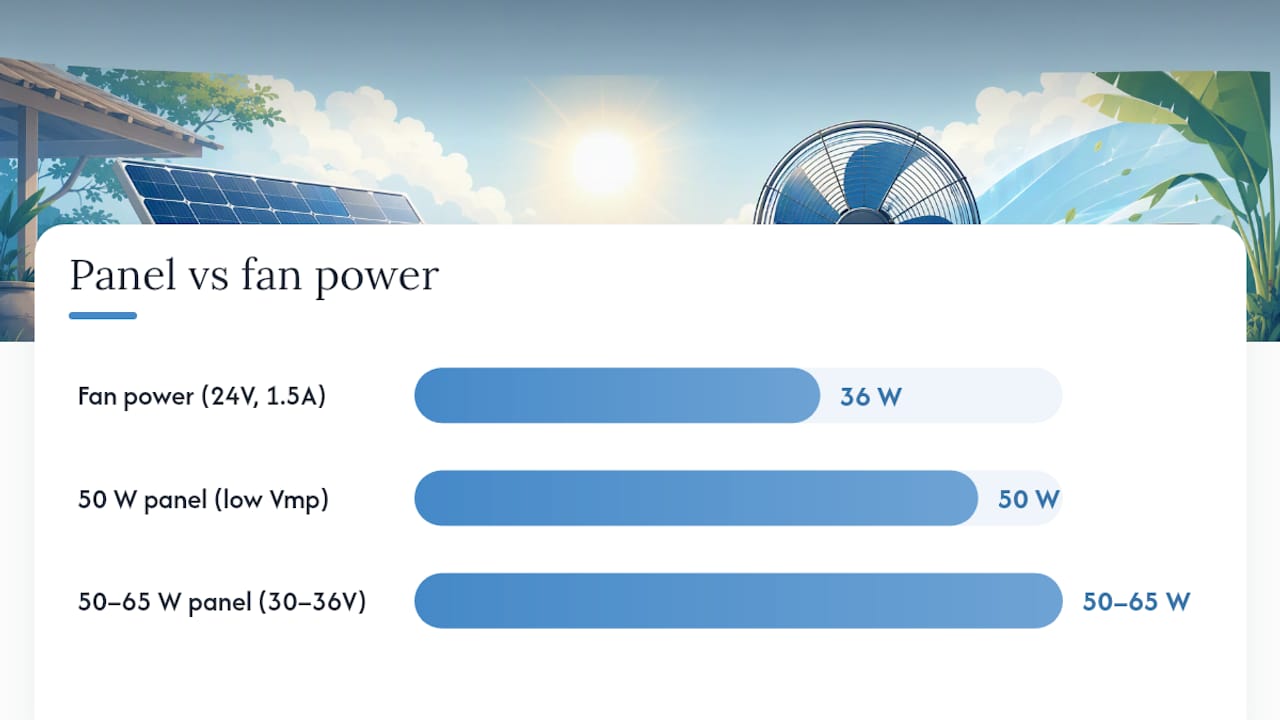
Bench testing on comparable setups shows that pairing fan impedance with the panel’s current capability is the single biggest factor in how much real-world airflow you get, more than panel wattage alone.
A few safety notes belong in every sizing plan:
- Use an inline fuse rated slightly above your fan’s normal operating current, placed as close to the panel’s positive lead as possible.
- Match wire gauge to your run length and current draw. Undersized wire on a long run drops voltage before it reaches the motor.
- MC4 connectors are the standard for panel-to-fan wiring and hold up better outdoors than bare spliced wire or cheap barrel connectors.
What Are the Wiring Options for Solar Fan Installation?
You have three basic ways to wire a solar direct-drive fan, and each one trades simplicity for capability in a different direction.
- Direct-wired. Panel connects straight to the fan with no electronics in between. Mount the panel where it gets full sun, run appropriately gauged cable to the fan, install an inline fuse near the panel, and use MC4 connectors at every junction. This is the fastest install and the one with the fewest parts to fail, and it’s what most greenhouse and coop owners actually need.
- Controller or regulator added. A motor speed controller or buck/boost converter sits between the panel and fan to smooth out voltage swings or provide a soft start. This adds cost and one more component that can fail, but it helps in setups where the fan needs a steadier speed regardless of cloud cover, or where you’re pairing a panel and fan that aren’t a natural voltage match.
- Battery-backed. A battery bank stores daytime solar energy so the fan can run into the evening or overnight. This is the right call for barns needing continuous airflow for livestock, or any structure where nighttime heat buildup is a real problem. Sizing changes significantly here, since you now need to account for battery capacity and charge controller specs, not just panel-to-fan matching.
Beyond the wiring itself, placement decisions determine how well any of these three setups perform. Mount the panel where it gets unobstructed sun for the bulk of the day, tilted roughly to match your latitude for year-round performance, or angled steeper in winter if cold-season ventilation matters most. Keep the fan itself shielded from direct rain intrusion while still allowing full airflow, and leave enough clearance around the housing for periodic cleaning. If you’re running wire through a wall or roof panel, seal the penetration point against moisture before you call the job done, and check that your fuse and connectors sit somewhere you can reach without tools during a future inspection.
Common DIY Mistakes When Installing a Solar Fan
Forum threads on this topic tell a consistent story: the same handful of mistakes account for most failed or disappointing installs. Practitioners who’ve built their own direct-drive systems point to a short list of recurring problems.
- Undersized panel. The fan technically spins, but only during peak midday sun, leaving you with weak airflow most of the day.
- Wrong nominal voltage. Pairing a 12V fan with a panel meant for a 24V system, or vice versa, without understanding how that mismatch changes current draw.
- No inline fuse. Skipping this step to save five dollars and risking a wiring fire if a short develops.
- Cheap or exposed connectors. Bare wire splices left uncovered corrode within a season of outdoor exposure.
Bench-testing your fan before permanent installation catches most of these problems early. Connect it to a multimeter and a known power source, note the voltage and current at a few different light levels if you can simulate them, and compare those readings against the nameplate spec. If the fan draws far more current than rated, something’s wrong with the motor or wiring. If it barely turns at all, check for a voltage mismatch before assuming the fan is defective.
A troubleshooting checklist worth keeping nearby: a fan that stalls in bright sun usually points to a voltage mismatch or a wiring fault, not a bad panel. Noisy bearings almost always mean the motor is nearing end of life, especially in dusty barn environments. Inconsistent speed that doesn’t track with visible cloud cover suggests a loose connection somewhere in the circuit.
Pro Tip: Keep a cheap multimeter in your toolbox specifically for fan checks. Five minutes of testing before you climb up to mount anything saves an entire afternoon of troubleshooting after installation.
If you’ve worked through this list and you’re still fighting inconsistent performance, that’s usually the point to stop chasing parts from three different vendors and switch to a matched kit instead.
Why Choose a Purpose-Built Kit Over DIY Parts?
Some companies have long histories of building solar-powered fan kits, and that experience can show in how their kits are engineered. Every component, from the panel’s Voc to the fan’s motor impedance, is matched at the factory instead of guessed at in a driveway.
A purpose-built kit removes the guesswork that trips up most DIY builds:
- Panel and fan are pre-matched for voltage and current, so you skip the sizing calculations entirely.
- Connectors, fuses, and cable are included and rated correctly for the system, not scavenged from unrelated projects.
- Documentation covers mounting angle, wiring order, and troubleshooting steps specific to that kit.
- Kits come in sizes from small greenhouse units up to larger floor fans and battery-backed hanging units, covering most structures without custom engineering.
Our video library walks through real installations start to finish, which is often more useful than a written wiring diagram when you’re standing in a barn trying to figure out where the fuse goes.
What Should Greenhouse, Coop, and Shed Owners Actually Buy?
If daytime ventilation covers your need, a direct-drive 24V fan paired with a correctly sized panel is the right call almost every time. It’s cheaper, it has fewer parts to maintain, and it solves the actual problem: heat and humidity buildup while the sun is up. A daytime-only kit sized for your square footage will outperform a DIY build cobbled together from mismatched components.
If your structure needs airflow overnight, whether that’s livestock comfort or humidity control in a sealed greenhouse, don’t try to stretch a direct-drive setup past what it’s built for. Go straight to a battery-backed kit and plan for a larger panel to cover both daytime fan use and battery charging.
Before you buy anything, run through this checklist: fan nominal voltage, rated current, expected sun hours for your region, and whether nighttime airflow actually matters for your use case. Get those four answers right and the rest of the decision falls into place.
— Chris
Get a Matched Solar Fan Kit Instead of Guessing at Parts
Some companies offer kits that provide panels and fans matched at the factory, helping customers skip sizing math and trial-and-error wiring common in DIY installs.

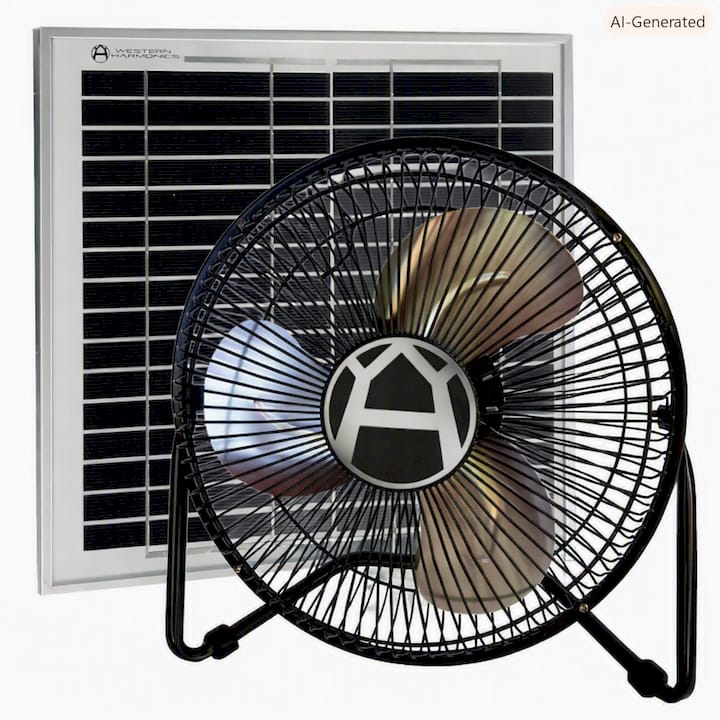
For a small greenhouse or coop, the 10W Solar Powered Fan Kit handles daytime ventilation with a single pre-wired unit. For larger sheds or barns that need more airflow, the 100W Solar Floor Fan Kit delivers stronger CFM without custom panel sizing on your part. If overnight airflow matters for your structure, the 200W Solar Hanging Fan Kit with Battery Backup extends ventilation past sunset. Browse the full Westernharmonics catalog to match a kit to your square footage and start ventilating before the next heat wave hits.
Sources
Bench-test data on 12V versus 24V direct-drive fans comes from Solar Thoughts’ hands-on panel comparison, which includes video documentation of voltage behavior under load. Mechanical efficiency claims for direct-drive motors reference Brooklyn Fan & Blower’s technical product notes. Real-world DIY pitfalls and community troubleshooting advice come from the DIY Solar Power Forum. For a broader primer on PV system sizing math, see this sizing guide from Solar Energy Management. Readers wanting manufacturer specs and installation demos can check the Westernharmonics greenhouse exhaust fan page and the Westernharmonics video library.
- Direct Drive Exhaust Fans & Blowers - Brooklyn Fan & Blower
- Solar DC Direct Drive 12v / 24v / Series car radiator fans – Bench Test with video – Solar Thoughts blog
- Let’s talk about solar direct fans | DIY Solar Power Forum
FAQ
Do solar fans actually work?
Yes. A correctly sized solar direct-drive fan reliably ventilates greenhouses, coops, and sheds during daylight hours, with airflow output rising and falling in step with sunlight intensity.
Are direct-drive fans better than belt-drive fans?
For small-scale off-grid ventilation, direct-drive fans generally outperform belt-drive units because they have fewer mechanical parts to wear out and require far less maintenance over their lifespan.
What are the drawbacks of solar fans?
The main drawback is that direct-drive solar fans only operate in daylight, with speed varying by cloud cover and the possibility of stalling under very low light unless the panel is sized with enough margin.
What is the best solar-powered fan for a greenhouse?
For daytime-only greenhouse ventilation, a matched kit like Westernharmonics’ 10W Solar Powered Fan Kit removes the sizing guesswork that trips up most DIY builds.
Do I need a battery for a solar fan?
Only if you need ventilation after sunset or overnight. Daytime-only needs are well served by a direct-wired panel-to-fan setup with no battery required.