

Convert CFM to PV/Battery for RV Solar Ventilation and Rural Buildings
Convert CFM to PV/Battery for RV Solar Ventilation and Rural Buildings
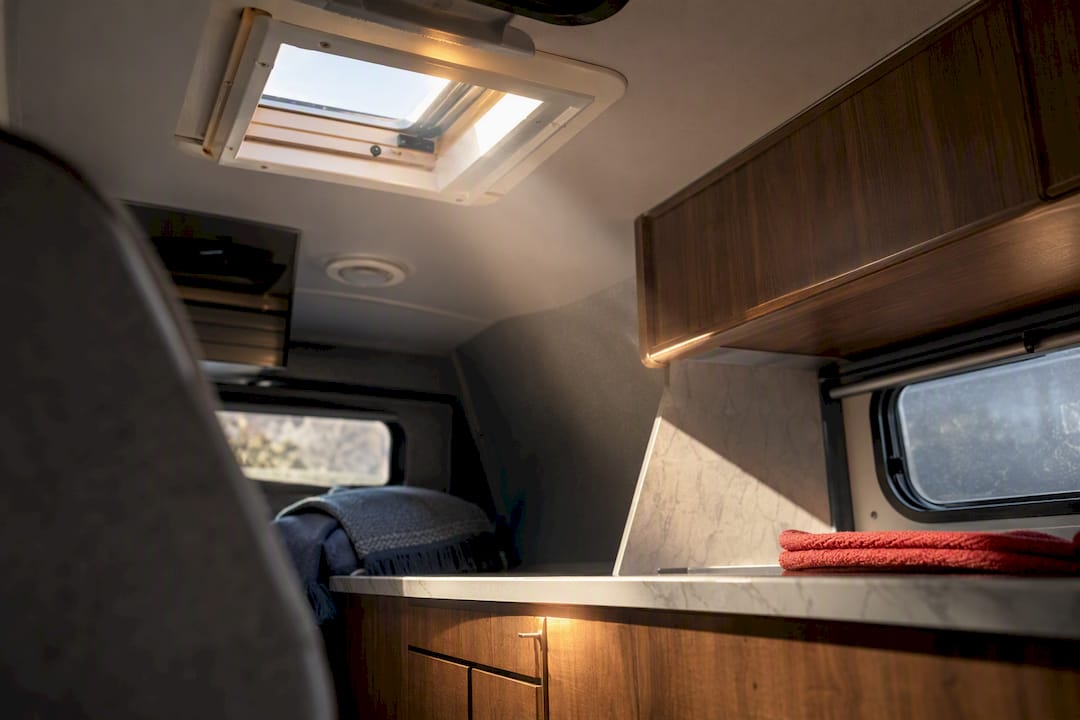
For off-grid barns, greenhouses, and workshops, a direct PV-to-DC fan setup gives you the simplest, most reliable daytime ventilation. Add battery backup only when you need overnight or continuous airflow. This is what we mean by rv solar ventilation in this guide: solar-powered fan systems built for remote structures, not recreational vehicles. Industry pioneers have built these systems since the category existed, and the math below comes from that same engineering discipline.
TL;DR:
- Properly sizing a solar ventilation system requires measuring building volume and selecting the appropriate ACH based on use, climate, and whether continuous operation is necessary.
- Calculations should include converting ACH to CFM, matching fan wattage, and sizing panels with a 20-25% safety margin, considering seasonal and variable use changes.
- DC brushless fans with MPPT controllers are preferred for efficiency and durability, especially when mounting in dusty or humid outdoor environments.
- Panel placement should avoid shading and be oriented south at your latitude, with exhaust fans mounted high on the wall opposite intake openings for optimal airflow.
- For RVs, system sizing must account for limited roof space, existing wiring, and shared battery capacity, with quieter, vibration-dampened fans recommended for comfort and safety.
Table of Contents
- What Should You Check Before Sizing a Solar Ventilation System?
- How Do You Calculate CFM and Size Your Panels and Batteries?
- Which Fans, Motors, and Controllers Actually Hold Up Off-Grid?
- Where Should Panels and Fans Actually Go?
- How Much Maintenance Does an Off-Grid Fan System Need?
- What Does a Solar Ventilation System Cost, and What’s the Payback?
- What’s Different About Installing Solar Ventilation in an RV?
- Are Solar-Powered Fans Quiet Enough for RV Living Spaces?
- Does Solar Ventilation Actually Improve RV Climate Control?
- What Electrical and Fire Code Rules Apply to RV Solar Ventilation?
- What Nobody Tells You About Sizing These Systems
- Which Western Harmonics Kit Fits Your Building?
- Sources
- FAQ
What Should You Check Before Sizing a Solar Ventilation System?
Before you calculate a single watt, walk your building and answer four questions. Skipping this step is how people end up with an undersized fan bolted to an oversized panel, or the reverse.
- Measure building volume in cubic feet and pick a target air changes per hour (ACH) based on use. Greenhouses typically need higher ACH in summer than a workshop does year-round.
- Decide daytime-only versus continuous operation. If animals or plants need airflow after dark, you need battery storage. If not, skip it and save money.
- Check sun exposure. A panel shaded by a tree line or an adjacent structure for even two hours a day will undersize your whole system.
- Verify intake area, insect screening, and any local electrical code requirements before you drill a single hole in the wall.
A ventilation calculator built for barns is worth running twice: once for summer peak cooling and once for winter minimum ventilation, since undersizing winter airflow risks ammonia buildup in livestock spaces.
How Do You Calculate CFM and Size Your Panels and Batteries?
The math behind rv solar ventilation sizing isn’t complicated, but skipping a step compounds errors fast. Here’s the sequence, in order.
- Convert your target ACH into required airflow. The formula is CFM = (Volume × ACH) ÷ 60. A 2,000 cubic foot greenhouse targeting 20 air changes per hour needs (2,000 × 20) ÷ 60, or roughly 667 CFM.
- Match that CFM to a fan’s rated wattage at that airflow, typically found on the fan’s spec sheet. A fan producing 667 CFM might draw somewhere in the 40 to 60 watt range depending on motor efficiency.
- Calculate daily energy need. Wh/day = fan wattage × run hours. A 50 watt fan running 8 daytime hours needs 400 Wh per day.
- Size the panel. PV size = Wh/day ÷ peak sun hours ÷ system efficiency, then add a 25% buffer for losses and panel degradation, a margin industry sizing guides recommend as standard practice. With 5 peak sun hours and 85% system efficiency, 400 Wh becomes roughly 94 watts before the buffer, landing near 118 watts after it.
- If you need battery storage, divide the Wh required for your desired autonomy window by the usable depth of discharge (DoD) of your battery chemistry.
| Step | Formula | Example result |
|---|---|---|
| Airflow needed | (Volume × ACH) ÷ 60 | 667 CFM |
| Daily energy | Fan watts × run hours | 400 Wh/day |
| Panel size (with buffer) | (Wh ÷ sun hours ÷ efficiency) × 1.25 | ~118 W |
| Battery (50% DoD, 8hr autonomy) | Wh needed ÷ 0.5 | battery capacity |
A solar sizing guide walks through the same peak-sun-hour logic for residential arrays, and the underlying arithmetic transfers directly to a small off-grid fan circuit.
Which Fans, Motors, and Controllers Actually Hold Up Off-Grid?
DC fans built around brushless DC (BLDC) motors are the default choice for a reason: they run directly off panel or battery voltage with no inverter stage, and every conversion step between sunlight and moving air costs you efficiency. AC fans forced into a solar system need an inverter, and that inverter draws power even when idle.
- Controllers: a basic PWM controller works for small direct-to-fan setups, but MPPT controllers extract more usable wattage from a panel in partial cloud or early morning light, which matters most on shorter winter days.
- Load-capable controllers with dedicated load outputs let you run the fan straight off the controller’s low-voltage disconnect, protecting the battery from deep discharge.
- Mounting styles vary by structure. Hanging fans work well in barns with open rafters, wall-mount units suit greenhouse endwalls, and inline duct fans fit tight workshop spaces.
- Look for an IP65 rating or better on any fan housing exposed to dust, rain, or wash-down conditions.
Evaporative cooling pairs naturally with solar fans in dry climates. A BLDC-driven evaporative cooler tested in 2026 research dropped temperatures by roughly 4 to 8°C (about 7 to 14°F) in trials, running on a 12V DC system with two to four hours of battery backup.
Off-grid systems get expanded, not replaced, and headroom now saves you a rewiring job later.*
Where Should Panels and Fans Actually Go?
Placement mistakes cost more efficiency than most people expect from either component.
- Orient panels south (in the Northern Hemisphere) with a tilt roughly matching your latitude, and scan for shade from trees, silos, or roof overhangs at different times of day, not just noon.
- Position the exhaust fan high on the wall opposite your intake, so hot air has to travel the full length of the space rather than short-circuiting straight back out.
- Size intake openings using roughly 1 square foot of intake per 300 CFM of fan capacity. Undersized intakes create negative pressure that strains the motor and cuts airflow.
- Fuse every circuit at the panel and near the battery, install a rated disconnect, and run wiring through conduit rated for outdoor and UV exposure. Bring in a licensed electrician for any work tying into a building’s existing electrical panel.
- Use stainless fasteners and lock washers on all outdoor hardware. Galvanized steel corrodes faster than most people expect in barns with ammonia-heavy air.
How Much Maintenance Does an Off-Grid Fan System Need?
Wipe panels clean of dust and bird debris every few months, and check fan blades and housings twice a year for barn dust buildup that unbalances the motor. LiFePO4 batteries need little intervention beyond keeping terminals clean, and they tolerate partial charge cycles far better than lead-acid.
Watch for three failure patterns in agricultural settings: water intrusion through cracked seals, rodent or livestock damage to exposed wiring, and corrosion on unprotected fasteners. Keep a spare fuse, a spare fan belt or blade if applicable, and a basic multimeter on hand. A simple low-voltage alarm or a $20 Bluetooth battery monitor catches a failing charge cycle before it becomes a dead system.
What Does a Solar Ventilation System Cost, and What’s the Payback?
A small direct PV-to-fan kit for a single greenhouse or workshop typically runs a few hundred dollars. Full PV-plus-battery systems for larger barns or continuous-duty needs cost more, scaling with panel wattage and battery capacity.
Before buying, check federal incentives like the Investment Tax Credit and the USDA’s Rural Energy for America Program (REAP), along with state and local rebates. Industry write-ups note these programs frequently shorten payback timelines for agricultural solar installations, though eligibility varies and is worth confirming directly with the administering agency.
For a sense of realistic payback, an academic case study on a livestock farm’s PV ventilation system found a positive net present value and a payback period near 3.8 years, driven mainly by avoided generator fuel and reduced heat stress losses. Systems replacing regular generator runtime or preventing livestock heat losses tend to pencil out fastest.
What’s Different About Installing Solar Ventilation in an RV?
Recreational vehicle installations share the same electrical logic as barn and greenhouse systems, but the constraints shrink dramatically. Roof space is limited to a few square feet per vent opening, and every added component competes with existing appliances, tanks, and structural ribs for wiring routes and battery capacity.
The biggest practical difference is integration. Most RVs already have a roof vent opening and sometimes an existing 12V fan. A solar ventilation retrofit usually means replacing that fan with a DC unit wired to a small panel, rather than building a system from scratch the way you would in a standalone workshop. That existing 12V wiring simplifies the job, but it also means you’re working within amperage limits the RV’s factory wiring was designed around, not limits you set yourself.
Battery capacity is the other constraint. An RV’s house battery bank already serves lighting, water pumps, and often a refrigerator, so a ventilation fan has to share that budget rather than draw from a dedicated bank the way a barn system typically would. Sizing conservatively, and confirming actual panel output against real roof space, matters more in an RV than in almost any other application covered by this guide.
Are Solar-Powered Fans Quiet Enough for RV Living Spaces?
Noise matters differently in a space where the fan sits a few feet above your head at night. DC brushless motors run notably quieter than the AC-induction motors found in older RV roof fans, largely because BLDC motors have no brushes generating friction noise and typically run at lower, more consistent RPM for a given airflow output.
Variable-speed control, which most quality DC fan and controller combinations support, lets you drop fan speed for sleeping hours without shutting airflow off entirely.
Mounting matters just as much as motor type. A fan installed with vibration-dampening gaskets against the roof opening transmits far less structural noise into the cabin than one bolted down without isolation. If quiet operation is a priority, prioritize a fan’s published decibel rating at your expected operating speed over its peak CFM spec, since the two numbers don’t move together in a predictable way across every model.
Does Solar Ventilation Actually Improve RV Climate Control?
Continuous low-level airflow reduces the temperature swings that make small enclosed spaces uncomfortable, particularly in direct sun where interior temperatures can climb well above outside ambient within an hour of the sun hitting the roof. Moving air doesn’t cool a space the way air conditioning does, but it prevents the stagnant heat buildup that makes an already-hot day worse.
The energy efficiency case is straightforward: a solar-powered fan runs on panel output during daylight hours when solar generation is highest anyway, so it doesn’t compete with your battery bank for power the way a compressor-based air conditioner does. That timing alignment is the core advantage of pairing ventilation with solar generation rather than running any DC or AC cooling appliance off stored battery power around the clock.
Humidity control benefits from the same mechanism. Continuous air exchange reduces condensation buildup from cooking, showering, or simple occupant respiration, which matters more in a sealed metal box than in a wood-framed structure with natural air leakage.

What Electrical and Fire Code Rules Apply to RV Solar Ventilation?
Any 12V wiring modification inside an RV should follow the same basic safety principles as household DC wiring: correctly rated fuses close to the battery source, wire gauge matched to amperage and run length, and no splices left exposed without weatherproof, vibration-resistant connectors. RVs experience far more vibration in normal use than a stationary barn or greenhouse, and a connection that would hold fine in a fixed building can loosen over thousands of miles of road travel.
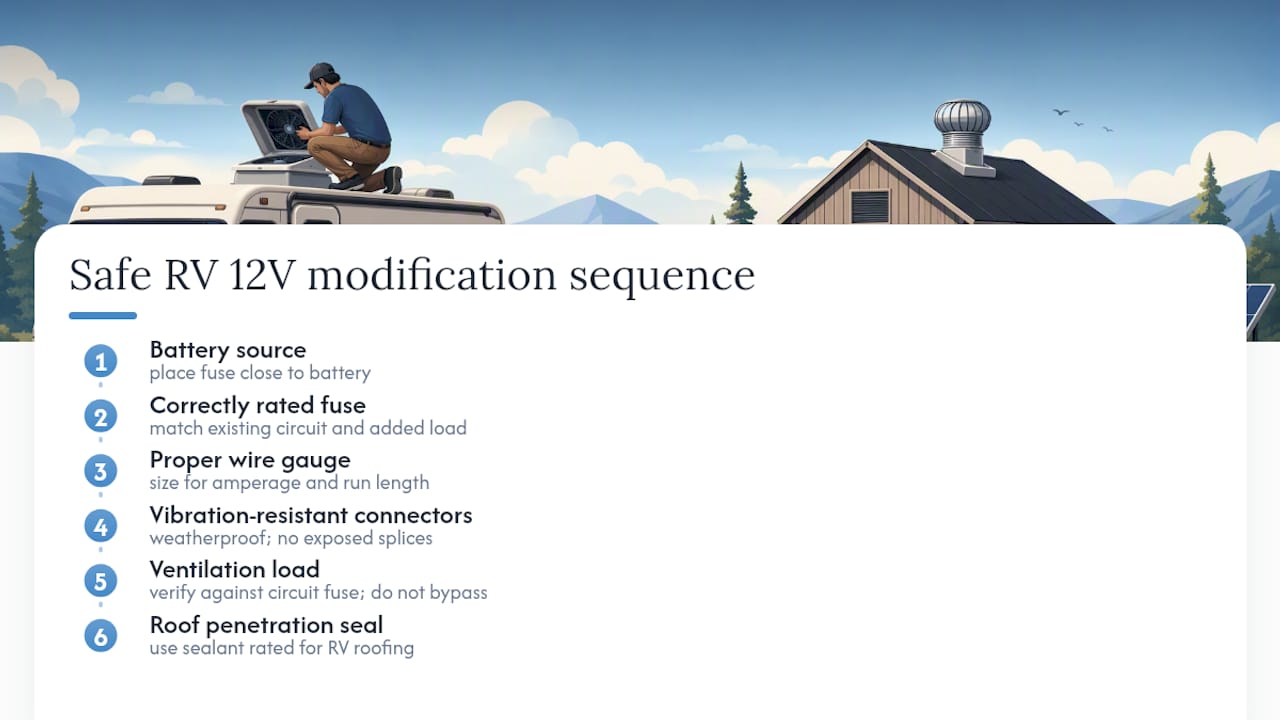
Roof penetrations for panel mounting or wiring need proper sealant rated for RV roofing material, since water intrusion around a poorly sealed penetration is one of the most common and expensive RV repair issues. Any modification that adds load to an existing 12V circuit should be checked against that circuit’s existing fuse rating rather than assumed safe because the new fan “seems small.”
Because RVs operate under different inspection and manufacturing standards than fixed structures, always consult your RV manufacturer’s documentation or a qualified RV electrician before modifying factory electrical systems, and never bypass an existing fuse or breaker to accommodate added load.
What Nobody Tells You About Sizing These Systems
Most guides treat solar ventilation sizing as a one-time calculation: measure once, buy once, done. That’s backwards. The buildings we’re talking about, barns, greenhouses, workshops, change use over a single year more than most people account for. A greenhouse running 20 ACH in July might need a fraction of that in January, and a barn with three horses in it draws differently than the same barn empty for winter storage.
The real skill isn’t nailing the CFM formula. It’s building in enough controller and battery headroom that next year’s changed use doesn’t force a full rebuild. Variable-speed control matters more than raw fan capacity for this reason: a fan that can throttle down uses less power on light-duty days and extends component life, while a single-speed oversized fan just cycles on and off, stressing the motor with every start.
The peer-reviewed research backs this pattern. The livestock farm case study’s favorable payback period came from a system sized for realistic year-round load, not peak-day worst-case numbers padded for safety. Western Harmonics has built its microgrid design tools around that same principle, letting a homeowner or barn operator model actual seasonal use rather than a single static number.
— Chris
Which Western Harmonics Kit Fits Your Building?
If you’ve run the numbers above, you already know roughly what you need. A small greenhouse or single-bay workshop with daytime-only requirements fits a compact direct PV kit, no battery, no complexity, just a panel wired straight to a fan. Larger barns with variable daily use or overnight ventilation needs call for a kit with battery backup built in, so airflow doesn’t stop when the sun does.

The first solar fan kits sold in the United States followed the logic: match the hardware to the real airflow need, not a generic one-size spec. For a small greenhouse or workshop, the 10 Watt Solar Powered Fan Kit covers daytime-only ventilation without unnecessary battery cost. For barns needing continuous airflow, the 200W Solar Hanging Fan Kit with Battery Backup covers overnight runtime. Browse the full solar powered fan catalog to compare classes side by side, or run your building’s numbers through Western Harmonics’ microgrid design tool before you buy to confirm your CFM and panel sizing match the kit you’re considering.
Sources
- Application of a Solar Photovoltaic System for Ventilation of a Livestock Farm in Southern Perú | Journal of Engineering and Sustainable Development
- Solar Panels Benefits: Power Ventilation Systems for Barns & Greenhouses - Growing Solar Mist
FAQ
How Many CFM Does a Greenhouse Fan Need?
Multiply your greenhouse’s volume in cubic feet by your target air changes per hour, then divide by 60. A 2,000 cubic foot space at 20 ACH needs roughly 667 CFM.
Do I Need a Battery for Solar Ventilation?
Only if you need airflow after dark or during continuous overnight operation; daytime-only ventilation works fine with a direct PV-to-fan setup and no battery at all.
Are DC Fans More Efficient Than AC Fans for Solar Systems?
Yes. DC fans, especially those with BLDC motors, skip the inverter stage AC fans require, which cuts conversion losses and improves runtime per watt of panel output.
What Size Buffer Should I Add When Sizing Solar Panels?
Add roughly 20 to 25% above your calculated wattage need to account for panel degradation, cloudy days, and system losses, a margin recommended across industry sizing guides.
Can Solar Ventilation Systems Qualify for Tax Incentives?
Many installations may qualify for the federal Investment Tax Credit or USDA REAP grants, though eligibility depends on your specific setup and location, so verify directly with the administering agency before purchase.