

Hoop House Ventilation: The Practical Guide to Airflow
Hoop House Ventilation: The Practical Guide to Airflow
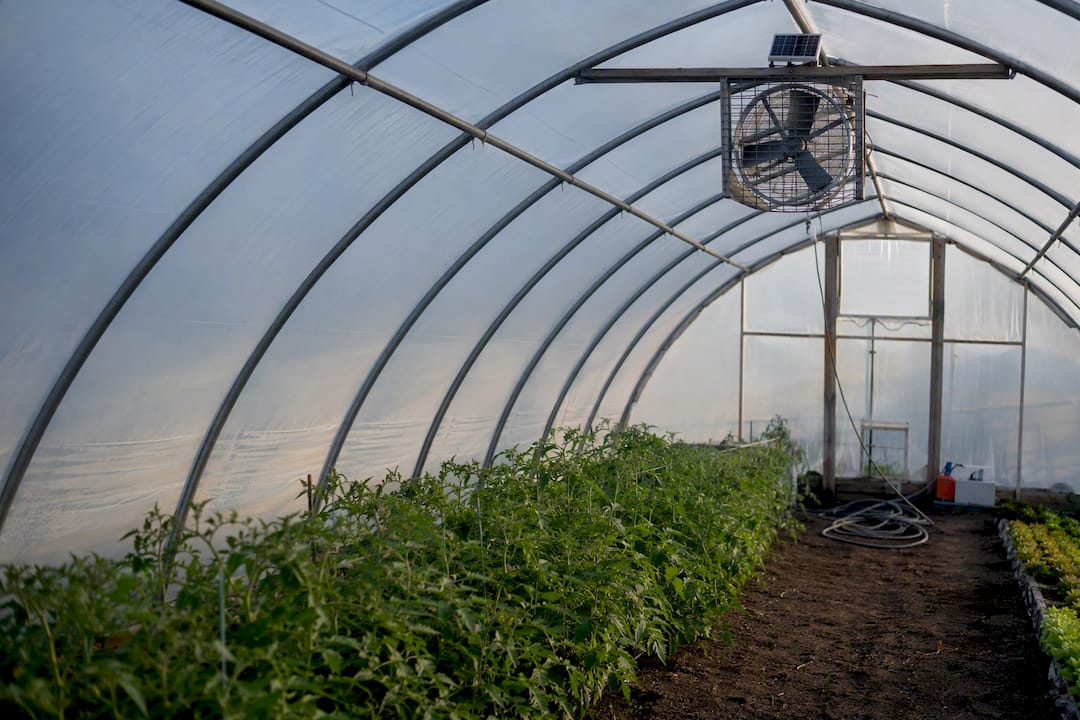
Use roll-up sidewalls for baseline air exchange, add mechanical exhaust fans once canopy density or heat load outpaces what wind can move, and bring in automation wherever you can’t be there to open a vent at 6 AM. That’s the whole strategy in one sentence. Two numbers back it up: passive ventilation needs at least 2 to 3 mph of wind to push air through open sidewalls, and once you go mechanical, size fans for 8 CFM per square foot in summer and 2 CFM per square foot in cooler months.
If your site sits in a low-wind pocket, or your tomato canopy has gotten thick enough to block airflow at knee height, passive alone won’t cut it. That’s where solar-powered exhaust fans and battery-backed controllers earn their keep, especially on sites without grid power nearby. Westernharmonics builds exactly that kind of hardware.
- Passive ventilation works when wind speed is 2 to 3 mph or higher and vents are sized to match.
- Mechanical exhaust fans become necessary when canopy density, calm air, or heat load exceed passive capacity.
- Automated controllers and wax-cylinder actuators close the gap when no one’s on site to adjust vents by hand.
Key Takeaways
Effective hoop house ventilation combines properly sized passive openings with mechanical exhaust and automation wherever wind, canopy density, or missing grid power leave gaps.
| Point | Details |
|---|---|
| Passive needs real wind | Roll-up sidewalls need at least 2 to 3 mph of wind to move meaningful air; calm sites need mechanical backup. |
| Size fans by season | Target 8 CFM per square foot in summer and 2 CFM per square foot in cooler months for exhaust fans. |
| Match inlets to exhaust | Undersized inlet louvers choke even a correctly sized exhaust fan, so size both together. |
| Automate for reliability | Wax-cylinder actuators and motorized controllers catch temperature swings you’d otherwise miss by hours. |
| Westernharmonics fills off-grid gaps | Solar fan kits with battery backup provide staged, reliable exhaust for hoop houses without grid power access. |
Table of Contents
- How Hoop House Ventilation Actually Works
- Will Passive Ventilation Be Enough for Your Site?
- Roll-Up Sidewalls, Ridge Vents, and Their Limits
- HAF Fans vs. Exhaust Fans: How to Size and Place Both
- Automating Your Hoop House Ventilation
- Installing and Troubleshooting Your Ventilation System
- Humidity Control and Routine Maintenance
- Real Installs: What Off-Grid Ventilation Looks Like in Practice
- Solving Your Ventilation Gaps Without a Grid Connection
- Frequently Asked Questions
- Sources
How Hoop House Ventilation Actually Works
Ventilation and circulation solve two different problems, and mixing them up is the most common mistake growers make. Ventilation means swapping hot, humid inside air for cooler, drier outside air. Circulation, often called horizontal air flow or HAF, just moves the air you already have around inside the structure. A hoop house can have great circulation and still cook its crop if it has no real ventilation.
Natural ventilation runs on two forces: wind pushing air through open sidewalls, and buoyancy, the tendency of hot air to rise and escape through a ridge or gable vent. Wind-driven flow needs at least 2 to 3 mph of outside wind to force meaningful airflow through sidewall openings. On a calm day, buoyancy alone has to do the work, and it’s weaker.
Research on vent placement backs this up with hard numbers. Combining roof vents with side openings can increase mass-based airflow by 20% to 78% in simulation studies, though the temperature benefit depends heavily on wind conditions and how much solar heat is hitting the structure. Roof vents matter most exactly when you’d expect: still, sunny days when side vents alone can’t move enough air.
Once you shift from natural to mechanical ventilation, the math gets simple:
- Measure your floor area. A 30 by 96 foot tunnel covers roughly 2,900 square feet.
- Multiply by your season’s rate: at 8 CFM/ft² for summer, that tunnel needs about 23,200 CFM total exhaust capacity.
- Drop to 2 CFM/ft² for cooler months, cutting that same tunnel’s requirement to roughly 5,800 CFM.
- Match inlet louver area to exhaust fan capacity so incoming air doesn’t choke the system.
Skip that inlet math and you’ll starve even a well-sized fan. A fan pulling 20,000 CFM against undersized louvers just burns power and moves nothing.
Will Passive Ventilation Be Enough for Your Site?
Not every hoop house can rely on roll-up sides and a ridge vent alone. Before you spend money on fans, run a quick site check.
Look for these risk factors first:
- A windbreak, treeline, or building blocking your prevailing wind direction.
- A low spot or basin where cold, still air tends to pool.
- Sidewalls oriented perpendicular to your dominant summer breeze instead of parallel to it.
- Dense canopy crops (tomatoes, cucumbers, peppers in full leaf) that restrict airflow at plant height.
Then test it in the field. Stand at canopy level around midday and see if you can feel air moving at all. Check the temperature difference between inside and outside air at the hottest point of the day. If it’s more than a few degrees above ambient with the sides fully open, passive isn’t keeping up. Walk the tunnel and feel for hotspots near the center or under dense foliage. Those pockets are where mechanical exhaust or HAF fans usually need to go first.
Canopy load is the variable growers underestimate most. Growers with high tunnels report that systems working fine early in the season often fall behind as plants fill in, because vegetation itself becomes a physical barrier to airflow. What worked in May can fail by July without a single mechanical change on your end.
Pro Tip: Do the canopy-level airflow check again in midsummer, not just at planting. A tunnel that ventilated fine in April can go still and stuffy once the crop fills in, and by then you’ve lost weeks of correction time.
If two or more risk factors apply, or your midday temperature differential regularly runs above 5 to 8°F, it’s time to add mechanical exhaust rather than fight the site with vents alone.
Roll-Up Sidewalls, Ridge Vents, and Their Limits
Roll-up sidewalls are the default for a reason: they’re cheap, low-tech, and effective when wind cooperates. But side-only ventilation has a ceiling. It depends entirely on wind reaching the openings at the right angle and speed, and on calm days or in wind-sheltered sites, it stalls out no matter how wide you roll them.
A few practical notes on getting the most from passive systems:
- Size roll-up sides to cover as much of the wall height as your hoop bows allow. Partial rolls barely move air compared to a full opening.
- Orient your tunnel, when you have the choice at construction time, so sidewalls face your prevailing summer wind rather than running parallel to it.
- Plan for gable or ridge vents during construction, not as a retrofit. Adding a peak vent later means cutting into the covering and rebuilding structural hoops, which costs far more than building it in from the start.
- Expect insect screens to cut airflow noticeably, often by a third or more depending on mesh size. If you’re screening for pests, oversize the opening to compensate rather than accepting reduced exchange.
- Motorized roll-ups cost more upfront but respond to temperature swings faster than a person checking vents twice a day. Manual crank systems work fine on small structures where someone’s on site regularly.
The real trade-off is labor versus consistency. A grower who can walk the tunnel every two hours doesn’t need motorized sides. A grower managing three tunnels across a property, or one who works off site during the day, loses crop-critical hours to a vent that should have opened at 9 AM and didn’t get touched until noon.
HAF Fans vs. Exhaust Fans: How to Size and Place Both
Horizontal air flow fans and exhaust fans do different jobs, and confusing them wastes money. HAF fans mix air inside the structure, evening out temperature and humidity pockets without removing a single cubic foot of hot air. Exhaust fans, paired with intake louvers, actually swap inside air for outside air. You often need both: HAF to eliminate hotspots, exhaust to drop the overall heat and humidity load.
Sizing exhaust capacity starts with the same CFM/ft² rule from the ventilation basics above. Here’s how it plays out across common hoop house sizes:
- A small 20 by 48 foot tunnel (roughly 960 ft²) needs about 7,680 CFM at the 8 CFM/ft² summer rate, achievable with a single 24 to 36 inch exhaust fan.
- A mid-size 30 by 72 foot tunnel usually requires ventilation capacity provided by two staged fans rather than one oversized unit.
- A larger 30 by 96 foot tunnel (about 2,900 ft²) needs the roughly 23,200 CFM figure calculated earlier, often split across two or three fans for redundancy.
Exhaust fans on the market typically run 12 to 48 inches in diameter, cost $150 to $1,000, and deliver anywhere from 1,000 to 22,000 CFM depending on size. Inlet louver area should roughly match total exhaust fan capacity; undersized inlets choke the whole system regardless of how strong the fan motor is.
Placement matters as much as sizing. Put exhaust fans in the end wall opposite your intake louvers so air has to travel the full length of the tunnel, picking up heat and humidity along the way rather than short-circuiting near the fan. For HAF layout, the textbook spacing is one fan every 50 feet, but in dense canopy situations, placing fans every 20 to 30 feet avoids dead corners where airflow drops to nearly nothing. Walk the canopy and feel for still air; that’s your cue to add a fan, not the spec sheet.
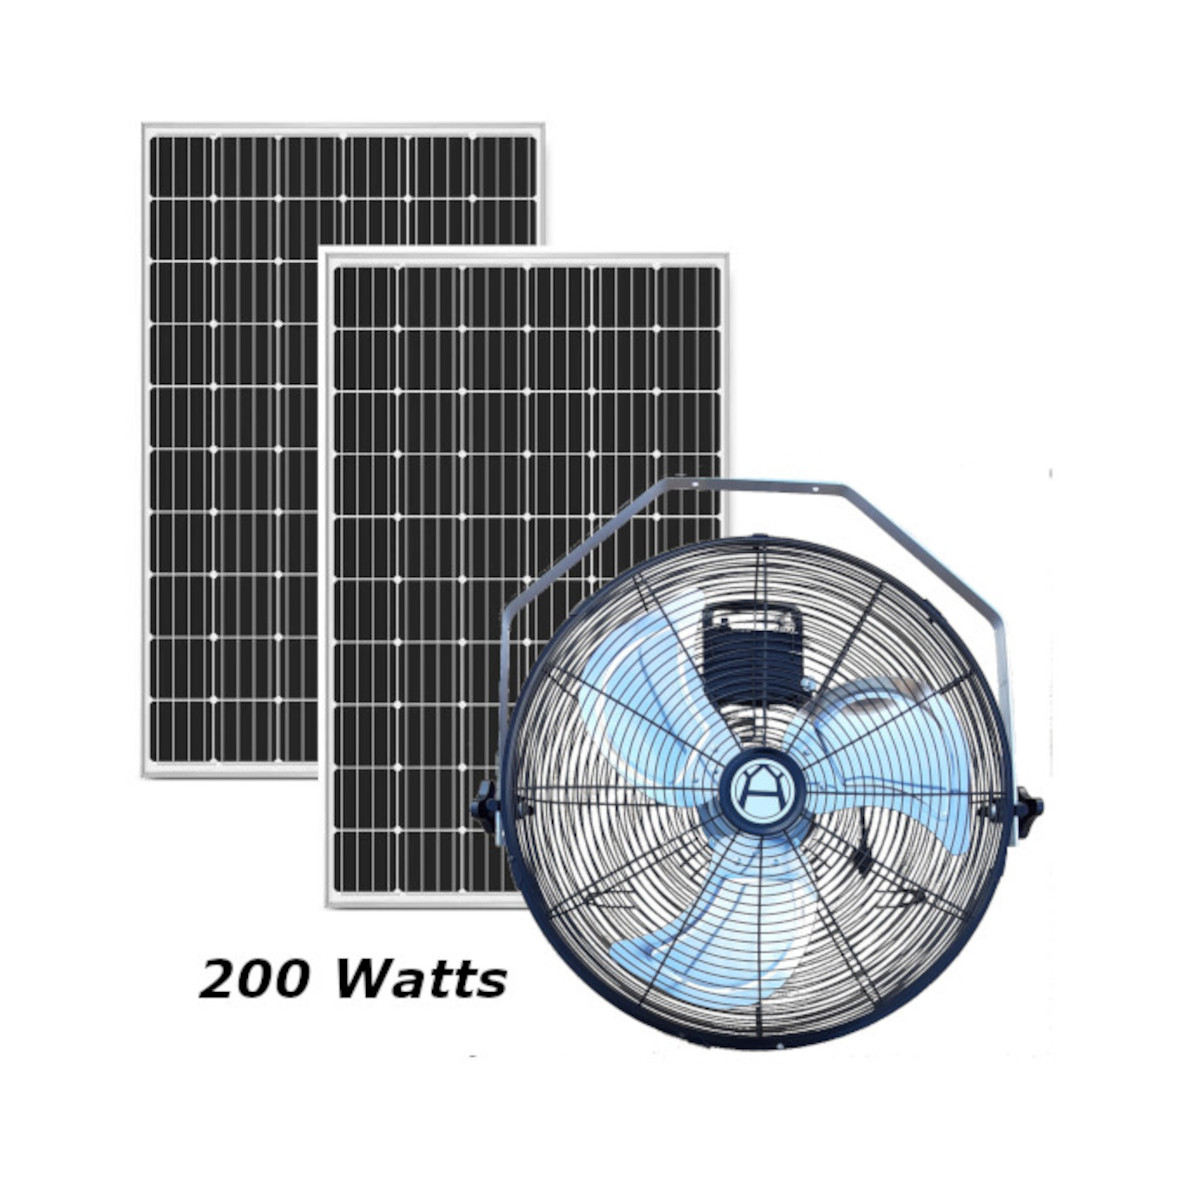
Off-grid sites change the calculation entirely. Running a wired 240-volt exhaust fan means trenching power out to a remote tunnel, which can cost more than the fan itself. A solar fan kit with battery backup sidesteps that problem outright, running on stored power through the evening and staying operational during grid outages that would otherwise shut a wired system down cold. Staging smaller solar-powered fans, rather than installing one large unit, also gives you redundancy: if one fan fails, you’re not losing all your exhaust capacity at once.
Automating Your Hoop House Ventilation
Automation matters most on the days you can’t predict: a cool, sunny morning in April that turns into a 90°F greenhouse by 11 AM while you’re at the feed store. Growers who automate their roll-up curtains report keeping inside temperatures closer to target and avoiding the rapid heat spikes that catch manual systems off guard on exactly those days.
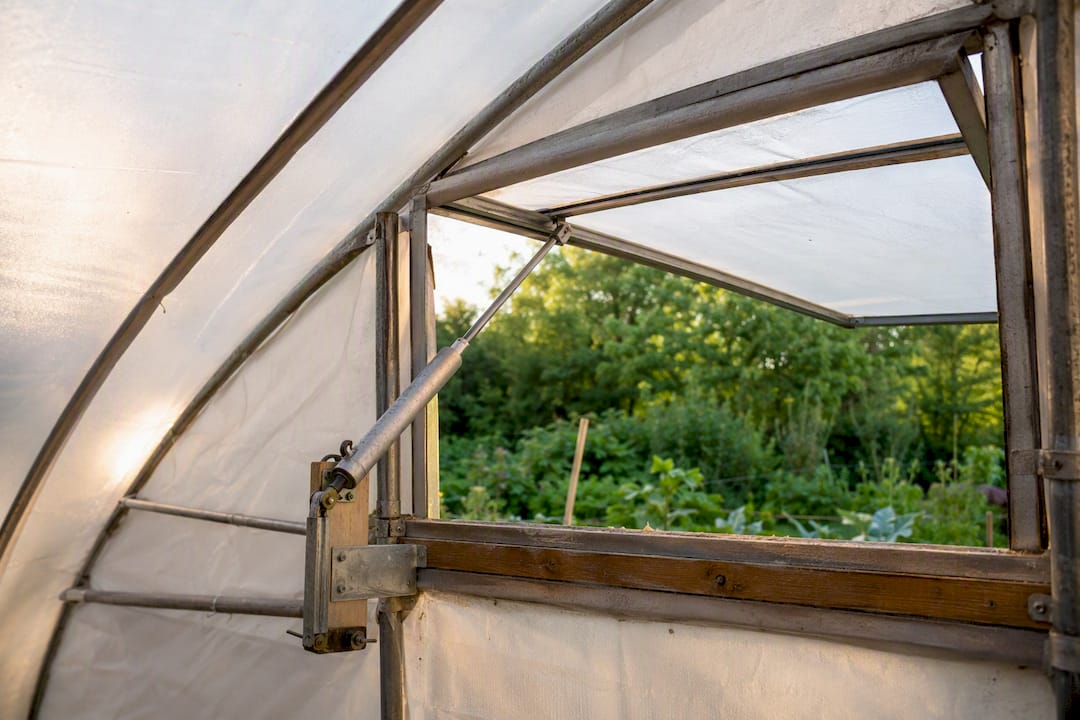
The simplest automation option needs no electricity at all. Wax-cylinder thermostatic actuators use a wax core that expands with heat, pushing a piston that opens a vent, then contracts and closes it again as temperatures drop. No wiring, no batteries, no controller to fail. They’re a strong fit for gable and peak vents on structures with no power access at all.
For roll-up sidewalls, motorized controllers paired with a thermostat sensor step things up a level, opening and closing curtains automatically as temperature crosses your set points. Solar-powered exhaust fan systems extend that same logic to active ventilation, running fans off stored battery power so ventilation continues through cloudy stretches and after sundown.
A few things worth building into any automated setup:
- Always keep a manual override switch or crank accessible. Sensors fail, and you need a way to force a vent open during a breakdown.
- Battery backup sized for at least a full day of cloudy weather keeps fans running when solar input drops.
- Place temperature sensors at canopy height, not near the roof peak, where readings run several degrees warmer than what your plants actually experience.
Pro Tip: Mount your thermostat sensor on the shaded north side of a support post, never directly on the covering itself. Direct sun on the sensor housing can trigger vents to open 10 to 15 degrees earlier than the actual air temperature warrants.
Installing and Troubleshooting Your Ventilation System
Get the sequence right before you bolt anything down, and you’ll skip most of the callbacks that come from rushed installs.
- Confirm framing can handle the added load of fans, louvers, or motorized roll-up hardware before cutting into the covering.
- Plan wiring or solar panel mounting paths that avoid foot traffic and equipment access points.
- Verify inlet louver area matches your calculated exhaust CFM before final installation, not after.
- Run fans at each stage individually during commissioning and confirm actual airflow at canopy level, not just at the fan housing.
- Measure inside-to-outside temperature differential over a full day to confirm the system meets your target range.
When performance falls short, the fixes are usually simpler than growers expect. Airflow restriction often traces back to undersized inlet louvers rather than a weak fan. A persistent hotspot usually means a sensor is mounted somewhere unrepresentative, near a metal frame or in direct sun, rather than a fan failure. A fan running louder than usual is often a sign of a loose mount or debris in the blade housing, both quick fixes. Call in a professional when you’re dealing with structural bracing changes for larger fan arrays or wiring a grid-tied electrical circuit, since both carry real safety stakes if done wrong.
Humidity Control and Routine Maintenance
Ventilation isn’t just a temperature tool. It’s your main defense against fungal disease, since stagnant, humid air inside a covered structure is exactly what botrytis and powdery mildew need to spread. Keep relative humidity below roughly 85% through consistent air exchange rather than letting it spike overnight when vents close.
A short seasonal maintenance routine keeps everything working when you need it most:
- Check wax-cylinder actuators each spring for smooth piston movement before the first hot day arrives.
- Inspect fan blades and housings for dust and debris buildup, especially after a dry, windy stretch.
- Wipe down solar panels feeding any off-grid fan kit, since dust buildup measurably cuts output.
- Confirm humidity and temperature sensors are still level and unobstructed by growing canopy.
- If humidity spikes unexpectedly, open every available vent immediately and run exhaust fans at full capacity rather than waiting out the moisture.
Real Installs: What Off-Grid Ventilation Looks Like in Practice
Westernharmonics started as, and remains, a builder of solar-powered ventilation hardware for sites where running grid power just isn’t practical or affordable. Barns, remote greenhouses, and hoop houses set back from the main electrical service all share the same problem: good ventilation shouldn’t depend on a 200-foot trench run.
Documented off-grid installs show solar fan kits with battery backup filling exactly the gap this guide has been describing: exhaust capacity that runs whether or not anyone remembers to flip a switch. When sizing a solar setup, match panel wattage to your fan’s actual draw, oversize the battery if the tunnel needs overnight air exchange, and choose a brushless exhaust fan for lower maintenance over years of continuous cycling. Getting circulation and ventilation working together, rather than treating them as one system, is covered in more depth in this breakdown of solar ventilation fans.
A field note on trade-offs
Every ventilation decision is a trade-off between cost, reliability, and how much labor you’re willing to put in daily. Automation and solar power tend to pay for themselves fastest on remote sites or wherever someone can’t be there twice a day to crank a vent by hand.
Solving Your Ventilation Gaps Without a Grid Connection
Once you’ve worked through the site checks and CFM math above, the actual hardware decision comes down to matching product to problem. A single small hoop house with modest canopy density usually needs nothing more than an entry-level 10-watt solar fan kit for supplemental exhaust or circulation. A tunnel running dense summer crops, or one that needs ventilation to continue overnight, calls for a 200-watt battery-backed fan kit built for staged, sustained exhaust rather than occasional boosts.

Before you order, run through a short checklist: target CFM based on your square footage and season, panel wattage sized to that fan’s actual draw, battery capacity for at least one full cloudy day, and whether you need a standalone thermostat controller or a kit with one built in. Growers running multiple tunnels or staged fan setups often start with a two-fan solar system rather than piecing components together separately. The full lineup, including panels, controllers, and evaporative add-ons, is browsable in the Westernharmonics catalog if you want to compare capacity and price side by side before placing an order.
Frequently Asked Questions
How much wind do I need for passive hoop house ventilation to work?
Roughly 2 to 3 mph is generally enough to push air through open sidewalls. Below that, buoyancy from a ridge or gable vent has to carry the load, and it usually can’t keep pace on a hot, still day.
What’s the difference between circulation and ventilation in a hoop house?
Circulation, or HAF, moves air you already have inside the structure to erase hotspots. Ventilation exchanges that air for cooler outside air. A tunnel can have excellent circulation and still overheat if it lacks true ventilation capacity.
How many CFM do I need to cool my hoop house?
Use 8 CFM per square foot for hot summer months and 2 CFM per square foot for cooler seasons. A 2,900 square foot tunnel needs about 23,200 CFM in summer and roughly 5,800 CFM in cool weather.
Do roll-up sides alone provide enough ventilation?
Often, yes, if your site gets consistent wind and canopy density stays moderate. But growers regularly find that systems adequate early in the season fall short once the crop fills in, which is when mechanical exhaust becomes necessary.
Are wax-cylinder actuators reliable for automating vents?
They’re one of the most dependable no-power options available. The wax core expands and contracts with temperature, opening and closing vents without any wiring, batteries, or electronics to maintain.
Can solar-powered fans really handle ventilation without grid power?
Yes, when sized correctly with adequate panel wattage and battery capacity. Documented off-grid installs show these systems running consistent exhaust ventilation through cloudy stretches and overnight hours without any grid connection at all.
Sources
- Natural ventilation in hoophouses — UMass Extension
- Ventilation in greenhouses and high tunnels — UVM Extension
- Effects of vent configuration and wind regime on the microclimate in the tunnel greenhouse (2022)