

Greenhouse Solar Power: A Practical Guide for Hobbyists
Greenhouse Solar Power: A Practical Guide for Hobbyists
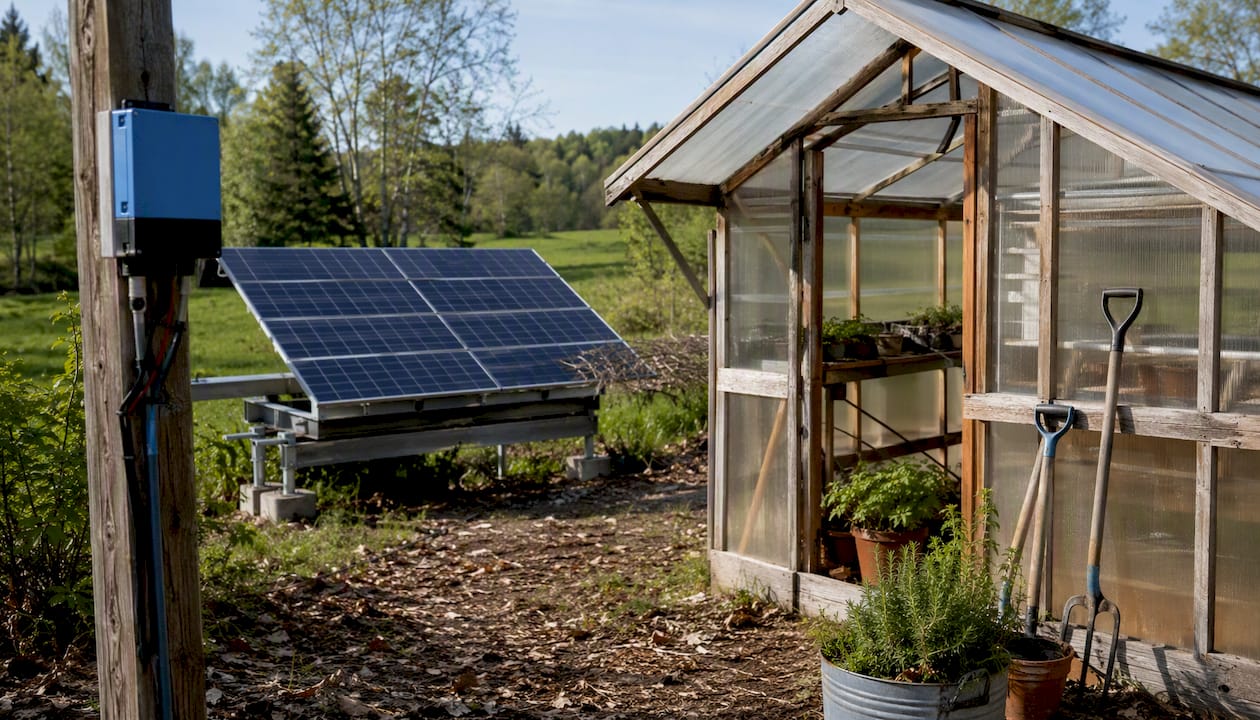
Yes, a hobby greenhouse can run on solar power. For most home gardeners, the fastest practical route is a PV + battery system sized to your electrical loads (fans, lights, small pumps), with passive heating strategies layered in to reduce what the panels need to carry. If continuous 24/7 electric heat through a hard winter is your primary goal, expect costs to climb sharply — electric resistance heating is the single biggest barrier to a fully off-grid greenhouse setup.
The default recommendation for hobbyists: start with a modest PV array, a LiFePO4 battery bank, and a small inverter or DC-direct fan kit. Add passive heat retention (thermal mass, insulation, thermal curtains) to shrink the heating load before you add more panels.
Four constraints commonly change the decision:
- Greenhouse size: A 6’ x 8’ cold frame needs far less power than a 16’ x 24’ four-season structure.
- Winter heating needs: Frost protection requires far less energy than maintaining 55°F through a Minnesota January.
- Local climate: Solar insolation in Phoenix is roughly double that of Seattle in December — your panel count depends heavily on where you live.
- Continuous 24/7 heat: If your crops can’t tolerate a cold night, you need either a large battery bank, a grid-tie backup, or a propane/generator fallback.
Table of Contents
- What electrical loads does a hobby greenhouse actually draw?
- The two proven approaches to solar energy for greenhouses
- How to size panels, batteries, and a charge controller for a small greenhouse
- Practical heating options when your greenhouse runs on solar
- Ventilation and cooling on solar: what actually works
- Components checklist and budget ranges for a hobby greenhouse solar system
- Installation and siting: orientation, tilt, shading, and winter performance
- What research shows about semi-transparent PV and greenhouse-integrated solar
- Permits and regulations for greenhouse solar installations in the US
- Key Takeaways
- What field experience with greenhouse solar actually teaches you
- Westernharmonics greenhouse kits and System Designer: where to start
- Useful sources and further reading
What electrical loads does a hobby greenhouse actually draw?
Understanding your daily kilowatt-hour (kWh) demand is the foundation of any solar design. Overestimate and you overbuild; underestimate and your plants suffer on a cloudy week.
Common loads in a small hobby greenhouse, with typical wattage ranges:
| Equipment | Typical Wattage | Daily Run Hours | Daily kWh |
|---|---|---|---|
| Exhaust fan (12" DC) | 25–50 W | 6–10 hrs | 0.15 kWh |
| Circulation fan (small) | 15–30 W | 8–12 hrs | 0.12 kWh |
| LED grow lights (2–4 ft strip) | 30 W | 12–16 hrs | — |
| Thermostat/controller | 5–10 W | 24 hrs | 0.12 kWh |
| Small circulation pump | 10–25 W | 4–8 hrs | — |
| Heat mat (seedling) | 20–40 W | 8–12 hrs | — |
| Small electric heater (1,500 W) | 1,500 W | 4–8 hrs | — |
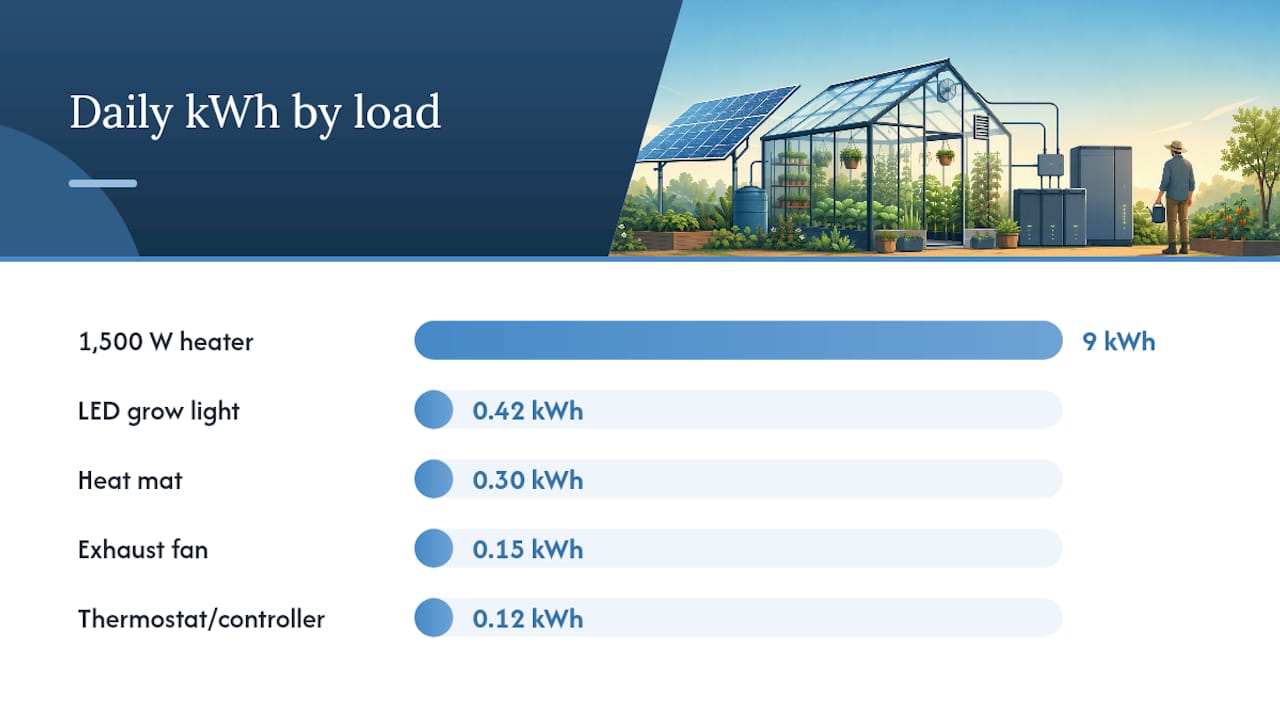
The heater row is not a typo. A single 1,500 W space heater running 6 hours a night adds roughly 9 kWh per day — more than everything else on the list combined. That one load can push a modest solar system into a full-scale installation.
How to calculate your daily kWh:
Daily kWh = (Watts × Daily Run Hours) ÷ 1,000
Add up each load, then multiply the total by 1.25 to account for system losses (wiring, inverter inefficiency, charge/discharge losses).
Pro Tip: Plug each piece of equipment into a Kill A Watt P3 energy monitor for a full week before sizing your system. Actual draw often differs from the nameplate rating, and run hours vary with seasons and thermostat cycling.
The two proven approaches to solar energy for greenhouses
Every greenhouse solar design falls into one of two strategies, or a combination of both.
| Approach A: PV + Battery + Inverter | Approach B: Passive Solar / Solar-Thermal | |
|---|---|---|
| What it powers | Fans, lights, pumps, electric heaters, controllers | Heat retention, water barrel thermal mass, south-facing glazing |
| Strengths | Flexible, powers any electrical load, scalable | Low cost, no moving parts, no electricity needed |
| Weaknesses | High cost for heating loads; battery sizing is critical | Can’t power electrical equipment; limited in cold, cloudy climates |
| Upfront cost | $400 depending on loads | $50 for barrels, insulation, curtains |
| Best for | Year-round growers who need fans, lights, and pumps | Hobbyists focused on frost protection and passive temperature buffering |
Approach A works well when your primary need is reliable electrical equipment: ventilation, grow lights, irrigation timers, and thermostatic controls. A hybrid grid/PV configuration is often the most cost-effective grid-connected option; for off-grid setups, a generator/PV/battery combination typically offers the best balance of cost and reliability. Fully renewable off-grid systems are technically feasible but often economically prohibitive for small growers.
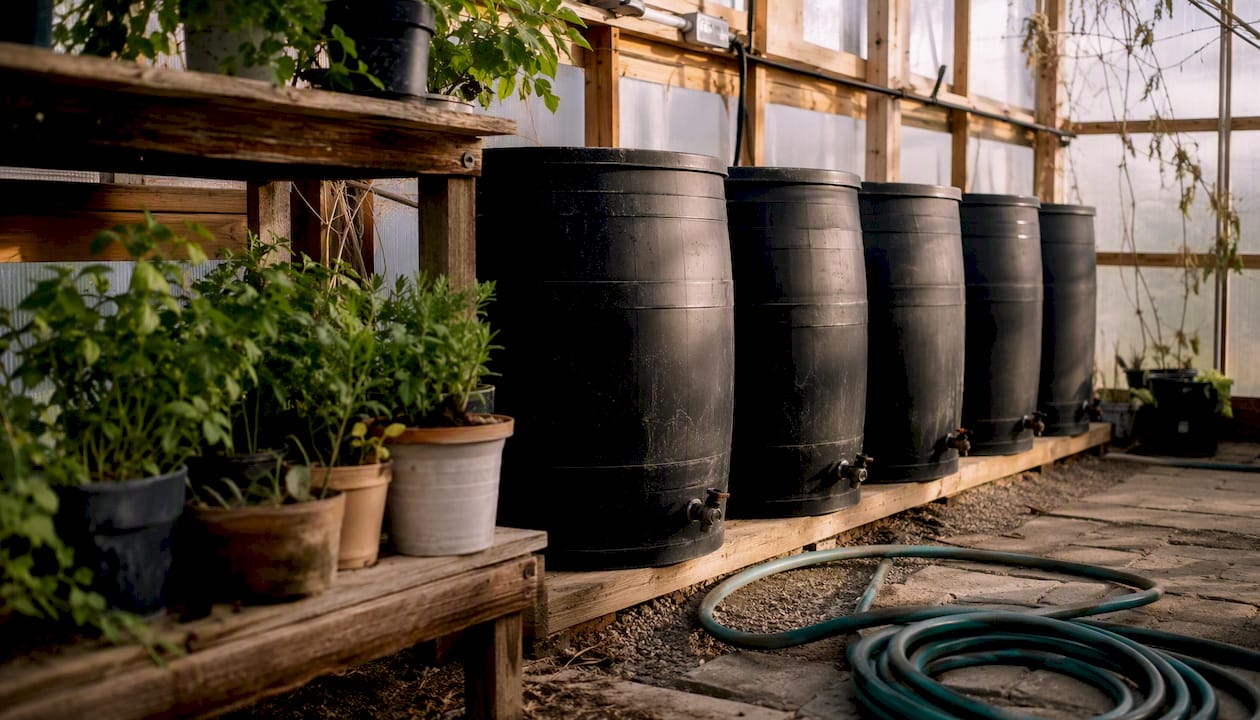
Approach B costs almost nothing to implement and should be your first move regardless of which solar path you choose. Filling 55-gallon black water barrels along the north wall, adding 2-inch foam insulation to the perimeter, and hanging thermal curtains at night can reduce heating demand by 30–50% in mild climates — which directly reduces the panel and battery capacity you need to buy.
Decision checklist:
- Choose PV + battery if you need fans, lights, or pumps running reliably.
- Choose passive/thermal if frost protection is your only goal and your climate is mild.
- Combine both when you need electrical loads AND want to minimize heating costs.
How to size panels, batteries, and a charge controller for a small greenhouse
This is where most hobbyists get stuck. The math is not complicated, but it requires working through the steps in order.
The algorithm:
- Calculate total daily kWh (sum of all loads × run hours ÷ 1,000).
- Add 25% for system losses: Adjusted kWh = Daily kWh × 1.25.
- Choose days of autonomy (how many cloudy days the battery must cover). Two days is a reasonable starting point for most US climates.
- Calculate battery bank size: Battery Wh = Adjusted daily kWh × 1,000 × Days of autonomy ÷ Usable DoD.
- Choose panel array size using your location’s peak sun hours (PSH). Panel watts = Adjusted daily kWh × 1,000 ÷ PSH.
- Size the charge controller: Controller amps = Panel watts ÷ Battery bank voltage (typically 12V or 24V).
- Size the inverter to handle your largest simultaneous AC load, with 20% headroom.
Worked example: 8’ x 12’ hobby greenhouse
Assumed loads:
- Two DC exhaust fans: 40 W × 8 hrs = 0.32 kWh
- LED grow light strip: 60 W × 14 hrs = 0.84 kWh
- Circulation pump: 20 W × 6 hrs = 0.12 kWh
- Thermostat controller: 8 W × 24 hrs = 0.19 kWh
Raw daily total: 1.47 kWh Adjusted (×1.25): 1.84 kWh
Location assumption: Central US, 4.5 peak sun hours per day (conservative annual average).
| Component | Calculation | Result |
|---|---|---|
| Battery bank (2-day autonomy, LiFePO4) | Adjusted daily kWh × 2 | — |
| Panel array | Adjusted daily kWh ÷ 4.5 PSH | Two 200W panels |
| Charge controller (12V system) | Panel watts ÷ 12V | Use a 40A MPPT controller |
| Inverter | Largest simultaneous load + 20% headroom | 300W pure sine wave |
LiFePO4 batteries are the right chemistry for this application. They deliver a long cycle life with thousands of charge cycles and high round-trip efficiency, and handle the partial-state-of-charge cycling that solar storage demands better than lead-acid alternatives. The higher upfront cost pays back through a much longer service life.
Pro Tip: If you’re in a northern state with heavy winter loads, run this calculation twice: once for your summer peak and once for your worst winter week. Size to the winter scenario if your greenhouse runs year-round.
Practical heating options when your greenhouse runs on solar
Heating is the hardest problem in greenhouse solar power. The math above shows why: a single 1,500 W heater running overnight can demand more energy than all other loads combined.
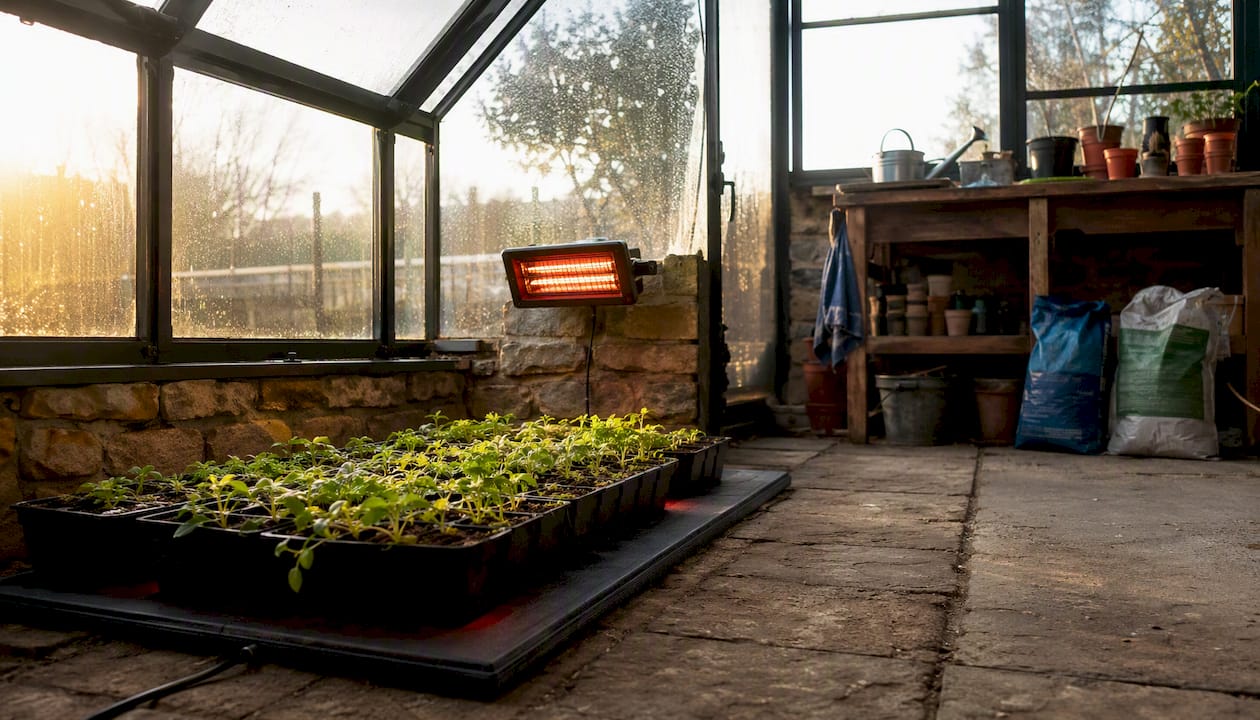
Electric heating options
Resistive space heaters draw 750–1,500 W and are the most common choice, but they are the most power-hungry. A 1,500 W unit running 8 hours overnight needs 12 kWh — roughly six times the rest of the example system above.
Infrared heaters (150–400 W for small units) heat objects and plants directly rather than warming air, which makes them more efficient in drafty or poorly insulated structures. They’re a better fit for solar-powered setups when used for spot heating.
Heat mats (20–40 W) are the most solar-friendly electric heating option. They keep root zones warm for seedlings without the massive draw of space heaters.
Passive heat strategies
| Method | Estimated Cost | Heating Benefit |
|---|---|---|
| 55-gal black water barrels (thermal mass) | $20–$60 each | Absorbs daytime heat, releases overnight |
| 2" foam perimeter insulation | $100–$300 | Reduces ground heat loss significantly |
| Thermal curtains (interior) | $50–$200 | Cuts nighttime radiant loss by 30–50% |
| Double-layer poly film | $100–$400 | Reduces heat loss vs. single-layer glazing |
For greenhouse thermostat control, a simple thermostatic outlet (around $25–$40) lets you run a heat mat or small infrared heater only when temperatures drop below a set point, which cuts energy use dramatically compared to running heaters on a fixed timer.
Ventilation and cooling on solar: what actually works
Ventilation is where solar power delivers the clearest, most immediate value in a greenhouse. Fans run during the day when panels produce the most power, which means the load and the supply align naturally.
Solar ventilation options for hobby greenhouses:
- DC solar fan kits (direct panel-to-fan, no battery): Run only when the sun shines, which is usually exactly when cooling is needed. Simple, low-cost, and zero wiring complexity.
- Solar fan kits with battery backup: Run through clouds and into the evening. Better for temperature-sensitive crops that can’t tolerate heat spikes during brief overcast periods.
- Timed or thermostat-controlled fans: Pair a temperature controller with a battery-backed fan kit to run ventilation only when the greenhouse exceeds a set temperature.
- Passive ridge vents: No power required. A ridge vent combined with low sidewall vents creates a natural convection draft. Best used alongside powered fans, not as a replacement.
- Evaporative (swamp) coolers: Effective in low-humidity climates (the Southwest and Mountain West). They draw more power than a fan alone (typically 100–300 W for small units), but they can drop temperatures by 10–20°F in dry conditions. The Westernharmonics Zendo Cooler is a solar-powered evaporative option built for exactly this use case.
Installation tips for fan placement:
- Mount exhaust fans high on the end wall opposite the prevailing wind, and intake vents low on the opposite end.
- Keep panel wiring runs short to minimize voltage drop; use appropriately sized wire for the amperage.
- Mount panels on a separate south-facing rack rather than on the greenhouse roof to avoid shading crops and to allow panels to run cooler. For a deeper look at fan placement and sizing, the Westernharmonics greenhouse ventilation guide covers off-grid sizing in practical detail.
The Westernharmonics Solar & Battery Greenhouse Exhaust Fan Kit integrates the panel, battery, and fan into a single pre-matched system. For hobbyists who don’t want to source components separately and wire them together, that integration removes most of the setup complexity.
Components checklist and budget ranges for a hobby greenhouse solar system
| Component | Entry-Level | Mid-Range | Reliable Off-Grid |
|---|---|---|---|
| PV panels (monocrystalline, 18–23% efficiency) | 1 × 100W ($80) | 2 × 200W ($300) | 4 × 200W ($600) |
| Charge controller (MPPT) | 10–20A ($25–$50) | 30–40A ($60) | 40–60A ($120) |
| Battery bank (LiFePO4) | 100Ah 12V ($180) | 200Ah 12V ($350) | 200Ah 24V ($600–$900) |
| Inverter (pure sine wave) | 300W ($40–$80) | 600W ($80–$150) | 1,000W ($150–$300) |
| Mounting rack / hardware | $50–$100 | $100–$200 | $150–$350 |
| Wiring, fuses, breakers | $30–$60 | $60–$120 | $100–$200 |
| Sensors / thermostat | $20–$40 | $40–$80 | $80–$150 |
| Estimated total | $425–$730 | $990–$1,720 | $1,800–$3,000 |
A few notes on components:
Panels: Monocrystalline panels generally offer 18–23% efficiency and perform better in low-light conditions, which matters in winter. Polycrystalline panels can be more cost-effective in consistently sunny climates. For most US hobbyists, monocrystalline is the better default.
Batteries: LiFePO4 is the right choice for solar storage. Its long cycle life means a quality pack can last many years in a hobby application. Lead-acid costs less upfront but typically needs replacement in 3–5 years and can only be discharged to 50% usable capacity.
Inverter: Buy a pure sine wave inverter, not a modified sine wave. Modified sine wave units can damage motor-driven loads (fans, pumps) and some electronics over time.
Don’t forget: permit fees (see the permits section below), conduit for outdoor wiring runs, weatherproof junction boxes, and any ground-mount post hardware. These add-ons can push a mid-range budget up by $100–$300.
Installation and siting: orientation, tilt, shading, and winter performance
Getting the physical installation right has a bigger impact on annual output than most hobbyists expect. A poorly sited array can lose 20–30% of its potential production.
- Orientation: Face panels true south (not magnetic south). In the continental US, the difference between true and magnetic south can be 5–20 degrees depending on your location.
- Tilt angle: A tilt equal to your latitude maximizes annual output. For winter-heavy loads, increase tilt by 10–15 degrees above your latitude to capture lower sun angles. A steeper tilt also sheds snow more effectively.
- Shading: Even partial shading of one cell in a string can reduce output of the entire string significantly. Keep panels clear of greenhouse ridge lines, nearby trees, and vent stacks. Use a solar pathfinder or a free tool like SunCalc to check for seasonal shading before you mount anything.
- Separate rack mounting: Mount panels on a dedicated ground rack or pole mount rather than on the greenhouse glazing. This preserves full crop light, allows panels to run cooler (which improves efficiency), and makes cleaning and maintenance straightforward. A building envelope that works with your solar setup can also reduce interior heat gain; the principles behind cool roof design apply to greenhouse structures as well.
- Snow management: A tilt of 35 degrees or more in northern states allows most snow to slide off naturally. Check after heavy snowfall regardless — a 2-inch snow layer can cut output to near zero.
- Battery cold-weather performance: LiFePO4 batteries lose capacity below 32°F and should not be charged below that temperature. Keep your battery bank inside the greenhouse or in an insulated enclosure, not in an unheated outdoor box.
Pro Tip: Before finalizing your rack location, spend a week observing shadows on your proposed site at 9 AM, noon, and 3 PM. Winter sun angles are much lower than summer, and a structure that looks unshaded in July may be heavily shaded in December.
What research shows about semi-transparent PV and greenhouse-integrated solar
Most hobbyists think of solar panels as something you mount outside the greenhouse. Semi-transparent photovoltaics (STPV) offer a different option: panels integrated directly into the roof or glazing that generate electricity while still transmitting light to crops.
The research findings are worth knowing before you invest. A systematic review of greenhouse-integrated PV found that PV roof coverage up to about a quarter of the roof area is generally compatible with many greenhouse crops with limited yield impact. Higher coverage often reduces crop performance, so full roof coverage is not a practical option for most food crops.
STPV technologies do more than generate electricity. A comparative study of CdTe and a-Si semi-transparent modules found that they can reduce evapotranspiration and buffer greenhouse microclimates, with ET₀ reductions of 31.4% (CdTe) and 61.3% (a-Si) under high-radiation conditions. Soil overheating was mitigated by up to 17.8%. For growers in hot, high-radiation climates, that microclimate buffering can reduce cooling loads as much as the electricity generation itself.
The practical guidance: if you’re considering STPV roof integration, keep coverage at or below 25% of roof area, and consult an agronomist before installing if you’re growing light-sensitive crops like lettuce or herbs. For most hobbyists, a separate rack-mounted array is simpler, cheaper, and avoids the crop-light trade-off entirely. STPV integration makes more sense for larger structures where the electricity value justifies the added complexity and cost.
Small PV integrations can support greenhouse energy needs for fans, pumps, and lighting when the system is designed carefully to balance energy generation against crop light requirements.
Permits and regulations for greenhouse solar installations in the US
Solar installations on or near greenhouses are subject to the same permitting requirements as any residential or agricultural PV system. Requirements vary by state and county, but the general framework is consistent.
What typically requires a permit:
- Any grid-tied PV system (virtually universal in the US).
- Battery storage systems above a certain capacity (thresholds vary by jurisdiction, often 10 kWh or more).
- Electrical work connecting to a main panel or subpanel.
- Structural modifications to support panel mounting.
What may not require a permit:
- Small off-grid DC systems below a certain wattage (often 50–100 W, jurisdiction-dependent) that are not connected to the building’s electrical system.
- Plug-in solar generators used as portable power sources.
Key steps before you install:
- Contact your local building department to confirm permit requirements for your system size and configuration.
- Check with your utility if you plan any grid-tied or net-metering connection. Utilities have their own interconnection application processes.
- Review HOA rules if applicable — some associations restrict panel visibility or placement.
- For agricultural properties, check whether your state has specific exemptions for farm structures. Several states (including California, Texas, and Florida) have streamlined permitting for agricultural solar.
If you’re planning a larger system or hiring a contractor, ask the right questions upfront. A homeowner’s checklist for solar installer questions covers what to verify before signing any contract.
The National Electrical Code (NEC) Article 690 governs PV system wiring in the US. Any system connected to a building’s electrical system should be installed to NEC standards, and most jurisdictions require a licensed electrician for that work. Off-grid DC fan kits wired only to a panel and battery, with no connection to the building’s electrical system, generally fall outside NEC Article 690 scope, but confirm with your local authority having jurisdiction (AHJ).
This article provides general information about permitting frameworks, not legal or regulatory advice. Confirm current requirements with your local building department and utility before installing.
Key Takeaways
A properly sized PV + battery system can power all electrical loads in a hobby greenhouse; passive heating strategies are the most cost-effective first step to reduce what the solar system needs to carry.
| Point | Details |
|---|---|
| Size to your actual loads | Log every load for 7 days, then apply the daily kWh formula before buying any hardware. |
| Heating is the cost driver | A single 1,500 W heater running overnight can demand more energy than all other greenhouse loads combined. |
| LiFePO4 is the right battery chemistry | 3,000–6,000+ cycles and over 95% efficiency make it the practical choice for solar storage despite higher upfront cost. |
| Mount panels off the structure | A separate south-facing rack preserves crop light, improves panel efficiency, and simplifies maintenance. |
| Westernharmonics fan kits simplify the first step | The Solar & Battery Greenhouse Exhaust Fan Kit integrates panel, battery, and fan in one pre-matched system for hobbyists who want reliable ventilation without sourcing components separately. |
What field experience with greenhouse solar actually teaches you
The conventional wisdom in most solar guides is to calculate your loads, buy the panels, and wire everything up. That sequence is correct, but it leaves out the part that actually determines whether a system works in practice: reducing the load before you size the array.
We’ve seen this pattern repeatedly in the work behind Westernharmonics’ greenhouse and off-grid cooling hardware. Growers come to us after buying a system that works fine in July and fails in January. The root cause is almost always the same: they sized for their summer loads and didn’t account for the combination of shorter days, lower sun angles, and higher heating demand in winter. The system was never wrong — it was just sized for the wrong scenario.
The other consistent mistake is mounting panels on the greenhouse roof. It seems logical: the roof faces the sun, so put the panels there. But greenhouse glazing is designed to transmit light to plants, and panels mounted on it shade exactly the crops that need the most light. A separate rack, even a simple ground-mounted angle-iron frame, solves both problems at once: it keeps crop light unobstructed and lets panels run cooler, which improves output.
The growers who get the most out of solar are the ones who treat passive heat retention as the first investment, not an afterthought. Thermal curtains, water barrels, and perimeter insulation cost a fraction of additional battery capacity and deliver the same result: fewer hours of electric heating, which means a smaller, cheaper, more reliable solar system.
Start small, measure everything, and add capacity based on what the data shows — not what a sizing calculator assumes.
Westernharmonics greenhouse kits and System Designer: where to start
Westernharmonics built the first solar-powered fan kit sold in the US, and greenhouse ventilation remains one of our core applications. The difference between our kits and a collection of separately sourced components is straightforward: every kit ships as a pre-matched, field-tested system. You’re not guessing whether the panel, controller, and fan are compatible — we’ve already done that work.
For most hobbyists starting out, the Solar & Battery Greenhouse Exhaust Fan Kit covers ventilation for a small to mid-size greenhouse with battery backup for cloudy periods. If you need a simpler entry point, the 10W Solar Powered Fan Kit handles targeted spot ventilation with no battery complexity. For larger spaces or zoned cooling, the 200W Hanging Fan Kit with Battery Backup gives you more airflow with the same integrated design.
Not sure which kit fits your greenhouse? The Westernharmonics System Designer walks you through your loads, location, and goals and recommends a matched system. It’s the fastest way to move from “I think I need solar” to a specific parts list. Browse the full greenhouse systems catalog or contact our support team for a custom microgrid design.
Useful sources and further reading
| Source | What it covers | Best used for |
|---|---|---|
| MDPI: STPV Microclimate Study | CdTe and a-Si semi-transparent PV microclimate effects, ET₀ reductions | Understanding STPV trade-offs before integrating panels into glazing |
| Energies: Hybrid Systems for Greenhouses | Grid/PV vs. Gen/PV/battery cost and feasibility analysis | Sizing trade-offs and off-grid vs. grid-tied decision-making |
| Wevolver: LiFePO4 Engineering Guide | LiFePO4 cycle life, efficiency, thermal stability | Battery chemistry selection and DoD assumptions |
| Family Handyman: Solar Greenhouse Heaters | Practical heating paths and mounting best practices | Heating strategy and rack-mounting guidance |
| Renewable Energy Hub: Solar Panels for Greenhouses | Mono vs. polycrystalline panel comparison | Panel selection based on climate and budget |
| Systematic Review: Greenhouse-Integrated PV | PV coverage ratios and crop yield impacts | Deciding how much roof coverage is safe for your crops |
| Preprint: PV Integration and Cucumber Growth | Small PV integration effects on microclimate and crop production | Understanding real-world crop impacts of panel integration |
| Westernharmonics System Designer | Interactive off-grid system sizing and kit selection | Moving from load calculations to a specific hardware recommendation |
For crop-specific decisions — particularly if you’re integrating semi-transparent modules or planning a year-round production greenhouse — consult a certified agronomist alongside these resources. Solar system sizing is engineering; crop light requirements are agronomy, and the two disciplines don’t always agree on the same answer.