

Controlling Greenhouse Heat: A Practical System Guide
Controlling Greenhouse Heat: A Practical System Guide
Effective greenhouse heat control combines five things working together: passive design (glazing, sealing, thermal mass), ventilation sized to your square footage, active cooling for peak heat, targeted heating at the root zone instead of just heating air, and a controller that keeps those systems from fighting each other. Do this today: check that your sensor sits at plant canopy height out of direct sun, set a heating/cooling deadband of at least 4 to 5°F so equipment doesn’t cycle against itself, and add shade cloth or a single exhaust fan before you spend money on anything bigger. The trade-off to keep in mind throughout: tighter temperature control costs more energy, so precision should go where the crop actually needs it.
- Check sensor placement (canopy height, shaded)
- Set a heating/cooling deadband before automating anything
- Add shade cloth or one exhaust fan before scaling up equipment
Key Takeaways
Greenhouse heat control works best as an integrated system where passive design, sized ventilation, targeted heating, and a coordinated controller share the load instead of one oversized device carrying it alone.
| Point | Details |
|---|---|
| Size ventilation correctly | Use 8 to 10 cfm per square foot as your baseline, adjusting upward for screens or dense canopy. |
| Prioritize root-zone heat | Bench heating at 95 to 105°F lets you run cooler air setpoints and cut energy use. |
| Build a real deadband | Keep heating and cooling setpoints 4 to 5°F apart to stop equipment from fighting itself. |
| Cheap fixes first | Shade cloth and gap sealing deliver fast payback before any mechanical upgrade. |
| Go off-grid with confidence | Western Harmonics solar fan kits paired with a PowerMosaics.com sub 3 kW design workflow make remote ventilation builds straightforward. |
Table of Contents
- What Does Greenhouse Heat Control Actually Involve?
- Which Heating Method Fits Your Greenhouse Size?
- How Do You Stop a Greenhouse From Overheating?
- How Do You Size an Exhaust Fan for Your Greenhouse?
- How Do Thermostats and Controllers Prevent Wasted Energy?
- What Passive Upgrades Cut Heating and Cooling Costs?
- How Tight Should Your Temperature Setpoints Be?
- Can You Run Greenhouse Ventilation Off-Grid or on Solar?
- Get the Right Solar Ventilation Hardware for Your Setup
- Frequently Asked Questions
- Sources
What Does Greenhouse Heat Control Actually Involve?
Greenhouse heat control is a system, not a single device. Six components determine how well your structure holds a stable temperature: the envelope (glazing and sealing), ventilation (natural and forced), active cooling (evaporative pads, misting, shading), heating (space heaters, bench heat, geothermal loops), sensors and controllers, and the power source running it all.
Picture the heat flow this way: sunlight enters through the glazing, warms the air and soil mass inside, and that heat either escapes through vents and infiltration or builds up until something removes it. Your job is directing that flow instead of fighting it after the fact.
- Envelope: glazing type, sealing, insulation value
- Ventilation: ridge vents, side vents, exhaust fans
- Cooling: evaporative pads, misting, shade cloth
- Heating: space heaters, bench mats, geothermal
- Controls: thermostats, sensors, environmental controllers
- Power: grid, solar, or battery-backed off-grid systems
Every adjustment here has a ripple effect. Crank ventilation to drop temperature and you’ll also drop humidity and possibly stress young transplants. Add shade to cut heat load and you cut light for fruiting crops too. Greenhouse temperature management is really about balancing those three variables at once, not maximizing any single one.
Which Heating Method Fits Your Greenhouse Size?
Match the heating method to your structure size and crop, not the other way around. Forced-air heaters (propane or electric) work well for small to mid-size hobby greenhouses because they distribute heat fast and are simple to size. Convection heaters are quieter and cheaper to run but distribute less evenly in longer structures, so plan for supplemental circulation fans.
Bench and root-zone heating deserves more attention than it gets. Hot-water tubing or electric bench mats keep root zones at optimal temperature while air setpoints stay lower, and hot-water bench loops typically run at temperatures suitable for seedlings, generally near 95 to 105°F, letting growers hold greenhouse air roughly 10°F cooler than the root zone. That’s a meaningful energy saver for anyone propagating seedlings or growing cold-sensitive starts.
Geothermal loops make sense for larger, permanent installations where the upfront cost pencils out over years of operation, but they’re rarely practical for a backyard structure under a few hundred square feet.
Size heaters to your worst-case heat loss, not your average night. Estimate Btu/hr loss using a conservative outside design temperature (your area’s coldest realistic night, not the average low) so you’re not caught short during a cold snap.
- Forced-air heaters: fast, simple, best for small to mid-size structures
- Bench/root heating: energy-efficient, ideal for propagation and seedlings
- Geothermal: high upfront cost, best for larger permanent operations
Pro Tip: Always keep a backup heater and a battery-powered high/low temperature alarm on hand. A single failed thermostat on a cold night can wipe out a season’s worth of seedlings.
How Do You Stop a Greenhouse From Overheating?
Cooling is where most hobbyists either overspend or underbuild. Start with natural ventilation. Roof vents paired with low side vents create a thermal chimney effect, pulling hot air out the top as cooler air enters low. It works well on breezy days but stalls in dead calm, which is exactly when overheating is worst.
Forced ventilation fills that gap. A common sizing rule holds that a forced ventilation rate of 8 to 10 cfm per square foot keeps greenhouse air within about 5°F of outside temperature, with fans placed to pull air across the full length of the structure rather than short-circuiting near the intake.
Energy Reality Check: Extension research shows heating alone typically eats up 65 to 85% of a greenhouse’s total annual energy budget for year-round operations. Every degree of overheating you prevent for free with shading or ventilation is a degree you’re not paying to remove mechanically later, and vice versa for heat you don’t need to add back.
Evaporative cooling (fan-pad systems or fine misting) works by evaporating water into the airstream, and it’s most effective when outside humidity is low. Evaporative coolers can achieve roughly 85% of their theoretical temperature drop under the right conditions, but they add humidity, which can invite disease pressure if circulation is weak.
Shading is the cheapest lever you have. External shade cloth or whitewash blocks solar gain before it ever hits the glazing, which beats internal shading for actual cooling effect. Aim to keep temperatures below recommended thresholds around 25 to 27°C (77 to 81°F) during peak heat without over-shading and starving fruiting crops of light.
- Natural ventilation: free but wind-dependent
- Forced ventilation: reliable, sized at 8 to 10 cfm per square foot
- Evaporative cooling: strong in dry climates, raises humidity
- Shading: cheapest fix, balance against light needs
How Do You Size an Exhaust Fan for Your Greenhouse?
Ventilation sizing starts with the 8 to 10 cfm per square foot rule, but a few variables push that number up or down. Insect screens can cut airflow by 30% or more, tight plant canopies restrict circulation, and a greenhouse tucked on the leeward side of a building loses the benefit of prevailing wind for natural venting.
Here’s a worked example. Say you’re running a 1,000 square foot hobby greenhouse. At 8 cfm per square foot, you need roughly 8,000 cfm of exhaust capacity; at the higher end of 10 cfm, that’s 10,000 cfm. If you’re running insect screens, add a buffer and design toward the higher figure. Split that across two fans rather than one for better distribution and redundancy if one fan fails.
- 1,000 sq ft × 8 cfm = 8,000 cfm minimum
- 1,000 sq ft × 10 cfm = 10,000 cfm with screens or poor airflow
- Split total cfm across two fans for redundancy and even distribution
Sensor placement matters as much as fan capacity. Sensors are best placed at plant canopy height and shielded from direct sun for accurate readings; a sensor mounted near the roof peak reads air that’s 10 to 15 degrees hotter than what your plants actually experience, which will trigger cooling too early or too late.
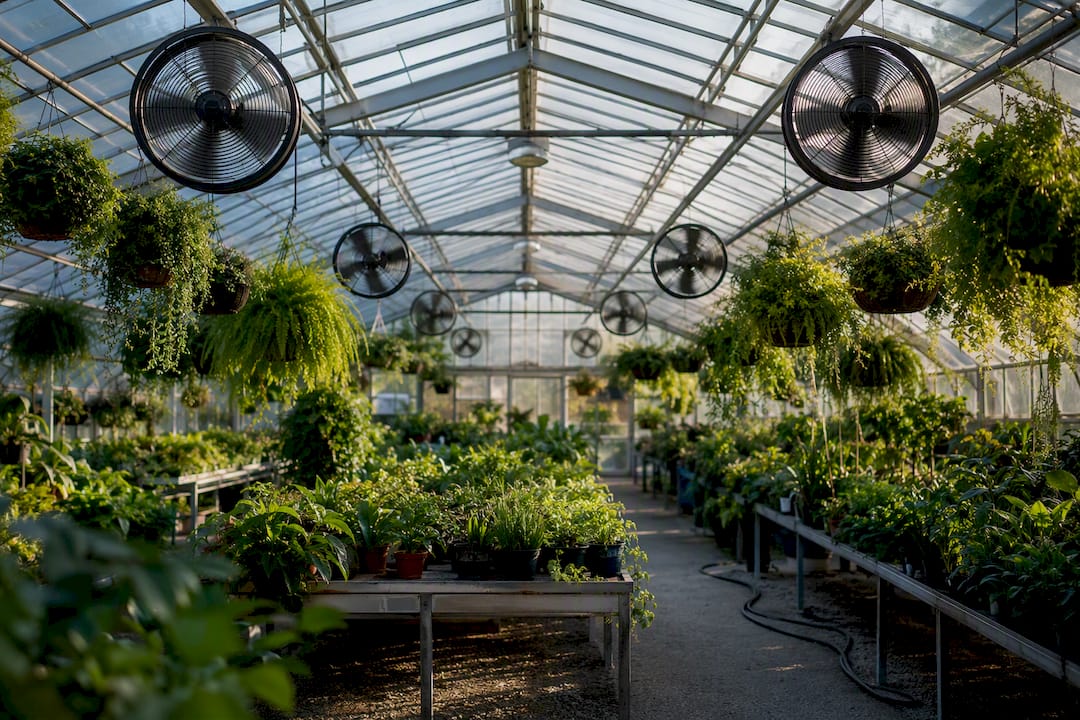
Pro Tip: Space circulation fans to eliminate corners and dead zones. Stagnant air pockets near end walls are where fungal issues and localized heat stress show up first, even in a well-ventilated house.
How Do Thermostats and Controllers Prevent Wasted Energy?
A basic mechanical thermostat works fine for a single heater or fan, but it can’t coordinate multiple systems. A digital environmental controller can run heating, cooling, and shading off one logic set, which matters once you’re running more than two devices.
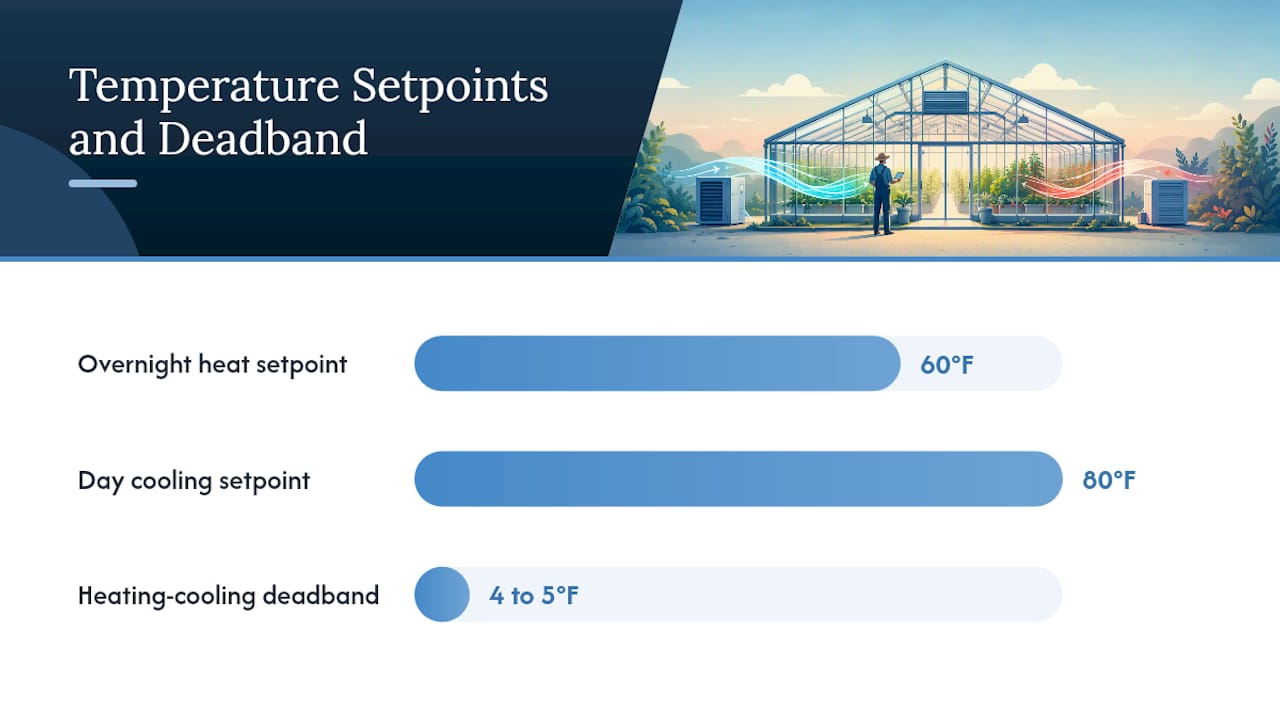
The most common mistake is setting heating and cooling setpoints too close together, so the heater and exhaust fan cycle against each other and waste energy on both ends. Build in a deadband of at least 4 to 5°F between your heating setpoint and your cooling setpoint. A reasonable day/night example: heat at 60°F overnight, allow cooling to kick in at 80°F during the day, with ventilation starting a few degrees before that as a first-stage response.
For growers dealing with humidity swings from evaporative cooling, multivariable control approaches that decouple temperature and humidity loops using split-range logic (combining a dehumidifier with a fogger or vent, for instance) meaningfully reduce the back-and-forth interaction you get from two independent single-loop thermostats. Our greenhouse thermostat control guide walks through setup basics if you’re configuring a controller for the first time.
- Use one controller for multiple systems instead of separate thermostats
- Build a 4 to 5°F deadband between heating and cooling setpoints
- Place humidity and temperature sensors together at canopy height
What Passive Upgrades Cut Heating and Cooling Costs?
Passive measures reduce the load your active systems have to fight, and they’re usually the highest-return dollar you’ll spend. Double-layer glazing traps an insulating air pocket that noticeably lowers heat loss compared to single-pane poly or glass, and sealing gaps around vents and doors closes the infiltration losses that undercut even a well-insulated structure.
Thermal mass, water barrels, gravel beds, or a concrete floor, absorbs daytime heat and releases it slowly overnight, flattening the temperature swing without burning any energy. Heat curtains (drawn at night, retracted during the day) trap warm air near the crop zone and are one of the better ROI upgrades for growers who already have basic glazing in place.
If you’re prioritizing on a budget, start cheap: sealing gaps and adding shade cloth cost little and pay back fast, the same air sealing principles used in home energy efficiency apply directly to a greenhouse envelope.
- Double glazing: reduces heat loss versus single-layer covering
- Heat curtains: trap warmth near crops at night
- Thermal mass: flattens temperature swings for free
- Sealing gaps and shade cloth: cheapest, fastest payback
How Tight Should Your Temperature Setpoints Be?
Heating typically consumes 65 to 85% of a greenhouse’s total annual energy cost in year-round operations, which makes setpoint discipline one of the biggest cost levers you control.
A comparative prototype test found that a stricter temperature control band consumed roughly 2.2 times more energy than a broader one. That’s the core trade-off: every degree of tighter precision you demand from your controller costs real money to maintain, especially through a cold night or a heat wave.
- Prioritize root-zone heating over raising whole-house air temperature
- Run lower air setpoints when bench heating covers root-zone needs
- Widen your deadband where crop tolerance allows it
- Reserve tight control bands for propagation trays, not the whole structure
Can You Run Greenhouse Ventilation Off-Grid or on Solar?
Remote and grid-unstable greenhouses don’t need to skip mechanical ventilation, they need it sized to a battery and panel instead of a wall outlet. A basic solar exhaust fan setup pairs a panel sized to your fan’s wattage with a battery buffer that carries you through cloudy stretches; plan panel capacity for 1.5 to 2 times your fan’s rated draw to account for shorter winter charging windows.
This is where PowerMosaics.com earns its keep over generic DC design tools. Most low-voltage design software built for solar and off-grid systems assumes larger residential or RV-scale loads; PowerMosaics is built around the sub 3 kW range that greenhouse ventilation and micro-power projects actually live in, with a workflow that maps panel, battery, and controller sizing directly to fan wattage and runtime targets, then exports a field-ready wiring plan instead of a generic spec sheet.
Western Harmonics solar fan kits are designed to plug into exactly that workflow. Test fan draw and battery voltage on the bench before final mounting, and secure wiring runs against wind and moisture before the first storm finds the weak point.
- Size solar panels at 1.5 to 2x fan wattage for winter charging margin
- Bench-test wiring and voltage before final mounting
- Use a design workflow scaled to under 3 kW, not oversized residential tools
Why System Thinking Beats One-Off Fixes
I’d rather see a grower design the envelope, ventilation, and controller together than buy a bigger heater every time a corner runs cold. Small prototypes, one shade panel plus one fan, tell you more about your structure’s real behavior than any spec sheet. Test cheap, then scale what works.
Get the Right Solar Ventilation Hardware for Your Setup
Every sizing rule in this guide, the 8 to 10 cfm per square foot target, the deadband logic, the panel-to-fan wattage ratio, maps directly onto Western Harmonics hardware built for exactly this job. Our solar-powered fan kits and battery-backed exhaust systems are sized for greenhouses from a small hobby hoop house up to structures needing multiple thousand-cfm fans, and they’re built to run whether or not grid power reaches your site.

If you’re still working out fan counts or battery capacity, our system design tool and PowerMosaics.com comparison resources can help you land on numbers before you buy. Browse the full solar-powered fan lineup or the complete off-grid hardware catalog to match a kit to your square footage, and reach out through the system design tool if you want a custom plan built around your specific structure.
Frequently Asked Questions
What is the best way to reduce heat in a greenhouse without spending much money? External shade cloth or whitewash is the cheapest high-impact fix. It blocks solar gain before it enters the structure, which beats trying to remove heat mechanically after it builds up.
How many cfm do I need for greenhouse ventilation? Plan for 8 to 10 cfm per square foot of floor space to keep interior air within about 5°F of outside temperature, adjusting upward if you’re running insect screens.
Should I heat the greenhouse air or just the root zone? For propagation and cold-sensitive starts, bench or root-zone heating is more energy-efficient than heating all the air, since you can run air setpoints roughly 10°F lower while keeping roots warm.
Does evaporative cooling work everywhere? It works best in dry climates. In humid regions, evaporative systems add moisture that can promote disease pressure unless paired with strong air circulation.
Can solar power run a full greenhouse exhaust fan system? Yes, for fans and small controllers, a properly sized panel and battery buffer can run exhaust ventilation reliably, especially in setups under 3 kW where tools like PowerMosaics.com help size the system correctly.