

Solar Cooling Without Electricity for Off-Grid Homes
Solar Cooling Without Electricity for Off-Grid Homes
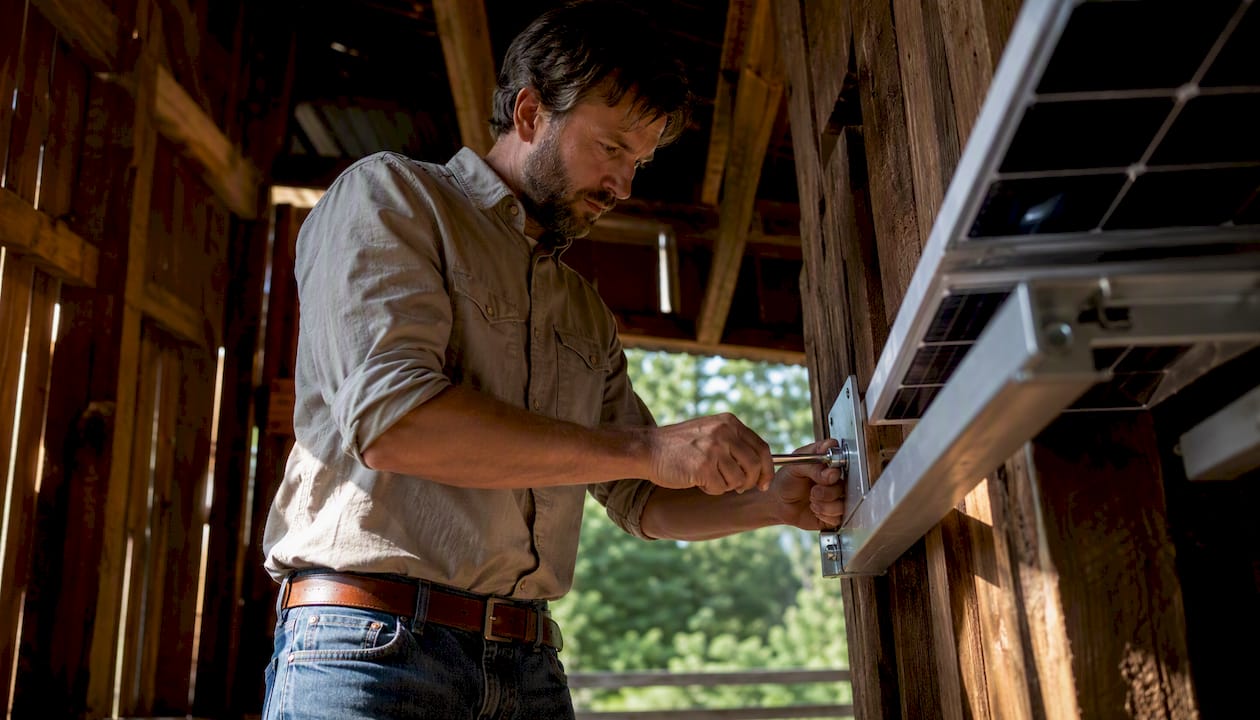
Solar-powered DC cooling is the practical answer for off-grid homes, barns, and greenhouses. You run a PV panel directly into a DC fan or DC compressor, and the sun does the work. No grid connection required. Here is how to choose the right approach:
- Direct-drive DC fans (battery-free): PV panel wired straight to a 12V or 24V DC motor. Runs only when the sun shines. Best for daytime ventilation in barns, coops, and workshops.
- Plug-and-play DC refrigeration units: Self-contained DC compressor systems with a small panel. Handles food storage, vaccine cold chains, or ice production.
- DC compressor + battery + thermal storage: The most capable configuration. Stores “coolth” in a water or phase-change material (PCM) tank during peak sun, then releases it through the evening. Cuts battery bank size significantly.
Choose direct-drive fans when you only need daytime airflow. Add battery or thermal storage when you need cooling after dark or on cloudy days.
Key Takeaways
Solar DC cooling is the most practical off-grid cooling approach for rural U.S. homeowners, barn operators, and greenhouse growers — and the right hardware pairing makes it reliable from day one.
| Point | Details |
|---|---|
| Direct-drive fans for daytime | Battery-free 12V/24V DC fan kits cover ventilation needs with zero maintenance overhead. |
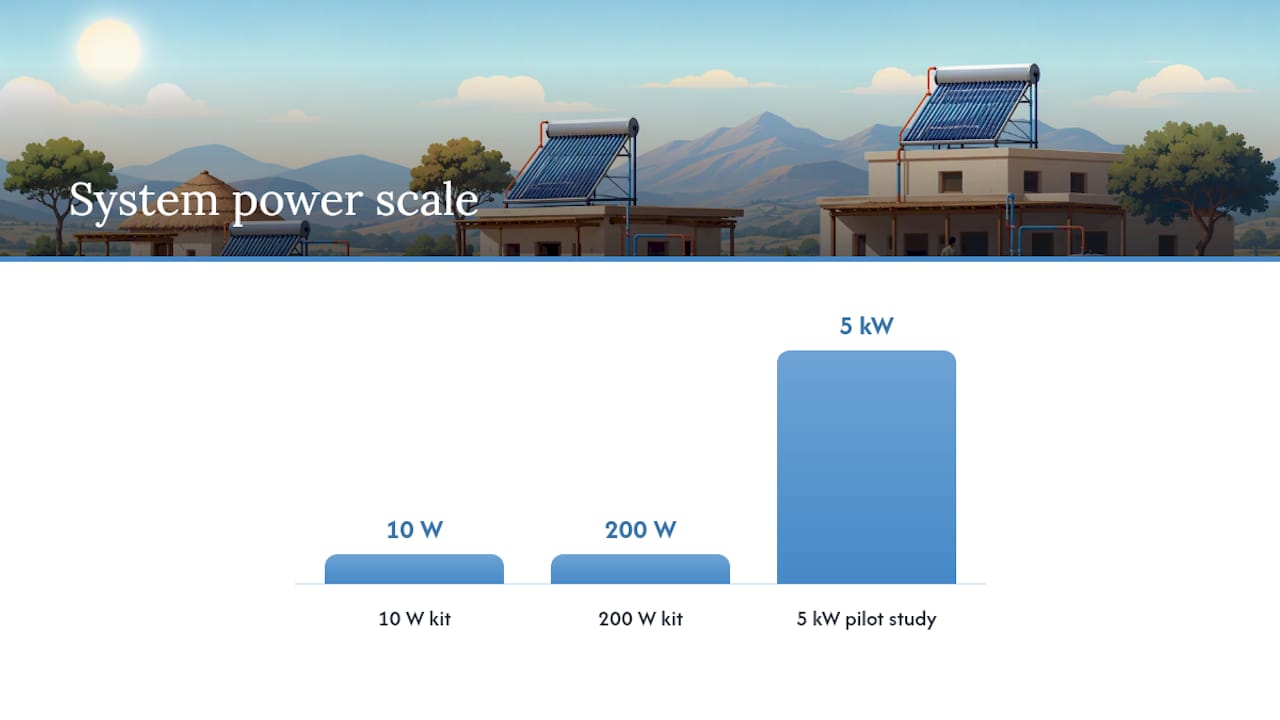
| Thermal storage cuts battery cost | Storing “coolth” in a PCM or water tank reduced battery reliance by roughly 80% in the 5 kW pilot study. |
| COP of about 3.36 is achievable | A tested DC vapor compression system with thermal storage averaged a COP around 3.36 at a 5 kW scale. |
| Size before you buy | Calculate CFM or BTU load, peak sun hours, and autonomy hours before selecting panels and storage. |
| Westernharmonics for hardware | From the 10W Kit# 1505-HG to the 200W battery-backed greenhouse kit, Westernharmonics covers the full range of off-grid DC cooling jobs. |
Table of Contents
- How does a solar DC cooling system actually work?
- What can you actually cool with these systems?
- What hardware do you need, and how do you size it?
- Which system configuration fits your situation?
- What performance and costs should you expect?
- How should you install and site your system?
- How do you keep a solar DC cooling system running?
- Which Westernharmonics products match your cooling job?
- How do you choose the right system for your site?
- Why DC solar cooling is the right call right now
- Westernharmonics has the hardware — here is where to start
- Sources
How does a solar DC cooling system actually work?
The core chain is simple: sunlight hits the PV panel, which produces DC electricity, which drives a DC motor or compressor directly. No inverter, no AC conversion, no utility meter.
For a basic fan kit, the panel output goes straight to the fan motor. Voltage matching matters here — a 12V fan needs a panel with a maximum power point voltage (Vmpp) near 17–18V, which is the standard for a nominal 12V panel. Mismatching voltages wastes power and can shorten motor life.
When you add a battery, an MPPT charge controller sits between the panel and the battery, maximizing energy harvest and protecting the battery from overcharge. The compressor or fan then draws from the battery, giving you operation after sunset.
The thermal storage alternative: Instead of a large battery bank, a DC compressor can freeze a water tank or PCM block during the day. That stored cold releases slowly through the night, reducing electrical battery storage reliance significantly in pilot testing. For a barn or greenhouse, that tradeoff often makes more economic sense than buying extra lithium cells.
Key components in any solar DC cooling system:
- PV panels: Sized in watts-peak (Wp) to match the load
- MPPT charge controller: Required when a battery is present
- DC fan or DC compressor: The load itself
- Battery bank (optional): Lithium or AGM for night or cloudy-day autonomy
- Thermal/PCM storage tank (optional): Replaces or supplements battery for cooling loads
Pro Tip: Match your panel’s Vmpp to your motor’s rated voltage as closely as possible. For a 12V DC fan, a standard 100W 12V panel works well. For a 24V compressor, use a 24V nominal panel or wire two 12V panels in series. This avoids unnecessary buck converters and keeps the system simple.
What can you actually cool with these systems?
Off-grid cooling markets are expanding rapidly, and the hardware now covers a wide range of rural use cases. Here is how system types map to real jobs:
- Greenhouse ventilation (50–200W PV): A thermostatted exhaust fan sized for one full air change every 1–3 minutes keeps temperatures and humidity in range. Solar exhaust fans with louvers and thermostats automate this without any grid connection, and battery backup extends operation on cloudy days.
- Chicken coop and barn ventilation (10–60W PV): Direct-drive fan kits handle daytime heat stress in small to mid-size structures. A 10W kit covers a small coop; a 200W battery-backed kit handles a full barn bay.
- Workshop and garage comfort (60–200W PV): A 20" hanging DC fan moves enough air to make a working environment tolerable through the hottest part of the day.
- Food and vaccine cold storage (150–400W PV): A direct-drive DC refrigerator or chest cooler needs roughly 150Wp of PV for 24-hour autonomy, based on field-tested plug-and-play solar cooling examples.
- Ice production for fish or milk (200–500W PV): Small DC ice makers are now available as plug-and-play units with modest panel requirements.
What hardware do you need, and how do you size it?
Every solar DC cooling system shares the same five components. Their sizing depends on your cooling load and how many hours of autonomy you need.
| Component | Role | Basic sizing rule |
|---|---|---|
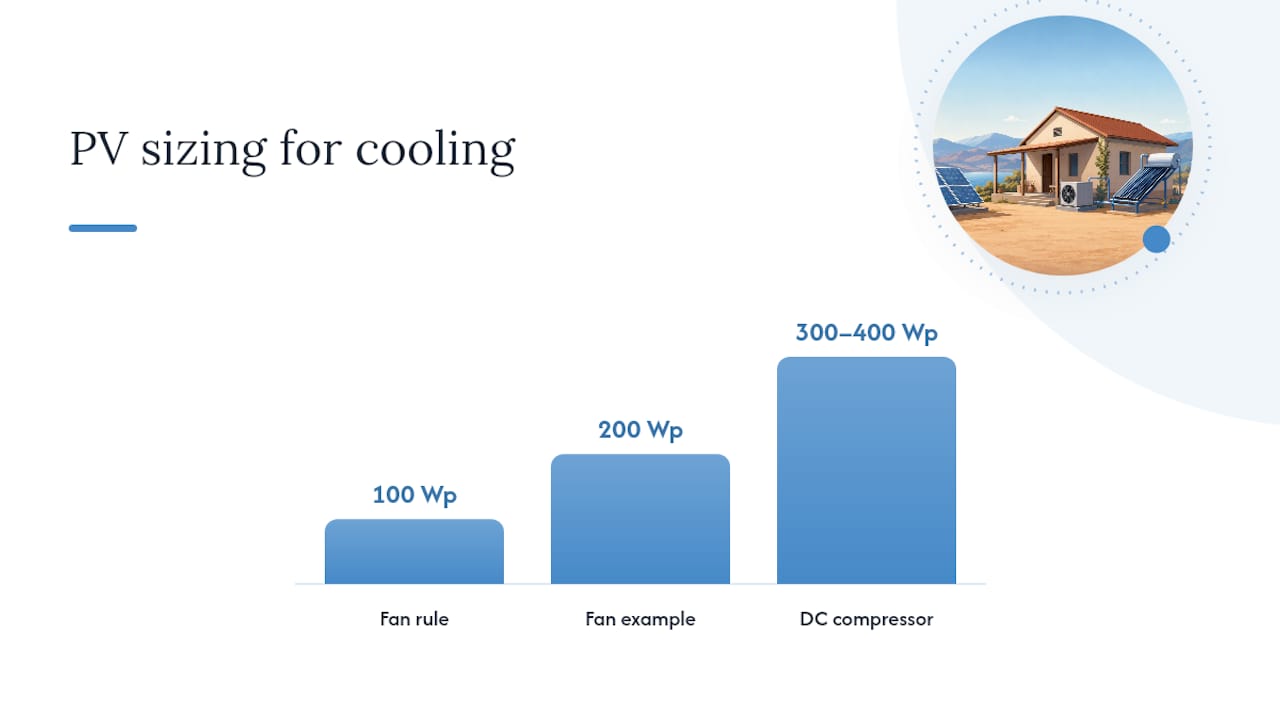
| PV panels | Primary power source | ~100Wp per 100 CFM of fan airflow; ~300–400Wp per kW of DC compressor cooling |
| DC fan or compressor | The cooling load | Match voltage (12V or 24V) to panel Vmpp |
| MPPT charge controller | Battery charging and protection | Size to panel short-circuit current |
| Battery bank | Night and cloudy-day autonomy | 1 kWh per 4–6 hours of compressor runtime |
| Thermal/PCM storage tank | Stores “coolth” during peak sun | Sized by heat load and desired hold time |
Worked example — small greenhouse (3m × 4m): A 200W exhaust fan running 8 hours per day needs roughly 200Wp of PV for direct-drive daytime operation. Add a 100Ah 12V battery and a 20A MPPT controller if you want 2–3 hours of post-sunset operation. For a DC compressor cooling the same space, plan on 300–400Wp of PV plus a thermal storage tank to reduce battery demand.
Common DC system voltages are 12V for small fan kits and 24V for larger compressor systems. See the AC vs DC fan comparison for a deeper look at why DC motors outperform AC in off-grid applications.
Which system configuration fits your situation?
Three builds cover most off-grid cooling needs. Each has a clear tradeoff.
Configuration 1: Direct-drive, battery-free fan kit
- Pros: Lowest cost, zero battery maintenance, simple wiring, no failure points beyond the panel and motor
- Cons: No operation at night or in heavy cloud; performance drops sharply when panels are undersized
- Best for: Daytime barn ventilation, coops, workshops
Configuration 2: DC compressor + battery bank
- Pros: Full 24-hour cooling capability, works in moderate cloud, flexible load management
- Cons: Battery cost and replacement cycle add to lifetime cost; more components to maintain
- Best for: Food storage, small cold rooms, overnight comfort cooling
Configuration 3: DC compressor + thermal/PCM storage
- Pros: Cuts battery bank size substantially, lower long-term cost, proven in pilot testing
- Cons: Requires a well-insulated thermal tank; slightly more complex initial design
- Best for: Healthcare cold storage, larger greenhouses, any application where overnight cooling matters
Configuration 4: Hybrid (battery + thermal storage)
- Pros: Maximum resilience across cloudy days and nights
- Cons: Highest upfront cost and most complex design
- Best for: Critical loads — vaccines, livestock health, remote clinics
What performance and costs should you expect?
A 5 kW off-grid DC vapor compression pilot system held indoor temperatures between 22°C and 26°C when outdoor temperatures reached 35°C. The system averaged a coefficient of performance (COP) of approximately 3.36, meaning it delivered 3.36 units of cooling for every unit of electricity consumed. COP peaked above 5 during high solar input. That is competitive with grid-tied residential air conditioning.
Key figure: A COP of 3.36 on a 5 kW DC system with thermal storage, tested at a rural healthcare facility. Battery storage reliance dropped by roughly 80% compared to a battery-only design.
Cost drivers for a solar DC cooling system:
- PV panels: Prices have fallen to roughly $0.25–$0.40 per Wp at retail in the U.S.
- Battery bank: Lithium iron phosphate (LiFePO4) cells run $200–$400 per kWh depending on brand and capacity
- Thermal storage tank: Often the lowest-cost storage option per kWh of cooling
- DC compressor or fan kit: Wide range from under $100 for a basic fan kit to $1,000+ for a full compressor unit
- Labor and mounting hardware: Varies by site complexity
Payback depends heavily on what you are replacing. If you are running a generator for cooling, a solar DC system typically pays back in 3–6 years. If you are building new off-grid infrastructure, the solar system is often the lower-cost option from day one.
How should you install and site your system?
Three siting decisions drive most of the performance difference between a well-built and a poorly built system: sun exposure, ventilation pathways, and insulation.
Installation checklist:
- Panel orientation: South-facing at a tilt angle equal to your latitude. Avoid shade from trees or structures between 9 AM and 3 PM.
- Cable sizing: Use appropriately rated DC wire for your voltage and current. Undersized wire causes voltage drop and heat. See microgrid component guidance for wire-sizing rules.
- Grounding: Ground the panel frame and charge controller to a proper earth ground per NEC Article 690.
- Ventilation pathways: Place exhaust fans high on the wall or roof peak; intake vents low and on the shaded side. Hot air rises — work with it.
- Insulation and sealing: Every degree of insulation improvement reduces the cooling load. Seal gaps, insulate walls and roofs, and shade south-facing glass before sizing your system.
- Refrigerant safety: DC compressor systems use R-134a or R-290 (propane-based). R-290 requires a licensed technician for service in most U.S. states. Check local permit requirements before installation.
- Freeze protection: In climates with hard freezes, drain or insulate water-based thermal storage tanks. PCM tanks with appropriate freeze points avoid this issue.
For DC systems under 3 kW, Powermosaics offers automated layout and wire-sizing tools built specifically for low-voltage solar DC systems. It handles the load calculations, cable sizing, and component selection faster than general-purpose electrical design software, which is typically built for AC systems and requires manual adaptation for 12V/24V DC work.
How do you keep a solar DC cooling system running?
Top five maintenance tasks that prevent most failures:
- Clean panels monthly (or after dust storms): A layer of dust can cut output by 10–25%.
- Inspect all DC connections quarterly: Loose terminals cause resistance, heat, and eventual failure.
- Check fan bearings and blade condition seasonally: Replace bearings before they seize; a seized motor can damage the controller.
- Inspect refrigerant lines annually (compressor systems): Look for oil stains near fittings, which indicate slow leaks.
- Test PCM or water tank integrity before each cooling season: Cracks or contamination reduce storage capacity.
Troubleshooting flow for common problems:
- Low airflow: Check panel output voltage first. Then inspect fan blade for debris. Check wiring connections at the controller and motor terminals.
- Low cooling capacity (compressor system): Verify panel output is meeting design Wp. Check refrigerant charge. Inspect condenser coil for dust blockage.
- Compressor not starting: Test battery voltage under load. Check controller fault codes. Verify thermal overload has not tripped.
- Poor PV output: Measure open-circuit voltage and compare to panel spec. Check for shading, soiling, or a failed bypass diode.
Call a licensed technician for refrigerant recharge, electrical faults beyond the controller, or any repair involving high-pressure refrigerant lines.
Which Westernharmonics products match your cooling job?
Westernharmonics has built the U.S. solar fan kit category from the ground up. Here are the products that map directly to the use cases above:
- Kit# 1505-HG 10W Solar Powered Fan Kit: 10W panel, 12V DC fan, direct-drive. The entry point for small coops, sheds, and pet houses. No battery required.
- 200W Solar Hanging Fan Kit w/ Battery Backup: 200W panel with battery backup. Covers barns, large workshops, and spaces where you need airflow past sunset. The battery extends operation into the evening without a generator.
- Zendo Cooler — Solar Powered Swamp Cooler: Evaporative DC cooling for drier climates. Pairs with a small PV array and delivers meaningful temperature drops in low-humidity environments like the Southwest and Mountain West.
- Solar & Battery Greenhouse Exhaust Fan Kit — 200W: Designed specifically for greenhouse operators. Thermostat-ready, battery-backed, and sized for reliable air changes in mid-size growing spaces.
- PowerJam Portable Power Station: A portable microgrid unit for temporary or mobile cooling loads. Useful for seasonal setups, remote job sites, or bridging gaps while a permanent system is installed.
Always verify panel voltage compatibility, fan CFM rating against your space volume, and warranty terms before purchase. For layout and wire-sizing help, use PowerMosaics.com alongside the Westernharmonics system design tool.
How do you choose the right system for your site?
The single most important decision: match your required cooling load and autonomy hours to your PV and storage budget before you buy anything.
- Measure your space: Length × width × height gives you volume. Calculate the CFM needed for one air change every 1–3 minutes for ventilation, or the BTU load for space cooling.
- Define your autonomy requirement: Daytime only, or do you need 4–8 hours of post-sunset operation?
- Assess your solar resource: Use NREL’s PVWatts calculator for your ZIP code to get peak sun hours.
- Choose your storage type: Battery for flexible loads; thermal/PCM for compressor cooling loads where overnight hold time matters.
- Set your budget: Direct-drive fan kits start under $100. Battery-backed compressor systems for serious cooling start around $1,000–$2,000 in hardware.
- Pick a design tool: For DC systems under 3 kW, PowerMosaics.com is purpose-built for low-voltage solar DC layouts. It handles load calculations, wire sizing, and component selection in a single workflow. General-purpose electrical design software (built for AC systems) requires manual adaptation for 12V/24V DC work and typically lacks the solar irradiance integration that PowerMosaics includes. For off-grid solar cooling specifically, that difference saves hours of manual calculation.
- Start with a kit, scale up: A Westernharmonics fan kit is a low-risk way to validate your site’s solar resource and airflow needs before committing to a larger compressor system.
Why DC solar cooling is the right call right now
DC solar cooling has crossed a threshold. The hardware is proven, the costs are down, and the design tools have caught up. A pilot 5 kW system hitting a COP of 3.36 with thermal storage is not a laboratory curiosity — it is a template for what a well-designed barn or greenhouse system can deliver today.
The piece most people underestimate is the design step. Buying the right panel and fan is straightforward. Getting the wire sizing, voltage matching, and storage sizing right is where systems fail or underperform. That is exactly where pairing Westernharmonics hardware with a purpose-built tool like PowerMosaics.com pays off. The combination of proven off-grid hardware and a DC-native design tool removes most of the guesswork from the planning phase.
Westernharmonics has the hardware — here is where to start
Westernharmonics has been building solar fan kits longer than anyone else in the U.S. market, and the product line now covers everything from a $100 direct-drive coop kit to a 200W battery-backed greenhouse system.

Three products worth looking at first, depending on your job:
- Small ventilation (coop, shed, small workshop): Kit# 1505-HG 10W Solar Fan Kit — plug-and-play, no battery needed, built to last outdoors.
- Barn or greenhouse with evening operation: 200W Solar Hanging Fan Kit w/ Battery Backup — the battery-backed option that keeps air moving after the sun drops.
Sources
- Design and performance of an off‑grid DC vapor compression cooling system for rural healthcare facilities
- Sustainable cooling in off‑grid rural areas
- DIY solar cooling manual — University of Hohenheim
- MARBERO 4.7 Inch Solar dual‑fan kit review
- Solar powered greenhouse exhaust fans for efficient ventilation
Recommended
- 20" Solar Hanging Fan 12V Off-Grid | Solar Powered Fans | Western Harmonics Off‑Grid Power Hardware
- Solar & Battery Greenhouse Exhaust Fan Kit – 200W Off Grid Cooling System | Greenhouse Systems | Western Harmonics Off‑Grid Power Hardware
- Solar Powered Fans | Western Harmonics Off‑Grid Power & Solar Cooling Components