

How to Add a Battery to Your Westernharmonics Fan Kit
How to Add a Battery to Your Westernharmonics Fan Kit
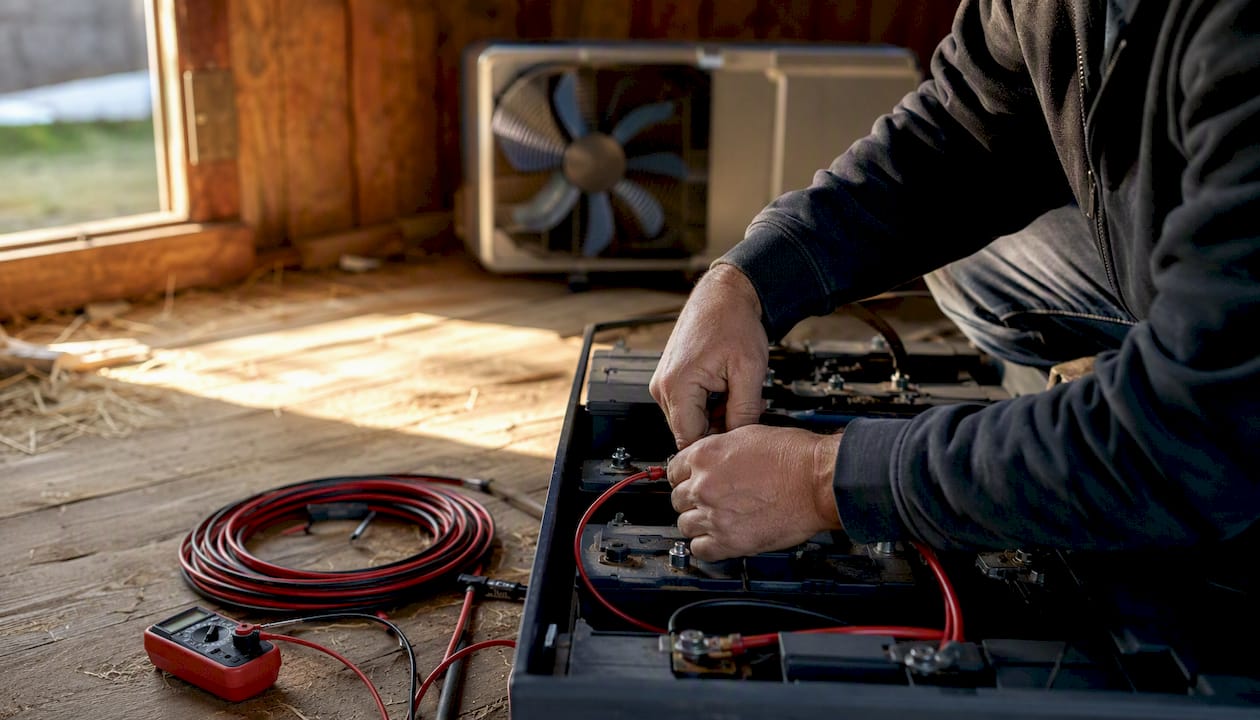
Yes, you can add a battery to any Westernharmonics fan kit, and the System Designer handles the sizing math for you. Enter your fan’s wattage, your required nightly runtime, and your preferred battery chemistry, and the tool returns the required battery capacity in both watt-hours (Wh) and amp-hours (Ah at 12 V), a recommended panel wattage, and basic wiring notes. You get a matched component list you can order directly from the site.
Here is what you need to have ready before you open the Designer:
- Fan load: watts drawn by your specific fan model (check the product page or nameplate)
- Runtime hours: how many hours per night you need the fan to run without sun
- Autonomy days: how many consecutive cloudy days the battery should cover (1 day is the common minimum; 2 days add a meaningful safety margin)
- Battery chemistry: lead-acid/AGM or lithium, which affects the depth-of-discharge (DoD) the Designer applies
- System voltage: Westernharmonics kits run at 12 V DC
Once you submit those inputs, the Designer outputs battery Wh, Ah at 12 V, suggested panel watts, and wiring notes. From there, you can match the output to a kit, order components, or contact support for custom sizing.
Key Takeaways
The System Designer converts your fan’s watt load and required runtime into a matched battery capacity, panel wattage, and wiring spec, giving you everything needed to order and install a battery-backed fan kit correctly.
| Point | Details |
|---|---|
| System Designer inputs | Enter fan watts, nightly runtime hours, autonomy days, and battery chemistry to get Ah and panel W. |
| Core sizing formula | Watts × hours = Wh; Wh ÷ 12 V = raw Ah; divide by DoD and multiply by 1.10 for losses. |
| Chemistry tradeoff | AGM requires roughly twice the raw Ah due to 50% DoD; lithium needs less capacity but costs more upfront. |
| Panel sizing rule | Daily Wh ÷ 4 peak sun-hours × 1.25 = practical minimum panel watts for most U.S. locations. |
| Westernharmonics kits | The 200W Solar Hanging Fan Kit with Battery Backup and the PowerJam cover the most common overnight runtime needs. |
Table of Contents
- How does the Westernharmonics System Designer walk you through adding a battery?
- What math is the System Designer actually running?
- Which battery chemistry works best for a fan kit?
- How much solar panel capacity do you need to recharge the battery?
- What does the wiring and installation checklist look like?
- Worked example: sizing a battery for a 20" Solar Hanging Fan running 8 hours at night
- Common problems after adding a battery to a fan kit
- What the numbers miss about a real off-grid install
- Westernharmonics kits, PowerJam, and Designer-backed ordering
- Useful sources and further reading
How does the Westernharmonics System Designer walk you through adding a battery?
Adding a battery to a Westernharmonics fan kit with the System Designer follows a clear, repeatable sequence. Here is the exact flow:
- Select your fan model or enter load watts. The Designer accepts a named fan from the catalog or a manual watt entry. For the 20" Solar Hanging Fan, pull the wattage from the product page and type it in directly.
- Set nightly runtime hours. Enter how many hours the fan must run after sunset. Eight hours covers a full night in most barn and greenhouse applications.
- Choose autonomy days. One day is the minimum; two days is a practical buffer for cloudy stretches common in the Midwest and Pacific Northwest.
- Pick battery chemistry. Lead-acid/AGM defaults to a 50% DoD; lithium allows 80–90% DoD. The Designer adjusts required Ah automatically based on this choice.
- Review the outputs. The screen shows required Wh, Ah at 12 V, recommended panel watts, and a wiring summary. These numbers are the foundation of your component order.
- Match to a kit or build a custom list. The Designer links outputs to available Westernharmonics kits or lets you configure individual components through the catalog.
The System Designer reduces DIY sizing errors by making the Wh-to-Ah-to-panel-watts conversion explicit and by applying chemistry-specific derating and DoD assumptions automatically.
Pro Tip: Set your runtime to the realistic worst case, not the average. A barn fan running 6 hours most nights but occasionally 9 hours should be sized for 9. The extra battery capacity costs less than a dead system at 3 AM in July.
What math is the System Designer actually running?
Understanding the calculation lets you verify the Designer’s output and catch any input errors before you order. The core formula is straightforward.
Step 1: Watt-hours required
Fan watts × runtime hours = required Wh
Step 2: Amp-hours at 12 V
Required Wh ÷ 12 V = raw Ah
Step 3: Adjust for DoD and derating
Raw Ah ÷ DoD factor = usable battery capacity needed
The table below shows how those factors interact across common scenarios:
Derated Ah = (Raw Ah ÷ DoD) × 1.10 to account for system losses.
Key points the Designer applies behind the scenes:
- Lead-acid and AGM batteries should not be discharged below 50% regularly; doing so cuts cycle life significantly.
- Lithium iron phosphate (LiFePO4) tolerates 80–90% DoD without the same cycle-life penalty.
- The 10% derating covers charge-controller conversion losses and resistive losses in wiring runs up to about 20 feet.
- For longer cable runs or higher-current fans, increase the derating to 15%.
Which battery chemistry works best for a fan kit?
Chemistry choice is the single biggest variable in your battery sizing, and it affects both the Ah number the Designer returns and your long-term maintenance burden.
Lead-acid and AGM
- Lower upfront cost per Ah, widely available at farm supply and auto parts stores
- 50% usable DoD means you buy roughly twice the raw Ah you actually need
- Flooded lead-acid requires periodic water top-offs; AGM is sealed and maintenance-free
- Heavy: a 100 Ah AGM battery weighs roughly 60–65 lbs, which matters for overhead or wall-mount installs
- Cold-weather performance drops noticeably below 32°F; capacity can fall 20–30% at 20°F
- Typical cycle life: 300–500 full cycles at 50% DoD
Lithium (LiFePO4)
- Higher upfront cost, but usable capacity per dollar is competitive over the battery’s lifespan
- 80–90% DoD means a smaller, lighter pack for the same runtime
- No maintenance, stable voltage curve through most of the discharge cycle
- Handles cold better than lead-acid, though charging below 32°F requires a battery management system (BMS) with low-temperature cutoff
- Typical cycle life: 2,000–3,000 cycles, making it the better long-term value for year-round installs
For a seasonal barn fan running May through September, AGM is a practical, cost-effective choice. For a greenhouse or livestock barn running year round, the weight savings and cycle life of lithium justify the premium.
Pro Tip: Store lead-acid batteries in a ventilated enclosure away from sparks. Charging produces hydrogen gas. A sealed battery box in an unventilated cabinet is a fire risk. Lithium packs are safer in enclosed spaces but still benefit from shade and moderate temperatures to preserve cycle life.
How much solar panel capacity do you need to recharge the battery?
Panel sizing follows directly from the daily energy you consumed the night before. The Designer uses this logic:
- Daily Wh consumed = fan watts × runtime hours (same number from the battery calculation)
- Bare-minimum panel watts = daily Wh ÷ average peak sun-hours for your location
- Practical panel watts = bare minimum × 1.25 (charging losses, soiling, angle inefficiency)
Average peak sun-hours across the continental U.S. range from about 3.5 hours per day in the Pacific Northwest and upper Midwest in winter to 6+ hours per day in the Southwest. For a conservative sizing that works across most of the country, use 4 peak sun-hours as your baseline.
Rules the Designer applies and that you should verify:
- Size panels to recharge the battery in one day under average conditions, not peak conditions.
- Add 25% to the bare-minimum panel figure to cover real-world losses (dust, partial shading, non-optimal tilt).
- For 2-day autonomy, the panel still only needs to cover one day’s consumption per day; the second battery day is a buffer, not a doubling of panel size.
- If your install site has regular afternoon shading, use 3.5 peak sun-hours instead of 4 and increase panel watts accordingly.
- Larger panel capacity shortens recharge time and gives you a buffer on partially cloudy days without requiring a bigger battery.
For context on whether adding battery storage makes economic sense for your specific situation, resources like solar battery cost guides can help frame the investment, though U.S. pricing and incentives differ from UK figures.
What does the wiring and installation checklist look like?
The Designer tells you what to buy; this checklist tells you how to connect it safely.
Core wiring requirements:
- Polarity: mark positive and negative leads before connecting anything. A reversed connection can damage the charge controller or fan motor instantly.
- Fuse or circuit breaker: install within 18 inches of the battery’s positive terminal. Size the fuse to 125% of the maximum expected current.
- Charge controller: required any time a panel charges a battery. A PWM controller works for most Westernharmonics kit sizes; an MPPT controller improves efficiency on longer cable runs or in low-light conditions.
- Connectors: use MC4 connectors for panel-to-controller runs and ring terminals crimped (not just twisted) for battery connections.
- Wire gauge: undersized wire causes voltage drop and heat. Use the table below as a minimum guide.
| Expected current (A) | Cable run (one way, ft) | Minimum wire gauge (AWG) |
|---|---|---|
| Up to 5 A | Up to 20 ft | 14 AWG |
| Up to 10 A | Up to 20 ft | 12 AWG |
| Up to 10 A | 20–40 ft | 10 AWG |
| Up to 20 A | Up to 20 ft | 10 AWG |
| Up to 20 A | 20–40 ft | 8 AWG |
Safety callouts:
- Ventilate the battery compartment if using flooded lead-acid.
- Ground the negative bus to the chassis or a dedicated ground rod for any permanent install.
- Install an isolation switch between the battery and the load circuit so you can disconnect safely for maintenance.
- For the 10W kit and other small installs, a 10 A inline fuse and 14 AWG wire are typically sufficient.
Worked example: sizing a battery for a 20" Solar Hanging Fan running 8 hours at night
This example mirrors what the System Designer calculates when you enter a typical overnight barn or greenhouse scenario.
Inputs:
- Fan: Westernharmonics 20" Solar Hanging Fan, approximately 30 W at full speed
- Runtime: 8 hours per night
- Autonomy: 1 cloudy day (2 nights total)
- Chemistry: AGM (50% DoD)
- Location sun-hours: 4 per day (conservative U.S. average)
Step-by-step calculation:
- Daily Wh: 30 W × 8 hours = 240 Wh per night
- Two-night total: 240 Wh × 2 nights = 480 Wh required from battery
- Raw Ah at 12 V: 480 Wh ÷ 12 V = 40 Ah
- AGM DoD adjustment (50%): 40 Ah ÷ 0.50 = 80 Ah
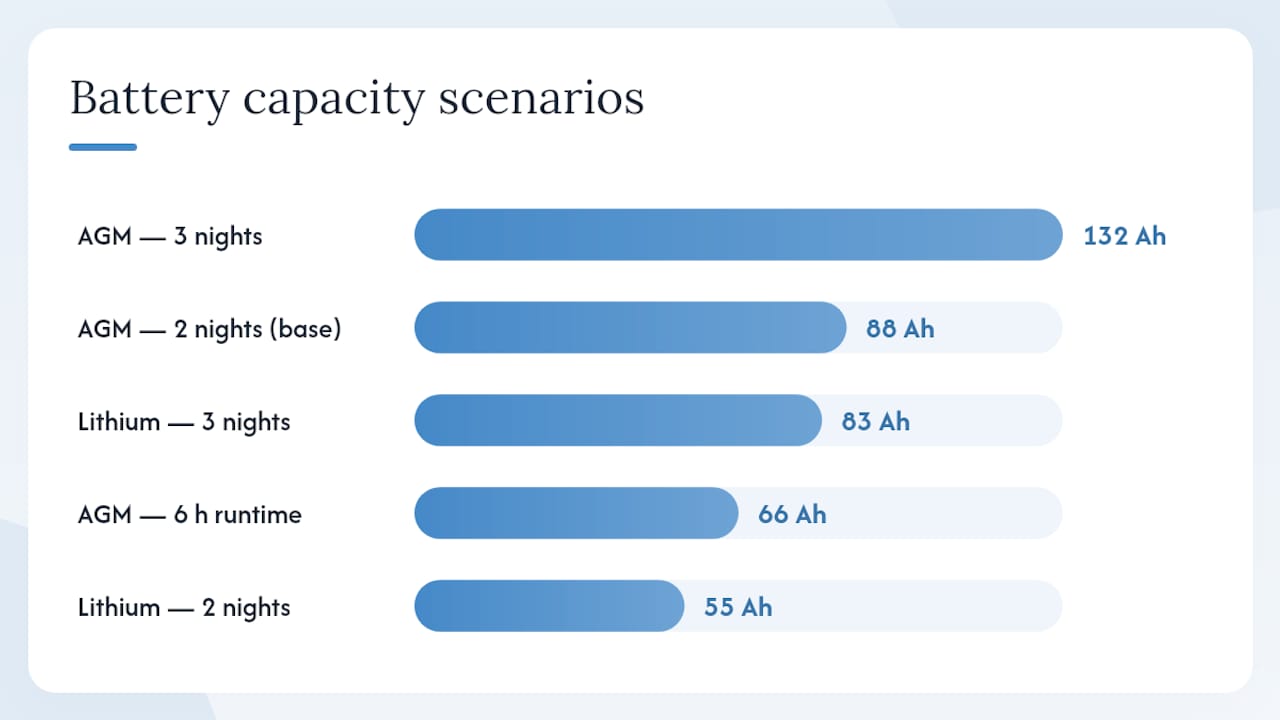
- 10% derating for losses: 80 Ah × 1.10 = 88 Ah minimum battery capacity
- Panel sizing: 240 Wh (one day’s use) ÷ 4 sun-hours = 60 W bare minimum; × 1.25 = 75 W minimum panel
Sensitivity scenarios:
- Switching to lithium (80% DoD): 40 Ah ÷ 0.80 × 1.10 = 55 Ah, cutting battery weight roughly in half.
- Adding a second cloudy day (3 nights): raw Ah jumps to 60 Ah, requiring a 132 Ah AGM or 83 Ah lithium pack.
- Reducing runtime to 6 hours: daily Wh drops to 180, and the AGM requirement falls to about 66 Ah.
Product match: The 200W Solar Hanging Fan Kit with Battery Backup covers this load profile and includes matched panel, battery, and controller components. For a portable or temporary setup, the PowerJam provides battery-backed operation without permanent wiring.
Pro Tip: Run the Designer with your actual fan wattage at the speed you plan to use, not the motor’s peak rating. A fan running at medium speed may draw noticeably less power than the peak rating, which shrinks the battery requirement and can drop you into a smaller, less expensive kit.
Common problems after adding a battery to a fan kit
Most issues trace back to one of four causes: undersized battery, wiring error, panel mismatch, or a charge controller that is not configured for the battery chemistry.
- Fan not running at night: Check battery state of charge (SoC) with a multimeter. A 12 V AGM battery below 12.0 V is at or below 50% SoC. If it is draining faster than expected, recheck your runtime input in the Designer.
- Battery not charging fully: Verify the panel is unshaded during peak sun hours and that the charge controller is set to the correct battery type (AGM vs. lithium profiles differ). A controller set to flooded lead-acid will undercharge an AGM.
- Erratic runtime: Loose ring terminals at the battery posts cause voltage drop under load. Tighten and re-crimp any connections that show heat discoloration or corrosion.
- Polarity issue: A reversed panel connection will not damage most modern charge controllers (they have reverse-polarity protection), but a reversed battery connection can. Always verify polarity with a multimeter before connecting the battery.
- Fuse tripping repeatedly: The fuse is doing its job. Do not upsize it. Instead, measure the actual current draw with a clamp meter and compare it to the Designer’s wiring notes. A fuse that trips at startup may need a slow-blow type rather than a fast-blow.
If the Designer’s recommended Ah and panel watts match your installed components and the system still underperforms, contact Westernharmonics support with your Designer output in hand. The output gives the support team an exact baseline to diagnose against. For any install involving conduit, sub-panels, or grid-tied components, consult a licensed electrician.
What the numbers miss about a real off-grid install
The System Designer gives you correct math. What it cannot give you is judgment about your specific site, and that gap is where most DIY installs run into trouble.
Shading is the most underestimated variable. If your site has any afternoon obstruction, use 3 peak sun-hours in the Designer, not 4. You will size a larger panel, but the system will actually deliver what you need.
Seasonal adjustment matters more than most builders expect. A barn fan sized for July in Kansas will be undersized for the same barn in November if you are running it for livestock ventilation year-round. Run the Designer twice: once with summer sun-hours and once with winter sun-hours for your region. The winter result sets your actual minimum panel size.
Keep a simple service log. Write down the battery’s resting voltage every month, note any days the fan ran short of the target runtime, and record the date of any connection maintenance. A 12 V AGM that reads 12.4 V at rest after a full day of sun is healthy; one that reads 12.1 V is telling you something. That log also satisfies most battery warranty documentation requirements.
For anyone who wants battery-backed cooling without the wiring work, the PowerJam and the preconfigured 200W Solar Hanging Fan Kit with Battery Backup are the faster path. The components are matched, the wiring is documented, and the system is ready to deploy the day it arrives.
Westernharmonics kits, PowerJam, and Designer-backed ordering
Westernharmonics builds the only solar fan kits in the U.S. designed from the ground up for off-grid cooling, and the System Designer is what connects your specific load to the right components without guesswork.

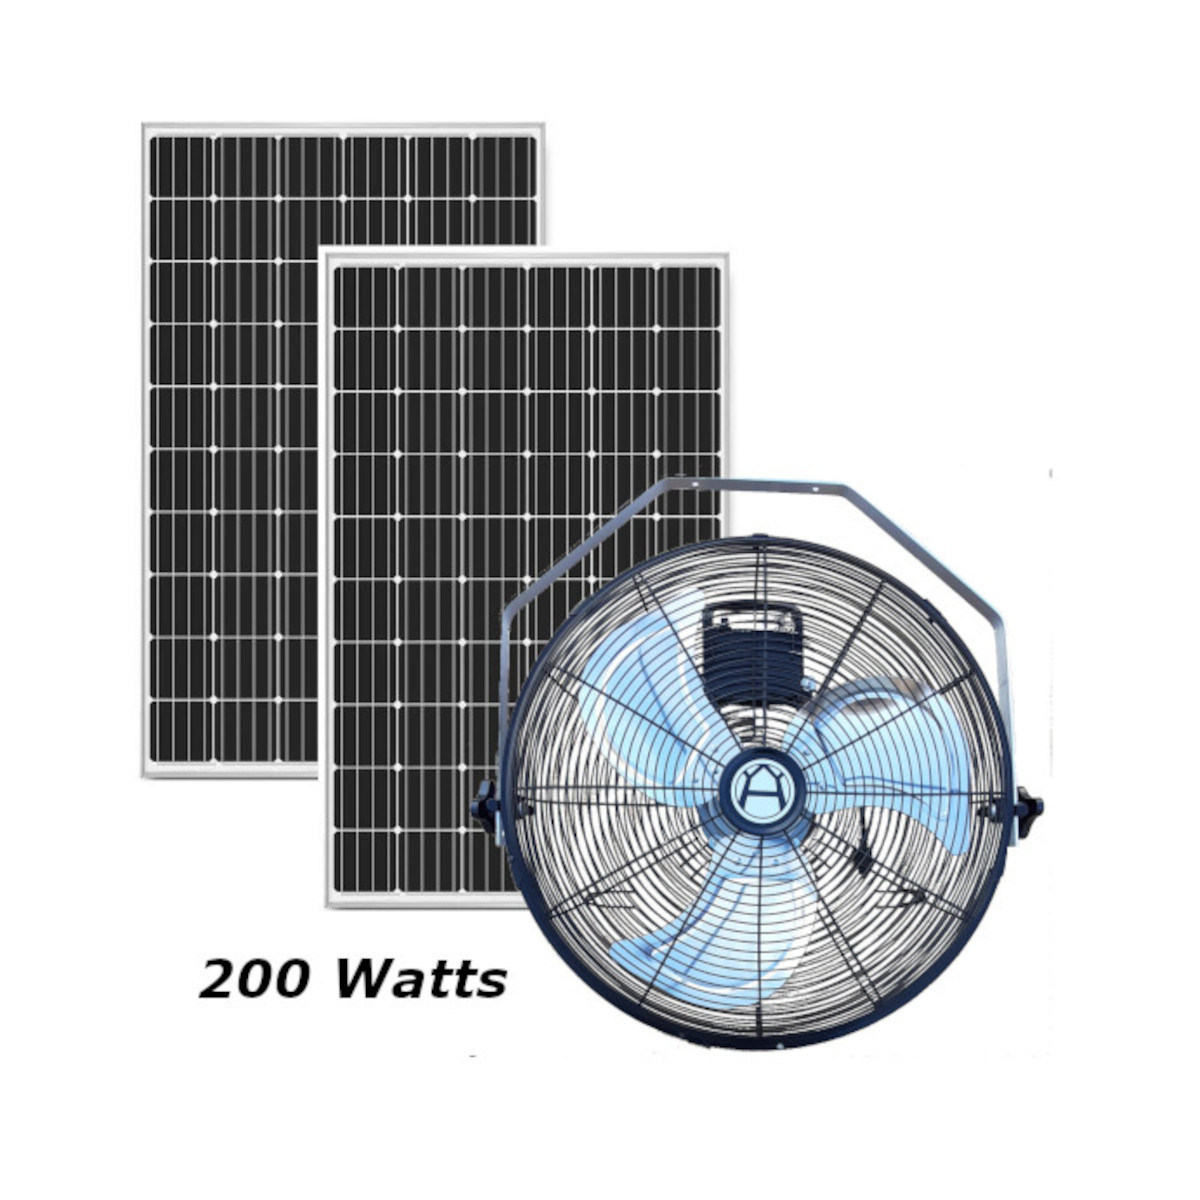
The 200W Solar Hanging Fan Kit with Battery Backup covers the most common overnight barn and greenhouse scenarios right out of the box. The Solar and Battery Systems catalog lists every matched panel, battery, and controller combination the Designer can recommend. For portable or temporary deployments, the PowerJam delivers battery-backed fan operation without a permanent install. Greenhouse operators can also review the 200W Greenhouse Exhaust Fan Kit for an agricultural-specific configuration. Open the System Designer, enter your fan load and runtime, and the tool produces a matched component list you can order in minutes or bring to our support team for a custom sizing review.
Useful sources and further reading
- Solar and Battery Systems catalog
- 20" Solar Hanging Fan 12V Off-Grid
- Solar and Battery Greenhouse Exhaust Fan Kit 200W
- Westernharmonics Video Library — installation demos and system walkthroughs
- Solar battery cost context — illustrative UK-market cost guide for battery storage economics (note: pricing and incentives differ in the U.S.)
Recommended
- Western Harmonics 200W Solar Hanging Fan Kit – Livestock & Horse Cooling with Battery Backup | Solar Powered Fans | Western Harmonics Off‑Grid Power Hardware
- Kit# 1505-HG 10w Solar Powered Fan Kit | Solar Powered Fans | Western Harmonics Off‑Grid Power Hardware
- Video Library | Western Harmonics Off‑Grid Systems, Solar Cooling & Product Demos